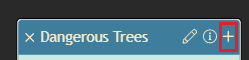
Beside of starting the workflow with an Action defined in an ActionSet or using a Workflow widget within the Dashboard the option presented here is an addon to the latter method, which creates a button within the tooltip of Dashboard. The result of the tutorial should look like this:
Creating a Functional Attribute
The first step is to create aFunctional attribute. For this reason you have to click Datasete Configuration in the configuration bar.
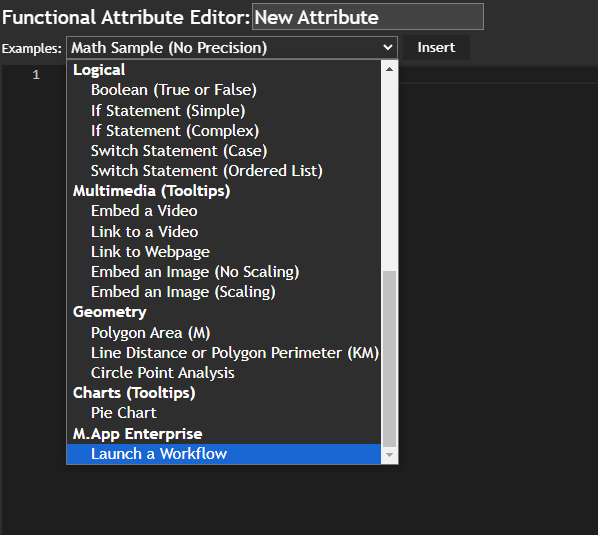
Functional Attribute.
M.App Enterprise with Launch a workflow. Hit the Insert button and you will get the necessary Javacript code. Click Apply to save the code. Change Functional Attribute Editor and rename New Attribute with you desired name.
Necessary changes to the Attribute
The only thing needs our attention is the variableChartTitle. If you didn't change anything you will find it in line 5 of the pre-defined code snippet.
You have to change it to the widget name of your workflow widget. See the following post for more information:
Workflow
In this post, we will explore the Workflow widget, which allows you with the simple configuration defined in XML, to create your own processes with lists and forms to edit attributive data and capture new geometries. ⚠️
You have two possibilities to add Workflows to your Dashboards. One is with ActionSets
 Stefan Schüttenkopf
⚠️
Dashboard has to know in which space the workflow should come up. That is the reason why you need an extra workflow widget.
Changes to the Workflow widget
⚠️
You can set the workflow widget to invisible. You won't see the widget unless you click the button from the tooltip
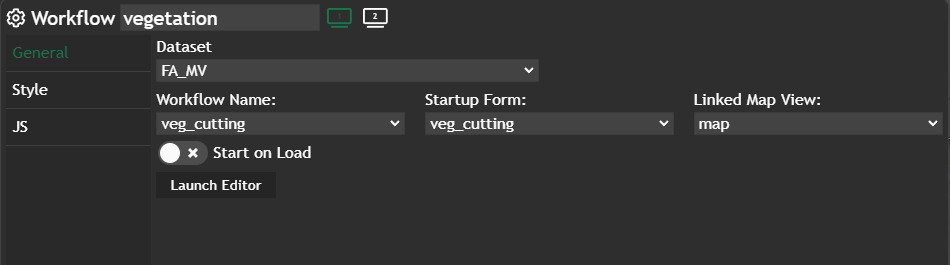
Start on Load is disabled, because we don't want to start the workflow when the user is opening the app but clicking on the button within the tooltip.
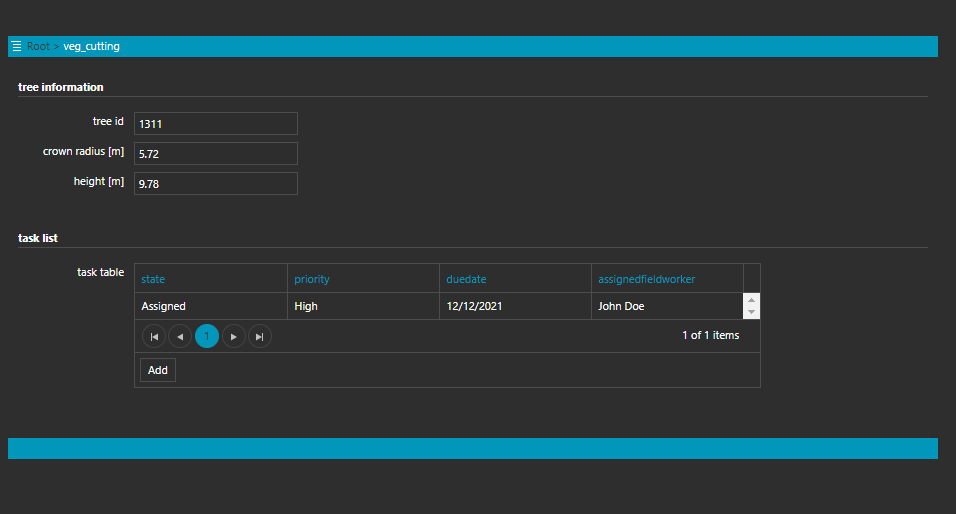
Creating the tooltip
Straightforward definition, where one of the available fields on the right side is theFunctional attribute defined at the beginning of this tutorial.

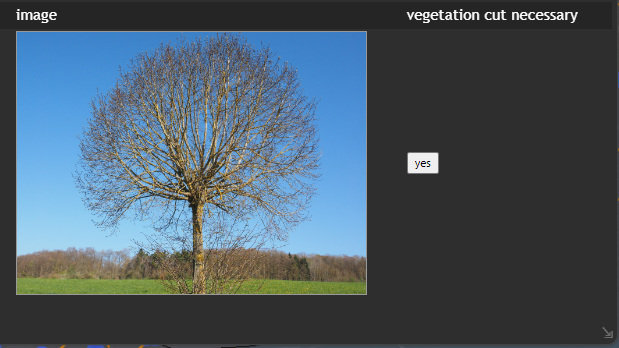
Result
As soon as you click on one of the geometries for which you have defined the tooltip / workflow, it will and should look like this: