This post will outline the steps necessary to integrate panoramics in your M.App Enterprise application.
Preliminaries
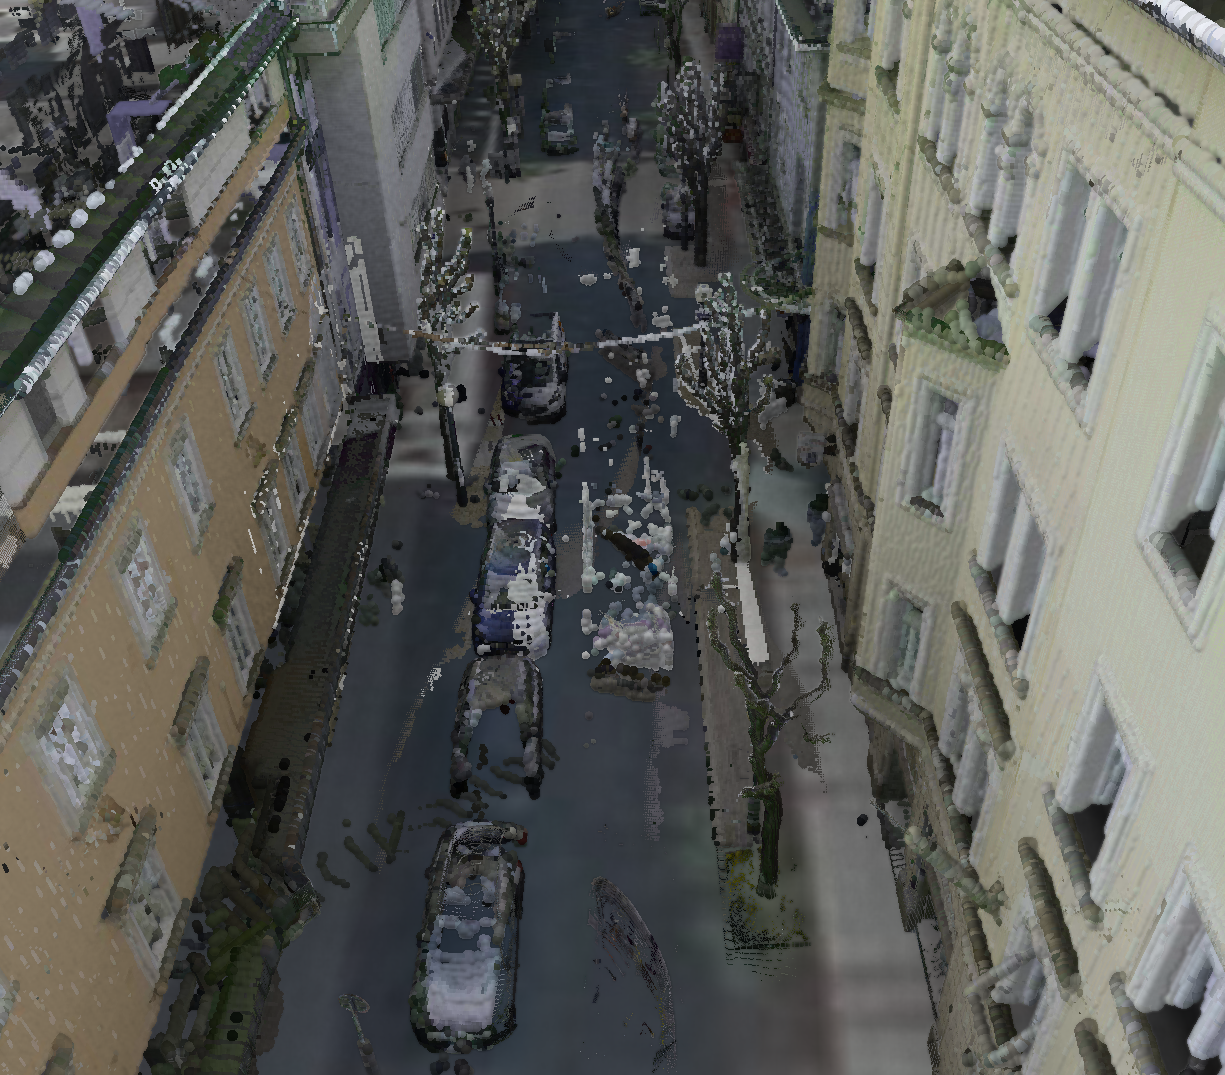
Your panoramics data is in E57 format, which is an ASTM standard to store 3D point data and additional panoramic photographs derived from laser scanners.
To create a service in Luciad Fusion, a project file with CRS definition is needed. Be careful to name it exactly as the E57 file and save it in the same folder, like in the example below.

Luciad Fusion
In order to enable the inclusion of 3D point data and panoramics in any M.App Enterprise App, it is necessary to have Luciad Fusion installed (Luciad Fusion Installation) and running. The software allows to generate geoservices for publishing geospatial data in applications, such as M.App Enterprise.
Set data root
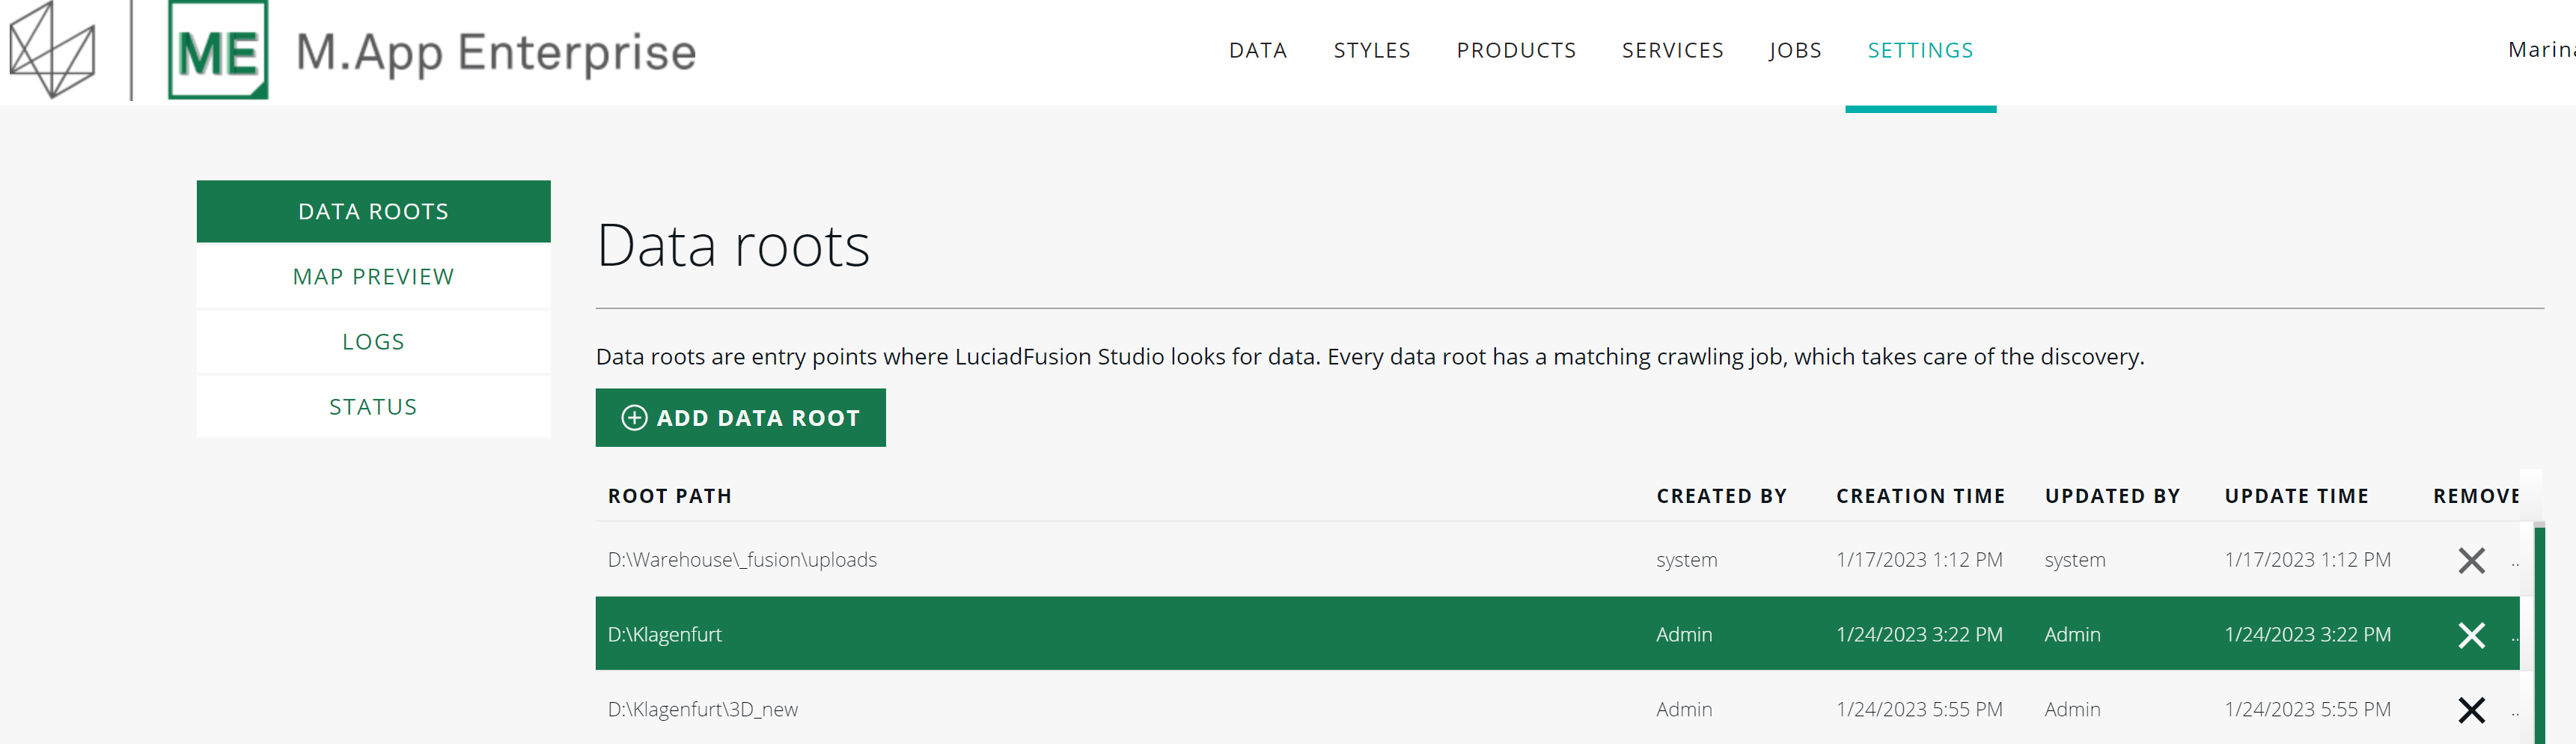
First, set a data root to show Luciad Fusion where your data is. LuciadFusion Studio then adds the location to the data roots list. The paths in this list should be relative to the server.
Settings → Add data root
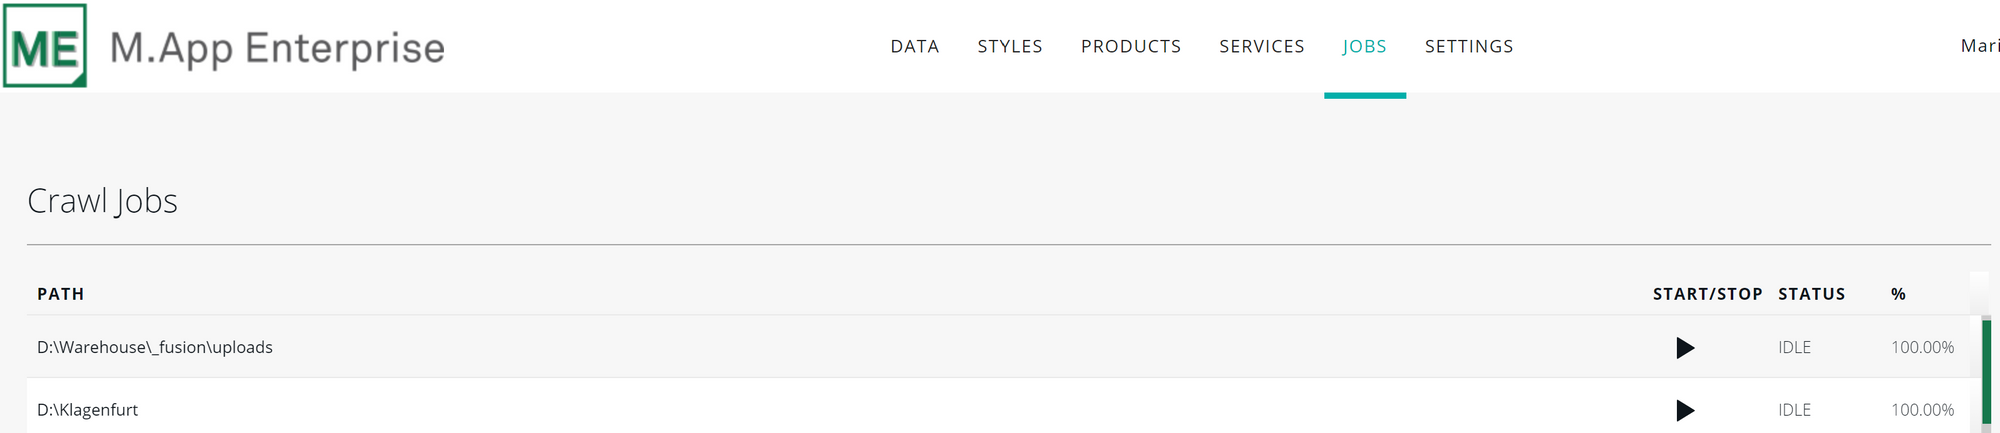
The desired data is crawled automatically from the specified location when the data root is added. This step can take a while dependent on the data volume. On the jobs page you can track the progress in the "%"-column.
Now you can switch to the data page and find the added files. Luciad Fusion detects when there are panoramics available and lists them separately from the point cloud.
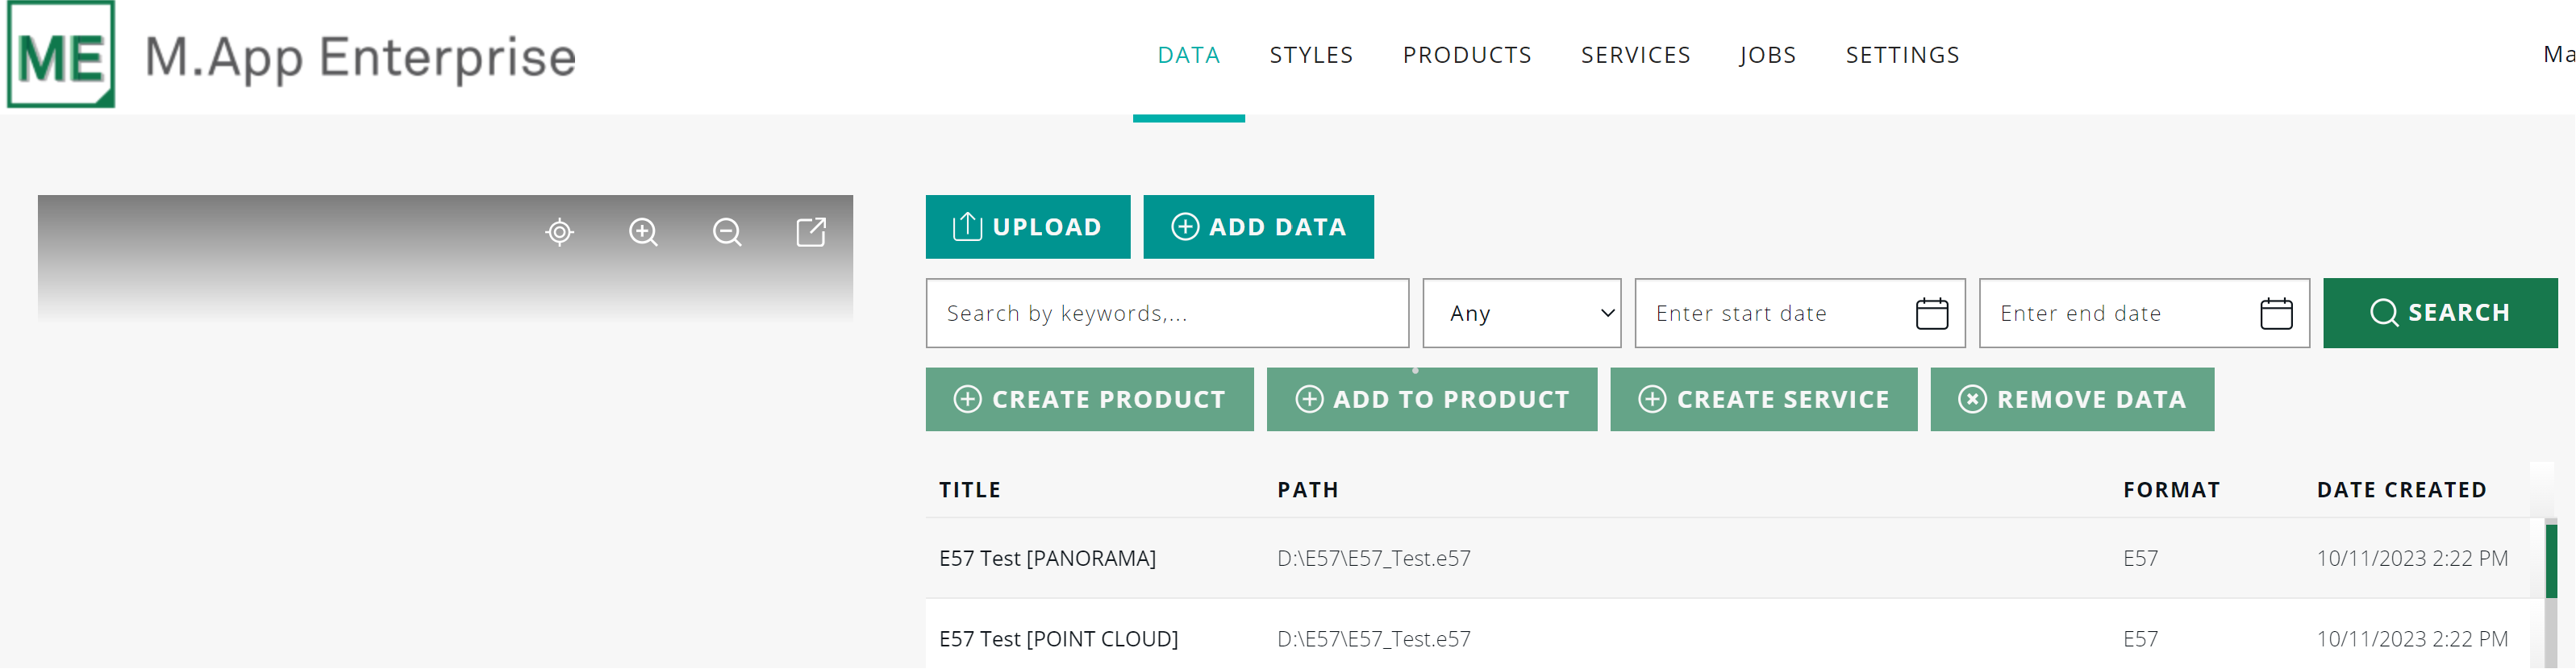
Create a Service
You have your data crawled in Luciad Fusion and now want to create a service for both your 3D point data and the panoramics, which is done in two separate steps.
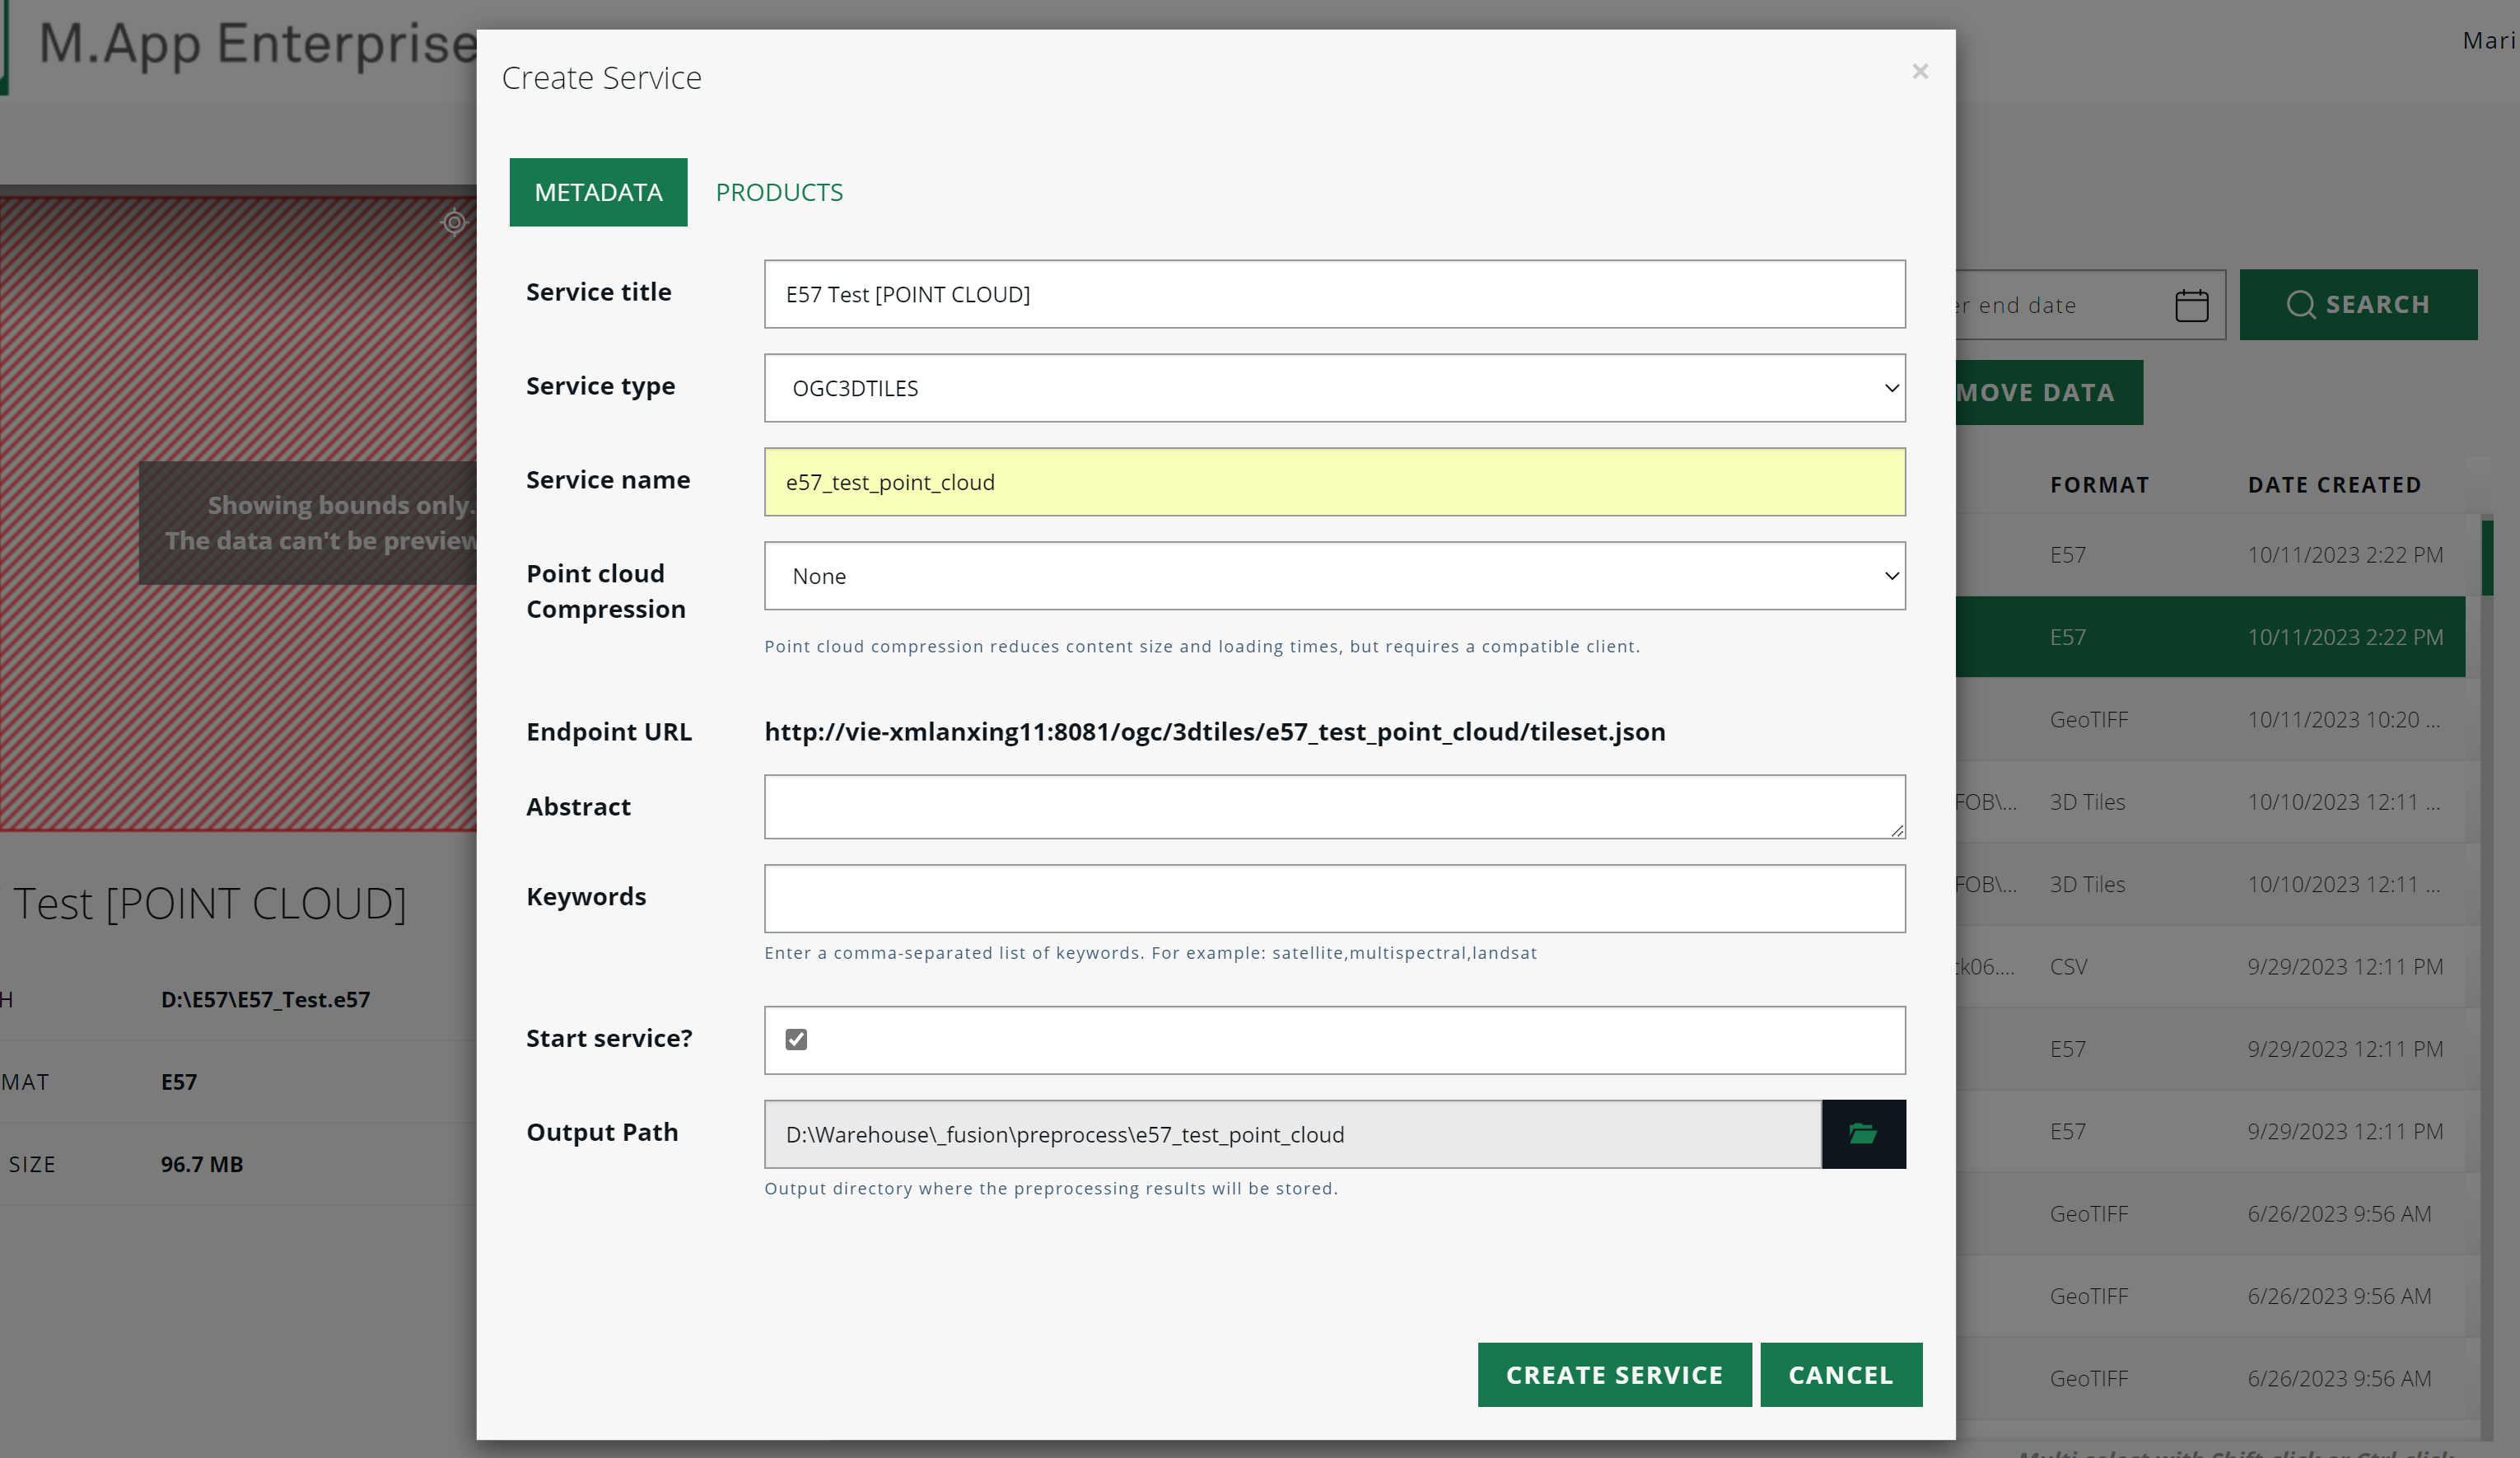
Data → Create service → Service title → Service type → Create service
3D point data
In order to create a service for the point cloud, select the file in the data section and click on Create Service. Then choose the right service type, namely OGC3DTiles, and optionally change the service title before creating the service.
Panoramics
For panoramics, the same steps apply as for the point cloud, except choosing "Panoramics" as service type.
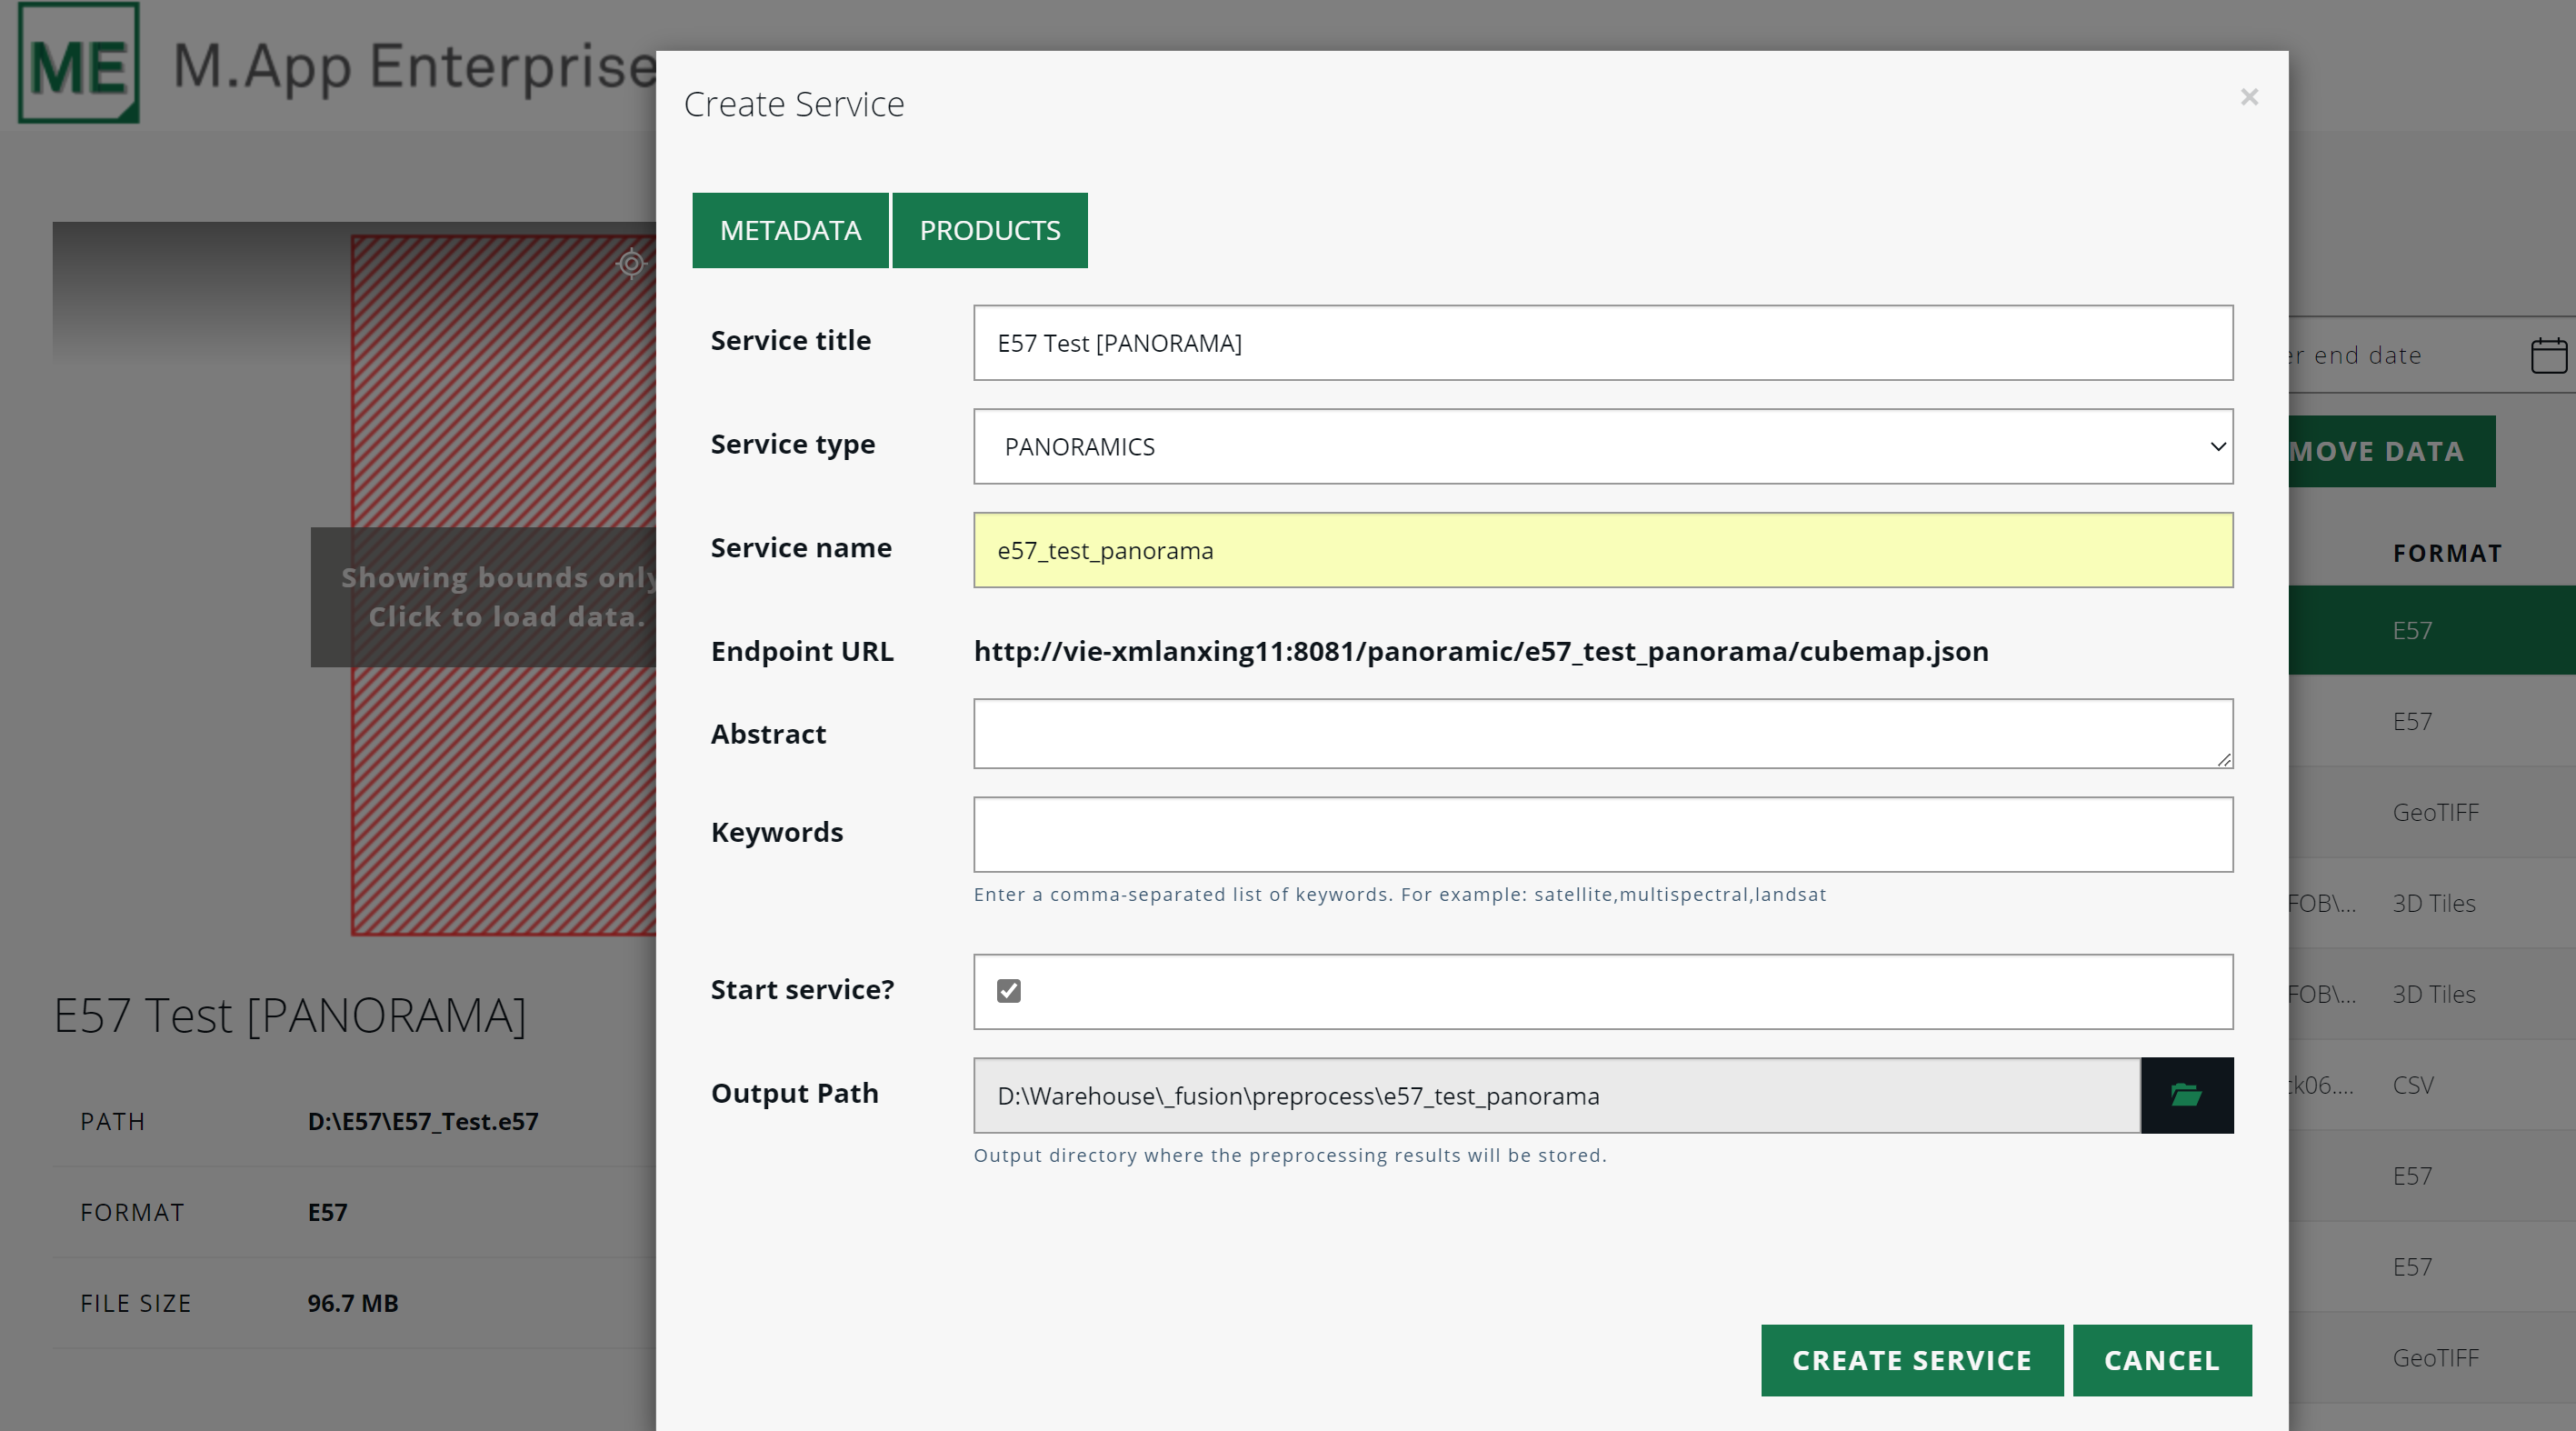
On the jobs page you can track the progress of the processing. Dependent on the file size, it can take up to several minutes or even hours.
Studio
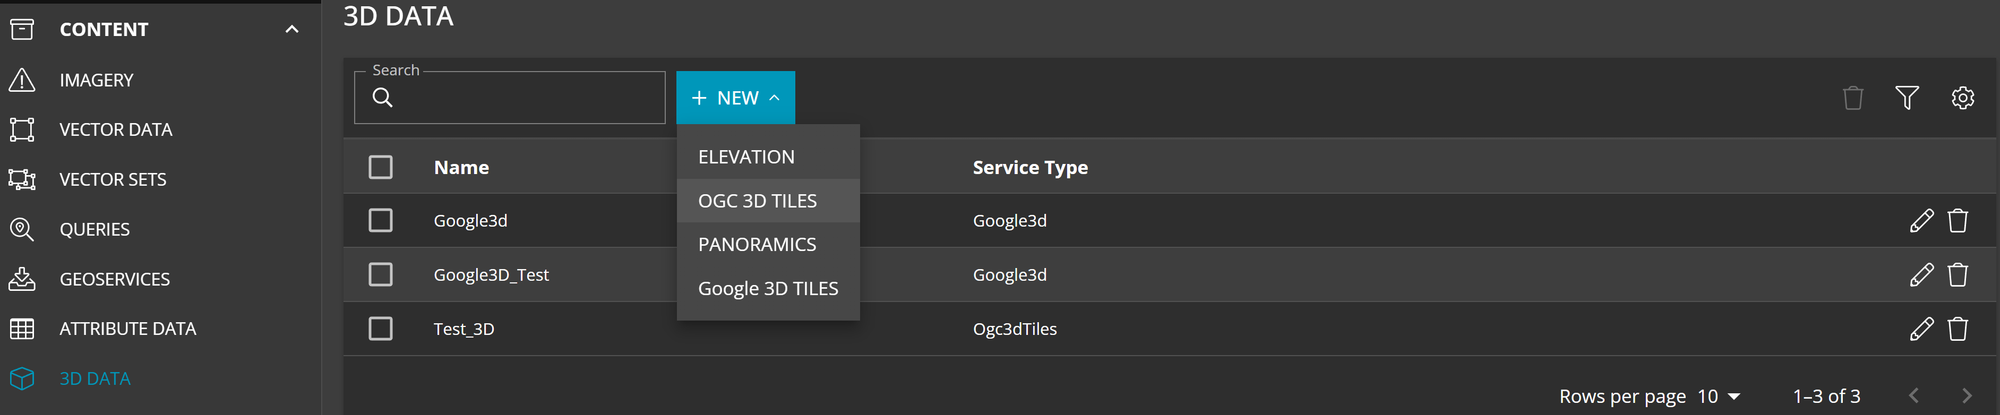
In the Studio of M.App Enterprise both services can be added in the content section by selecting 3D Data and adding a new service.
Content → 3D Data → New → OGC 3D Tiles
Content → 3D Data → New → Panoramics
Thereafter, add the services to a legend and proceed further to create your application to visualize your data.
Apps
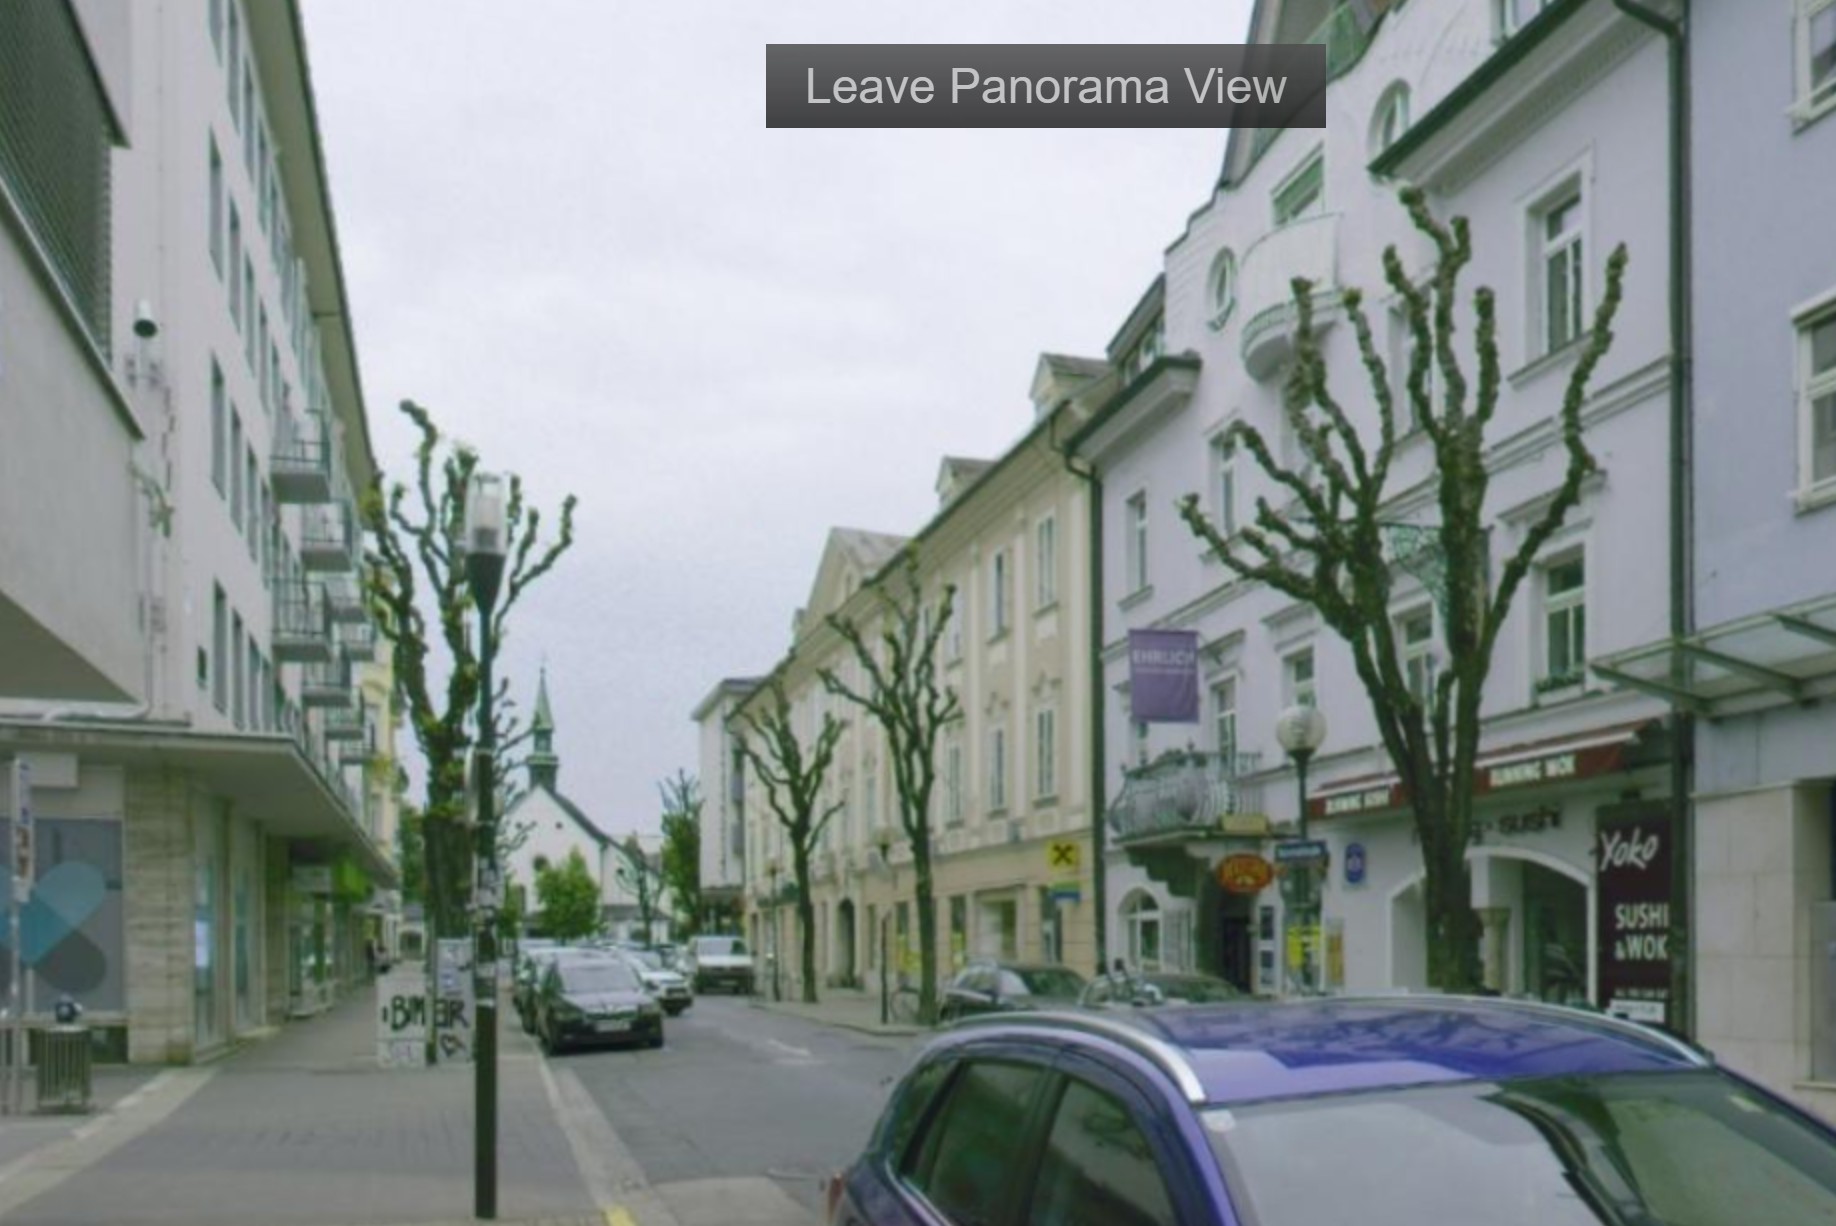
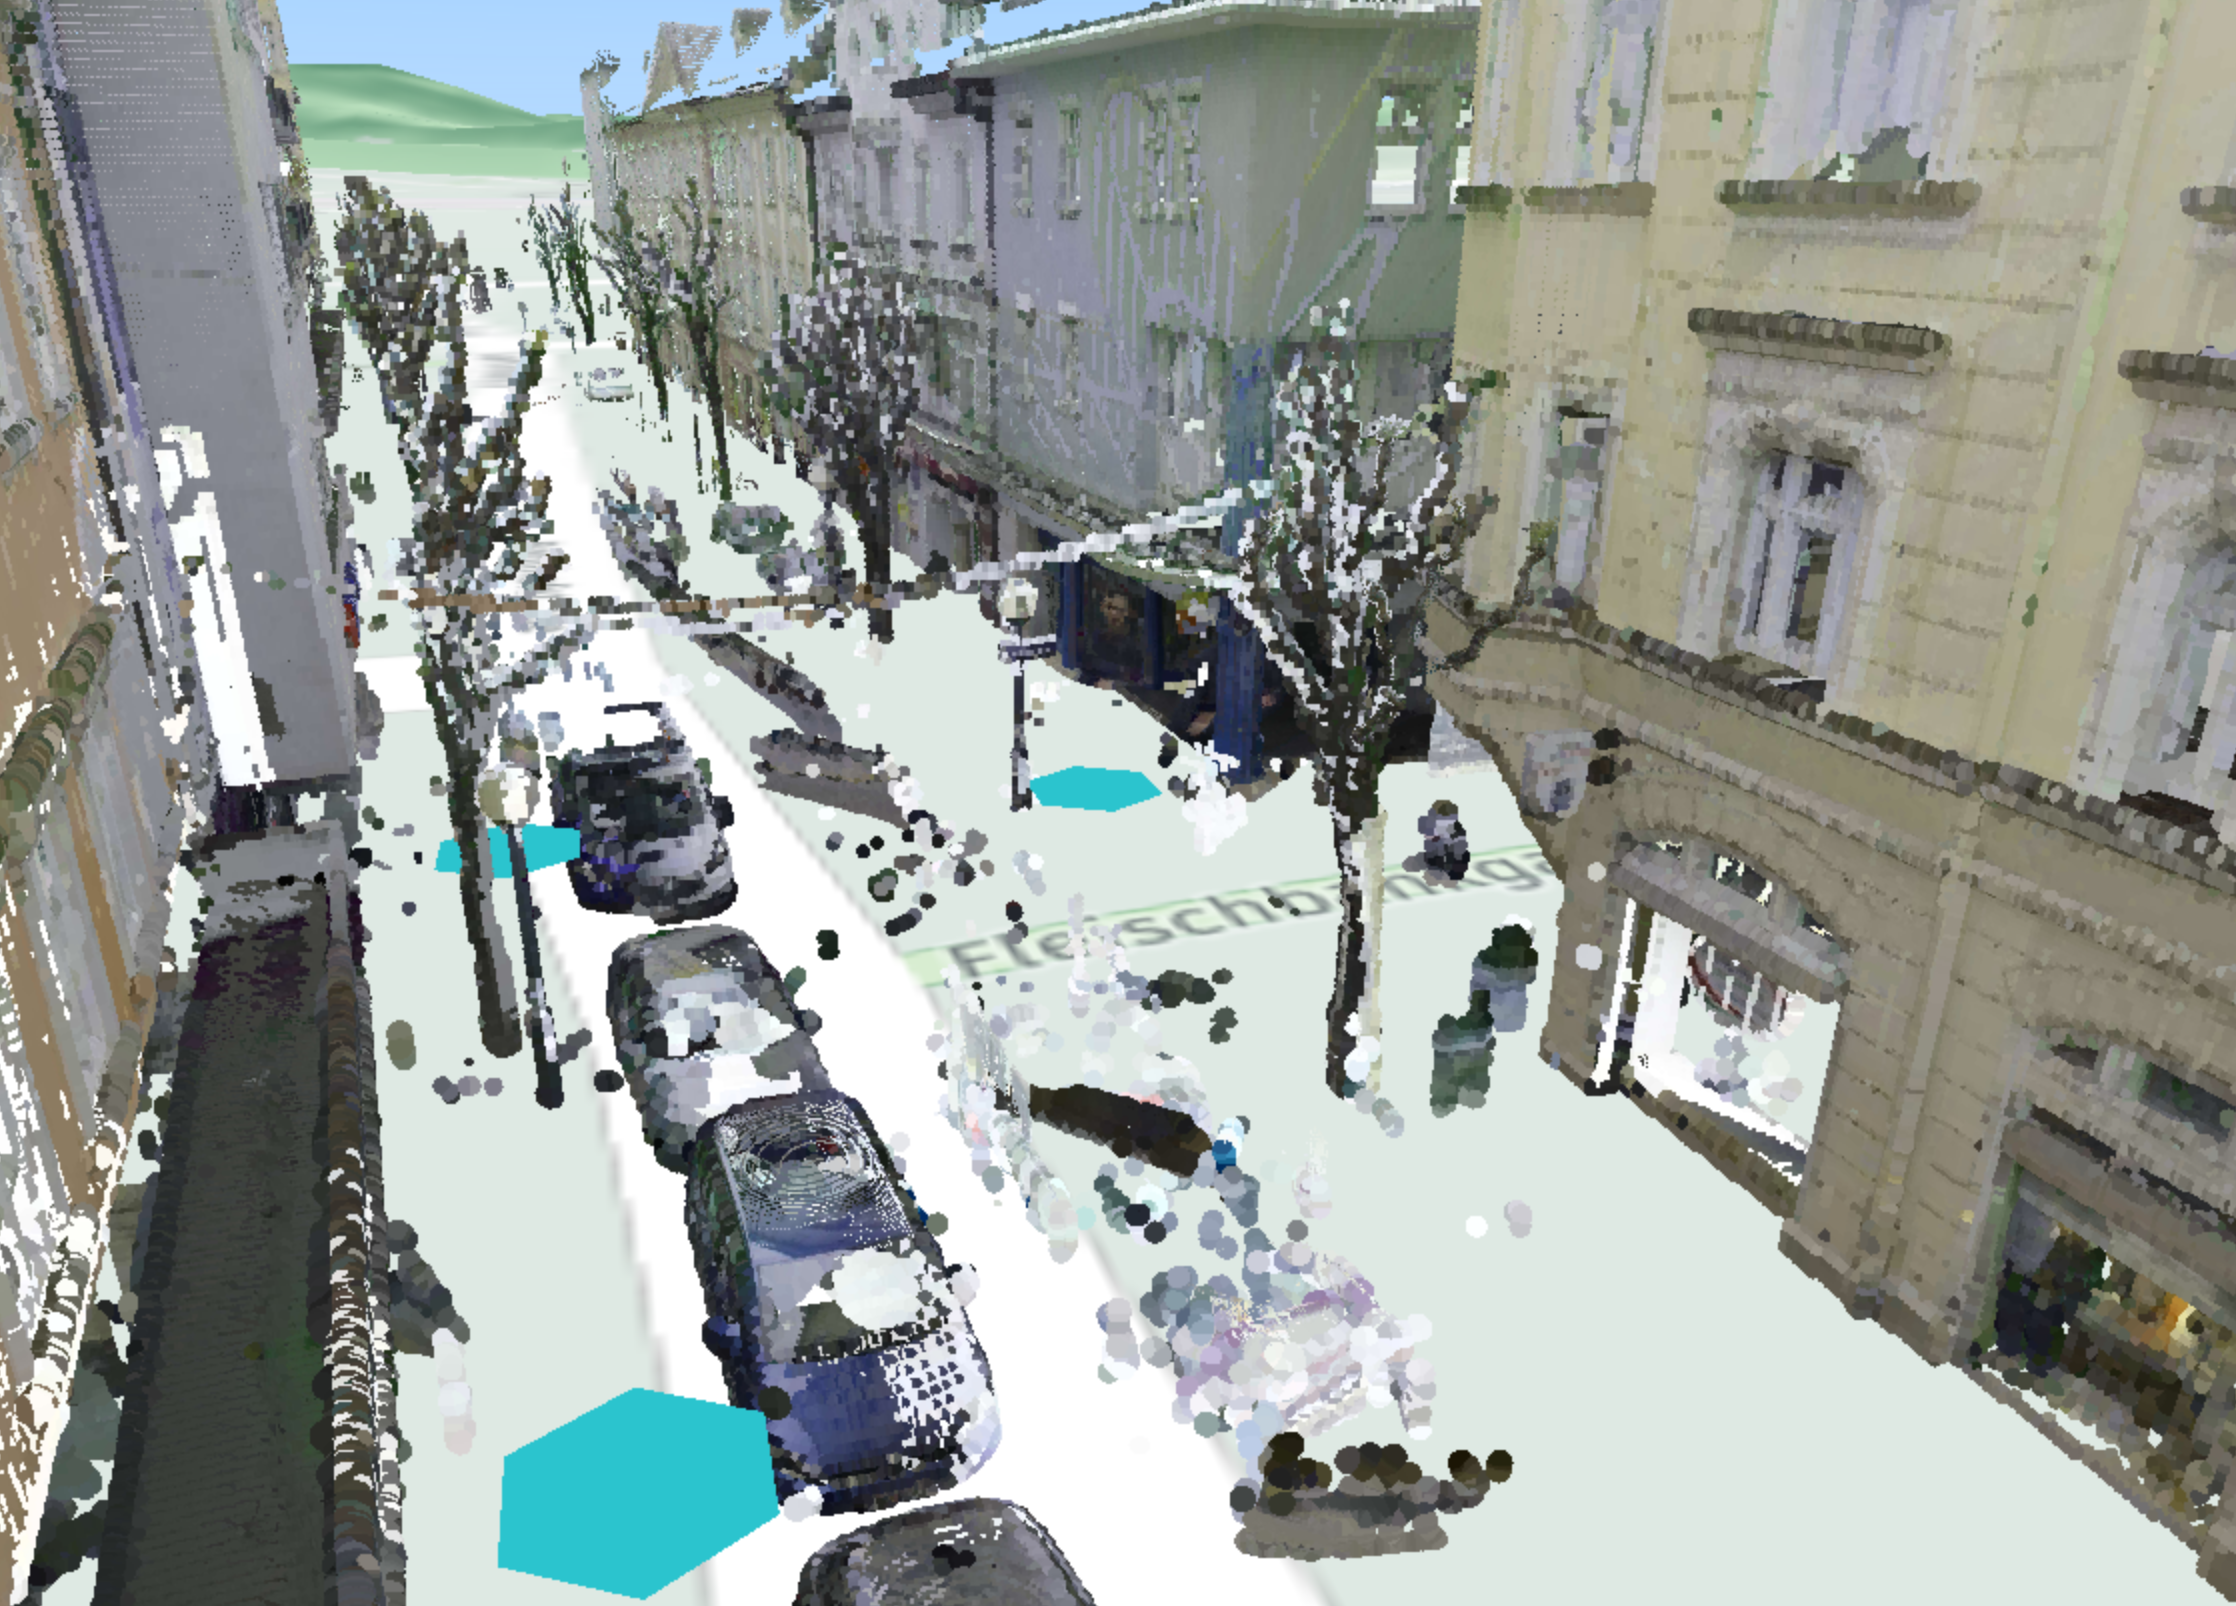
When visualizing the panoramics in a web application, they are displayed by default as blue hexagons. They are clickable and will forward the user in the panorama view of each viewpoint. It's possible to move around 360° or even jump to the next point if it's in sight.
Click on the Leave Panorama View button to go back to the map view.