Use Case: Create spatial records with a form and fetching table
Insert spatial records through a validated data-entry form and refresh a fetching table after every insert.
POSTED: | UPDATED: | by Stefan Schüttenkopf
What you will build
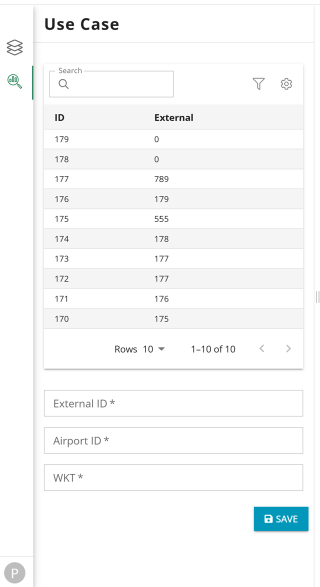
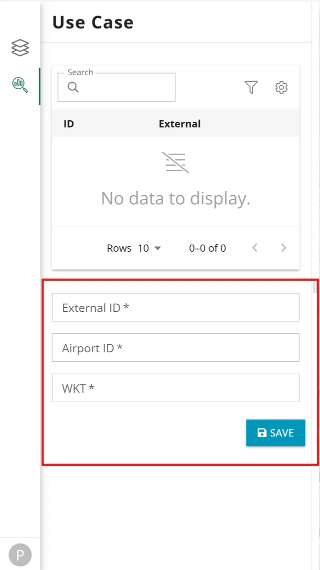
This tutorial creates a sidebar panel that lets users add spatial records.
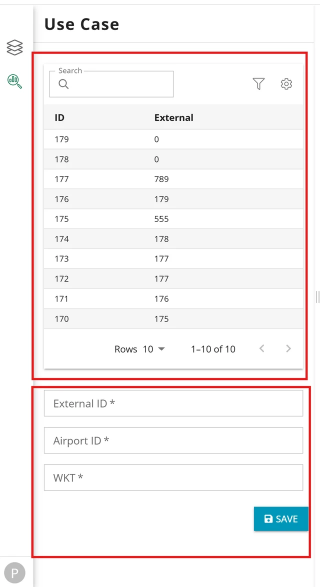
But before writing code, it is useful to understand what the application will contain. The panel consists of two main components:
- A table showing recent records from a Studio query.
- A form for entering a new record.
When the user submits the form, the application follows this sequence:
Submit form
    ↓
Execute insert query
    ↓
Reload table data
    ↓
Reset form fields
The table and form are independent UI components, but they work together as one workflow.
Before you start: Prepare the layer
Before building the application, create the layer (Data, Legend, Map View, Browser app).
Once the layer is available, you can start building the analysis application.
Step 1: Create the Studio queries
The application uses two Studio queries to communicate with the database. In Studio > Content > Queries, create the following queries. Their names must match the names used in the script.
load_record
Loads the most recent records for the table.
SELECT
  id AS "id",
  external_id AS "external_id"
FROM
  your_table_name
ORDER BY
  id DESC
LIMIT
  10;
insert_record
Creates a record from the form values and returns the new table row.
INSERT INTO your_table_name (
  external_id,
  copy_arpt_id,
  geom
)
VALUES (
  {ENTITY.external_id},
  {ENTITY.copy_arpt_id},
  ST_Transform(
    ST_GeomFromText({ENTITY.wkt}, 4326),
    26918
  )
)
RETURNING
  id AS "id",
  external_id AS "external_id";
For more information about query execution read the following tutorial.
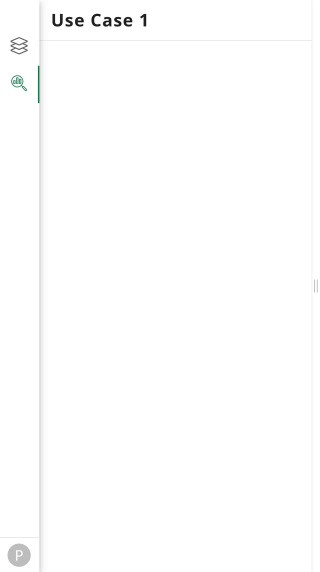
Step 2: Add the sidebar
Start the application by creating the panel container. Its panel will contain the records table and the form added in the following steps.
async function main(): Promise<void> {
    const panelRoot = document.createElement('div');

    window.map.stores.sidebarMenu.addMenuItem(
        {
            id: 'use-case-form',
            icon: {
                svgIcon: {
                    path: 'M19 13h-6v6h-2v-6H5v-2h6V5h2v6h6v2z',
                    viewWidth: 24,
                    viewHeight: 24
                },
                tooltip: 'Use Case'
            },
            panel: {
                domContent: panelRoot,
                title: 'Use Case'
            }
        },
        true
    );
}

main();
Step 3: Create the table
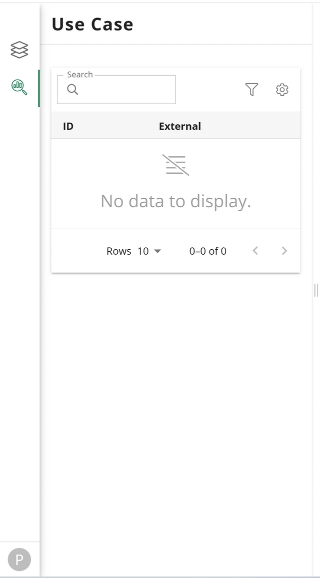
A fetching table loads its rows from an asynchronous query instead of receiving a fixed data array. The table owns the fetched result and can be refreshed after a record is inserted.
Define the row type
The row type describes the data displayed in each table row. It provides autocomplete and catches invalid column names while writing the configuration.
Add this outside main():
type SpatialRecord = {
  id: number;
  external_id: number;
};

let table: AppEngineDataFetchingTable<SpatialRecord, 'id'>;
Load the table data
The table query must be an asynchronous function that returns an array of SpatialRecord values. This function executes the load_record Studio query created in Step 1.
async function loadRecords(): Promise<SpatialRecord[]> {
  const result = await executeQuery('load_record', {
    format: 'json',
    srid: 4326,
    parameters: {}
  });

  return result.rows.map(
    (row: { id: unknown; external_id: unknown }) => ({
      id: Number(row.id),
      external_id: Number(row.external_id)
    })
  );
}
Configure the table
Inside main(), create the table configuration. keyField identifies each row, and query.fn provides the data-loading function.
const tableConfig: AppEngineTableConfig<SpatialRecord, 'id'> = {
  ui: {
    elevation: 2,
    padding: 2,
    backgroundColor: 'transparent'
  },
  id: 'use-case-table',
  keyField: 'id',
  selectionMode: 'none',
  type: 'fetching',
  query: {
    key: ['use-case-records'],
    fn: loadRecords
  },
  columns: [
    { field: 'id', headerName: 'ID' },
    { field: 'external_id', headerName: 'External ID' }
  ]
};
Adjust the table appearance
The ui configuration controls the table's visual appearance. You can find more information in the UI documentation.
Add the table to the panel
After tableConfig and before creating the form, create a DOM element for the table, add it to the sidebar panel, and create the table instance.
async function main(): Promise<void> {
  const panelRoot = document.createElement('div');

  const tableConfig: AppEngineTableConfig<SpatialRecord, 'id'> = {
    // Table configuration from the previous section.
  };

  const tableRoot = document.createElement('div');
  panelRoot.appendChild(tableRoot);

  table = TableInstance.create(
    tableRoot,
    tableConfig
  ) as AppEngineDataFetchingTable<SpatialRecord, 'id'>;

  // Create the form here in Step 4.
}
Step 4: Create the form
The form is not bound to an existing record. It starts empty and collects the values for a new spatial record, so it uses AppEngineEmptyForm.
Define the form values
Add these declarations outside main(). RecordFormValues defines the form fields and their expected value types. It gives TypeScript autocomplete and detects invalid field names or values while configuring the form.
type RecordFormValues = {
  external_id: number;
  copy_arpt_id: string;
  wkt: string;
};

let form: AppEngineEmptyForm<RecordFormValues>;
Configure the fields
Inside main(), create the form configuration. The form validates that every field is present. WKT syntax is validated by the database when the insert query runs.
const formConfig: AppEngineFormConfig<RecordFormValues> = {
  ui: {
    displaySubmitButton: true,
    formBackgroundColor: 'transparent',
    sectionElevation: 0,
    sectionPadding: 1,
    formPadding: 1
  },
  config: {
    sections: [
      {
        section: '',
        fields: [
          {
            name: 'external_id',
            type: 'number',
            label: 'External ID',
            placeholder: '174',
            showRequiredAsterisk: true,
            validation: [
              { required: true, message: 'External ID is required' }
            ]
          },
          {
            name: 'copy_arpt_id',
            type: 'text',
            label: 'Airport ID',
            placeholder: 'NJ38',
            showRequiredAsterisk: true,
            validation: [
              { required: true, message: 'Airport ID is required' }
            ]
          },
          {
            name: 'wkt',
            type: 'text',
            label: 'WKT',
            placeholder: 'POINT(-74.006 40.7128)',
            showRequiredAsterisk: true,
            validation: [
              { required: true, message: 'WKT is required' }
            ]
          }
        ]
      }
    ]
  }
};
Adjust the form appearance
The ui configuration shows the submit button, uses the sidebar background, and controls spacing around the form and its fields. You can find more information in the UI documentation.
Add the form to the panel
Inside main(), after formConfig and after creating the table in Step 3, create a DOM element for the form, add it to the sidebar panel, and create the form instance.
async function main(): Promise<void> {
  const panelRoot = document.createElement('div');

  // Table creation from Step 3.

  const formConfig: AppEngineFormConfig<RecordFormValues> = {
    // Form configuration from the previous section.
  };

  const formRoot = document.createElement('div');
  panelRoot.appendChild(formRoot);

  form = FormInstance.create(
    formRoot,
    formConfig
  ) as AppEngineEmptyForm<RecordFormValues>;

  // Add form submission handling in Step 5.
}
Step 5: Submit the form data
When the user submits the form, the application inserts the values into the database, reloads the table, and clears the form. The form is cleared only after both operations succeed.
Create the insert helper
Add this function outside main(). Its parameters fill the {ENTITY.…} placeholders used by the insert_record query from Step 1.
async function insertRecord(values: RecordFormValues): Promise<SpatialRecord> {
  const result = await executeQuery('insert_record', {
    format: 'json',
    srid: 4326,
    parameters: {
      external_id: Number(values.external_id),
      copy_arpt_id: values.copy_arpt_id,
      wkt: values.wkt
    }
  });

  const row = result.rows[0] as { id: unknown; external_id: unknown };

  return {
    id: Number(row.id),
    external_id: Number(row.external_id)
  };
}
Add the submit handler
Inside formConfig, add handleSubmit alongside ui and config.
The table reloads from the database, so it retains the query order and shows the newest records correctly.
const formConfig: AppEngineFormConfig<RecordFormValues> = {
  ui: {
    // UI configuration from Step 4.
  },
  config: {
    // Field configuration from Step 4.
  },
  handleSubmit: async (values) => {
    await insertRecord(values);
    await table.refetch();
    form.reset();
  }
};
Step 6: Select a feature from a table row (optional)
This optional step connects a table row to its feature on the map. Before using it, the user has to activate the layer in the Layer Tree. The record id must match the feature ID in that layer.
If it is not already present, add this outside main():
const { map } = window;
Then add onRowClick to tableConfig:
const tableConfig: AppEngineTableConfig<SpatialRecord, 'id'> = {
  // Existing table configuration.
  columns: [
    { field: 'id', headerName: 'ID' },
    { field: 'external_id', headerName: 'External ID' }
  ],
  onRowClick: (row) => {
    map.stores.mapState.apiFeatureSelect([String(row.id)], 'replace');
  }
};
Clicking a row selects the corresponding feature on the active map layer.