
This post will revolve around the installation of Luciad Fusion on an Ubuntu virtual machine in combination with M.App Enterprise running on a Windows machine.
If you need assistance with this step, please refer to the optional section of this tutorial, where we provide a detailed guide on creating an Ubuntu VM using Hyper-V.
Requirements for Luciad Fusion Installation
To install Luciad Fusion, there are some requirements to be done beforehand.
Install Java
Simply open your Terminal and type the following command:
You can install OpenJDK using the package manager
sudo apt install openjdk-17-jdk
java -version
Create new database
Create a new database for Luciad Fusion to store and manage all metadata. You will need the connection string in the next chapter when setting environment variables.
pgcrypto and postgis extensions are enabled for your databaseCreate a Warehouse folder
You can create a warehouse folder either directly on the linux virtual machine or on your windows machine.
Option A: Folder on Linux
When you choose to have your warehouse folder on your Ubuntu VM, simply create a directory using your file explorer. A common location might be /home/user/warehouse.
Option B: Mount a network share
When you opt for having the warehouse folder on your windows machine, there is a few steps to follow.
Ensure that the cifs-utils package is installed on your Linux server. You can install it with the following command:
sudo apt-get install cifs-utils
Create a Mount Point
A mount point is a directory on your VM's file system where the network share will be accessible. A common location could be:
/media/windowsshare
Mount the Share
sudo mount -t cifs -o username=your-username,password=your-password //windows-server-ip/share-name /media/windowsshare
Automate the Mount
To ensure the network share mounts automatically at system startup, you add an entry to the /etc/fstab file. This file contains information about file systems and their mount points.
//windows-server-ip/share-name /media/windowsshare cifs username=your-username,password=your-password,iocharset=utf8,sec=ntlm 0 0
After editing the /etc/fstab file, it it suggested to mount all file systems again, that are defined in it. This is done by the following command:
sudo mount -a
Once mounted, you can access the Windows share by navigating to /media/windowsshare on your Linux system. This allows you to work with the files as if they were stored locally.
Set environment variables
Before running the setup file, it is necessary to set the environment varibales in the .yml file. Therefore, navigate to your Luciad Fusion setup folder and Resources and then open the application-fusion.production.yml.
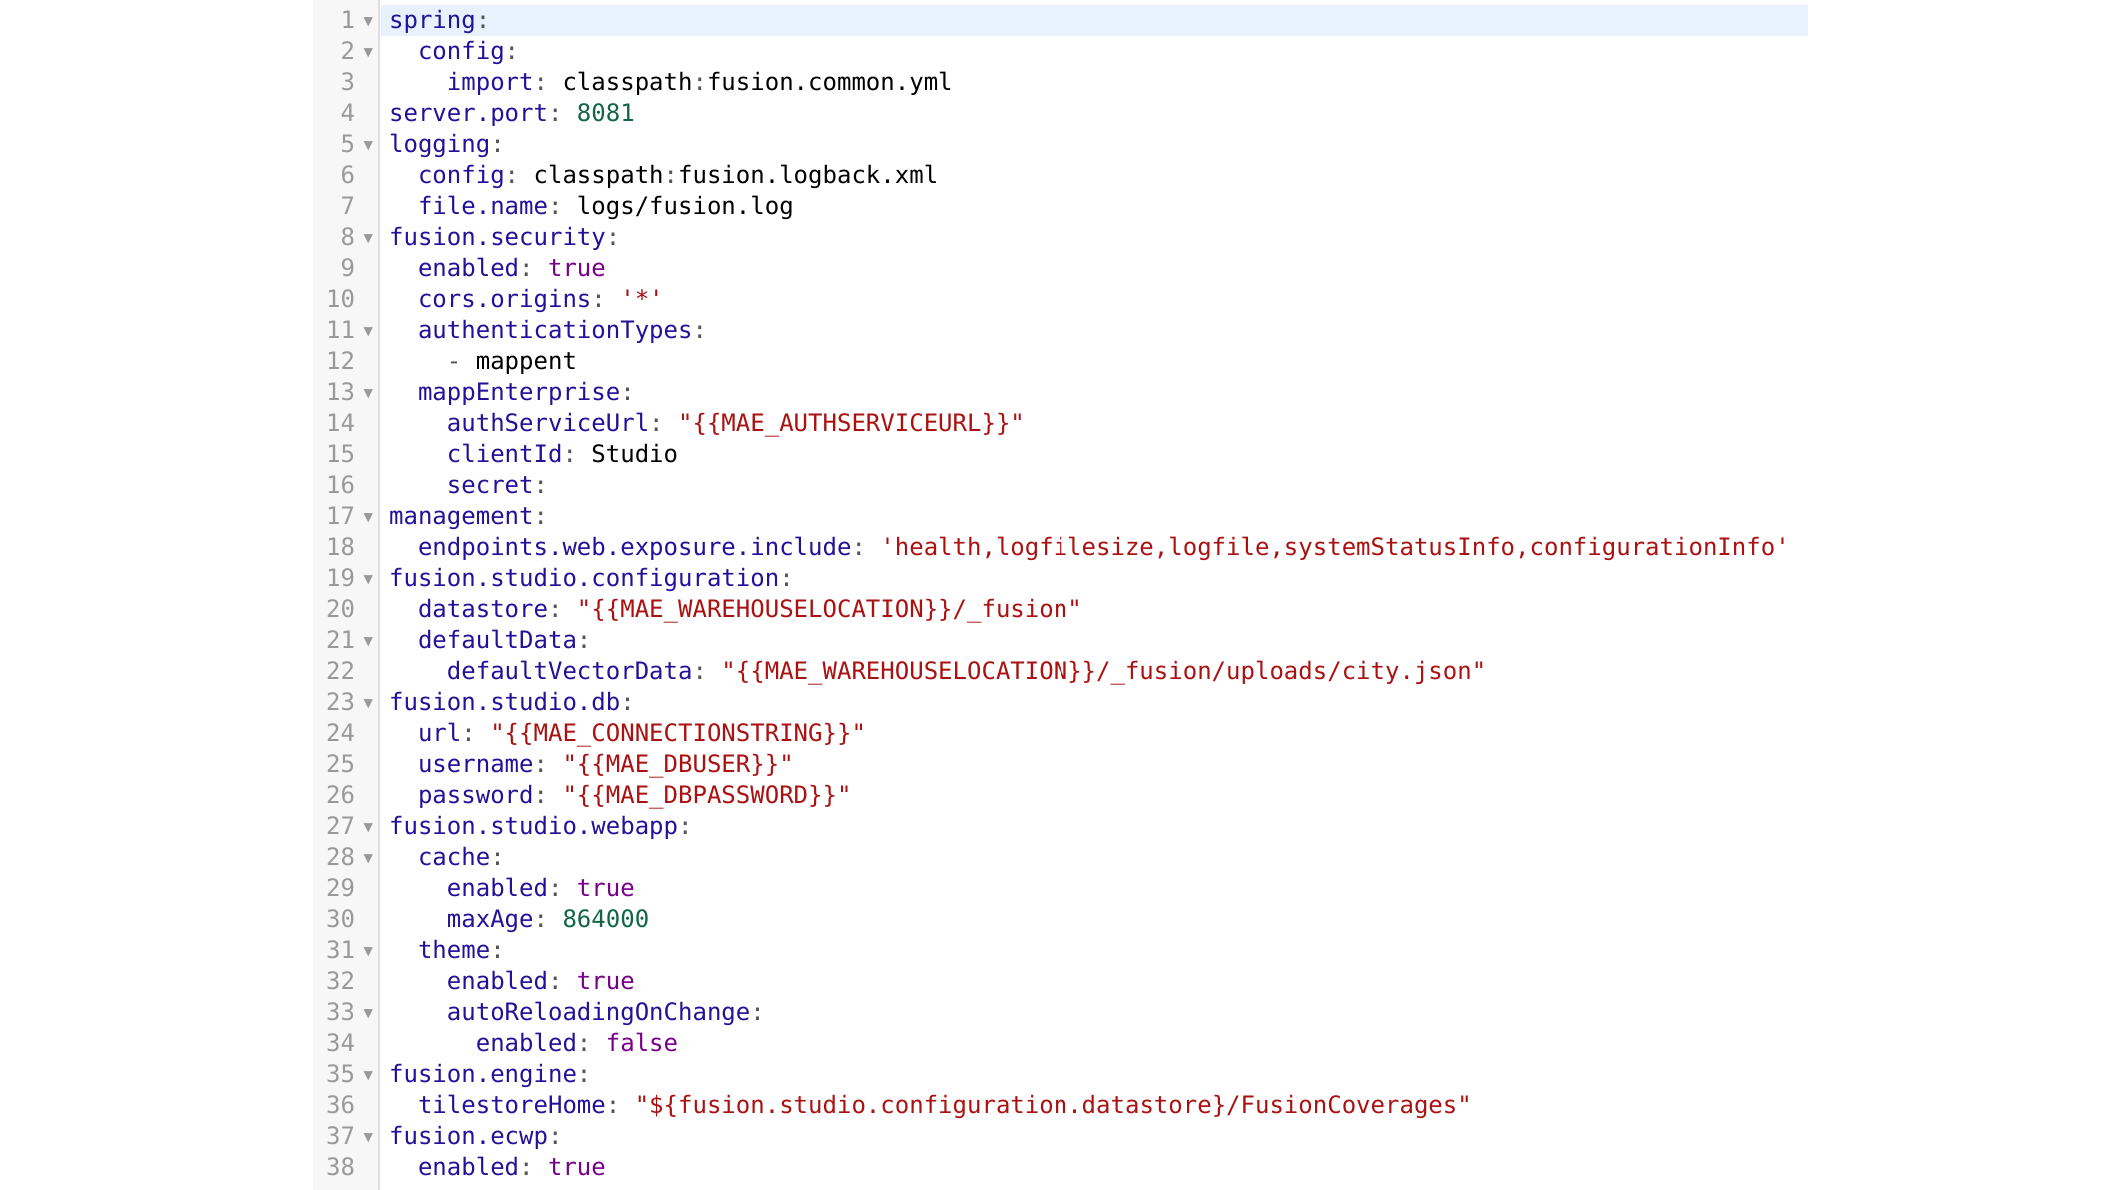
Replace the placeholders with your actual variables.
Update mapp_config
Navigate to your master database from your M.App Enterprise installation and open the mapp_config table. For the Fusion Server Url value you have to indicate your virtual machine's name:
http://Virtual-Machine:8081
Add license server variable
Add the license server variable to the StartFusionPlatformServer.sh file to ensure proper configuration. The file can be found directly within your Luciad Fusion setup folder.
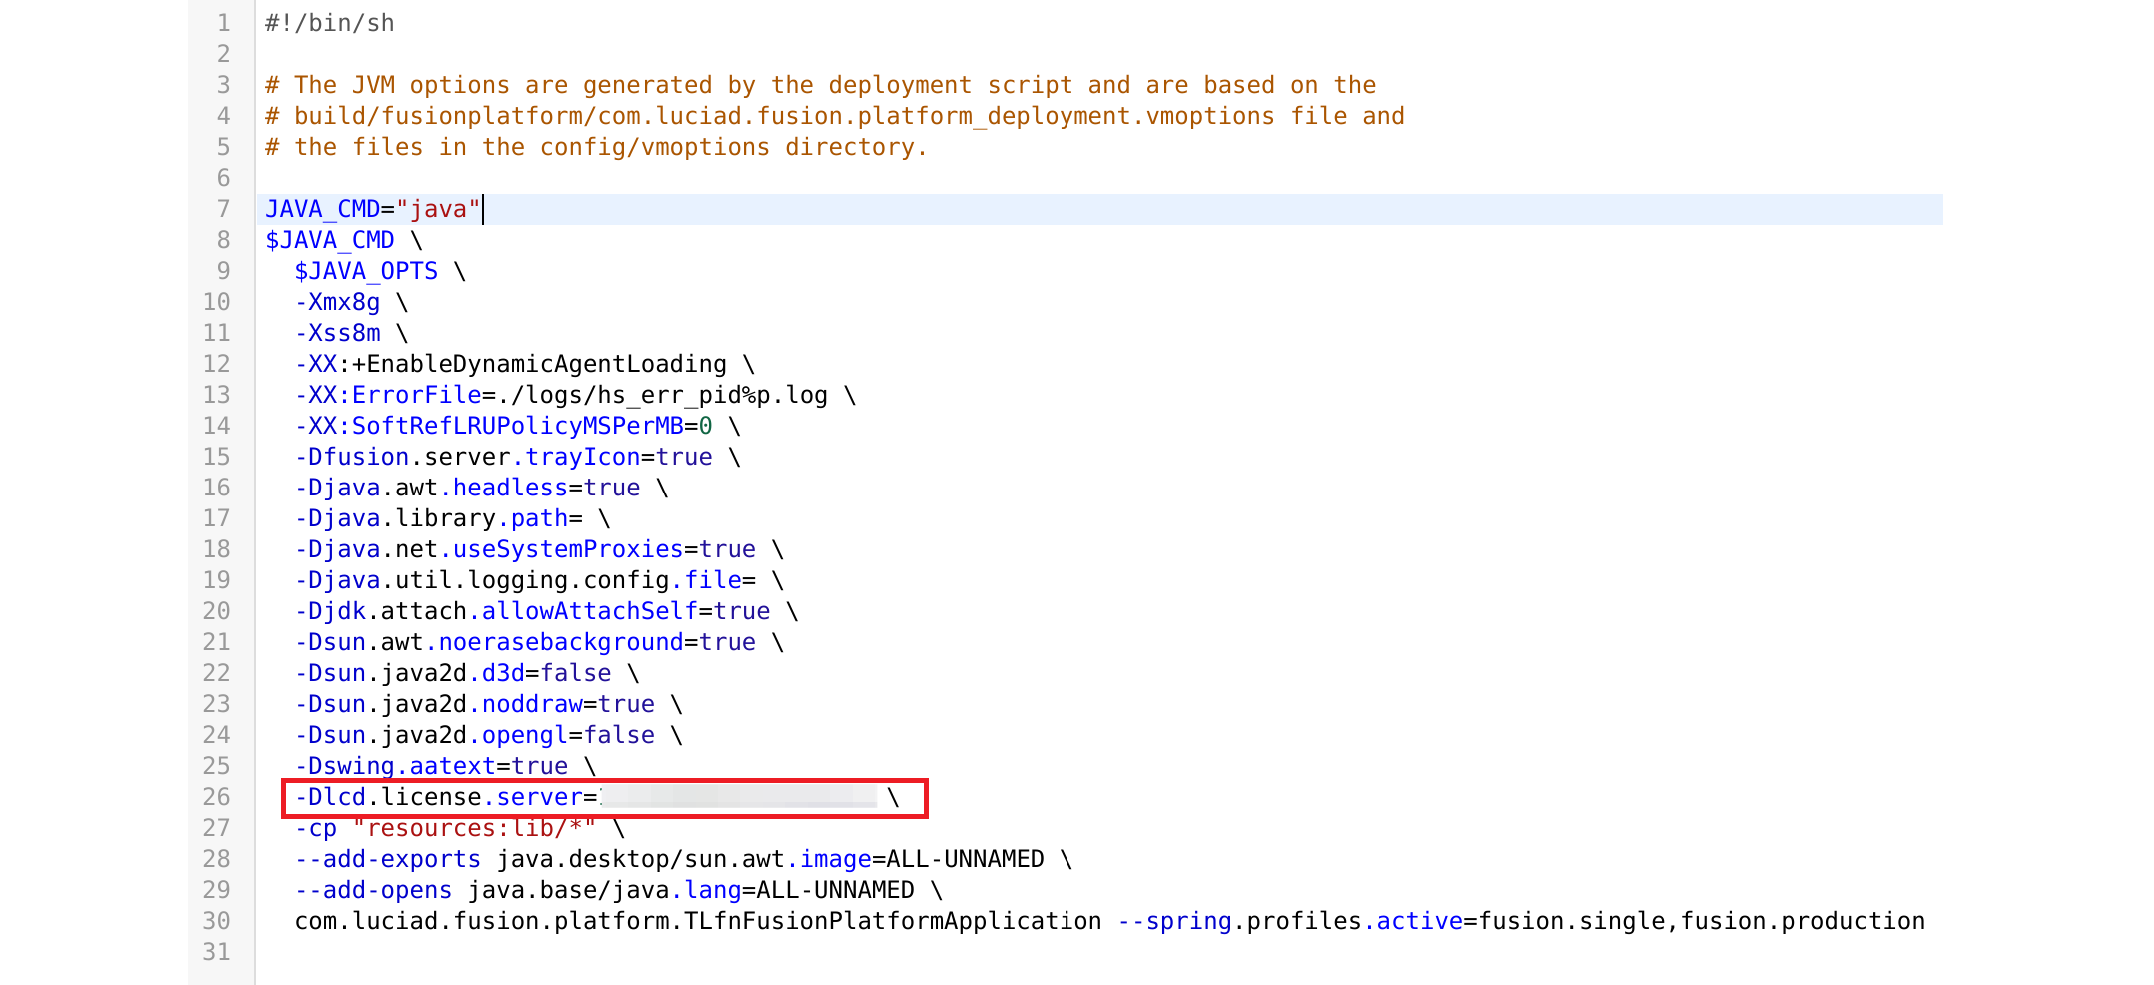
Simply add this line and indicate your license server's name or IP address.
Run Luciad Fusion
Open the terminal and navigate to the folder containing the StartFusionPlatformServer.sh script using the following command:
cd /path/to/your/script
chmod +x StartFusionPlatformServer.sh
./StartFusionPlatformServer.sh
./StartFusionPlatformServer.sh
If there are no error messages in the log, that's a positive indication. Proceed to launch Luciad Fusion from the M.App Enterprise Studio to confirm its functionality.

Optional
Create a virtual machine with Hyper-V
In this post we use Hyper-V to create a virtual machine as it is a robust and efficient virtualization solution that integrates seamlessly with Windows environments.
To begin, launch Hyper-V and establish a connection to your preferred server. Once connected, right-click on the server and select Quick Create... from the menu.
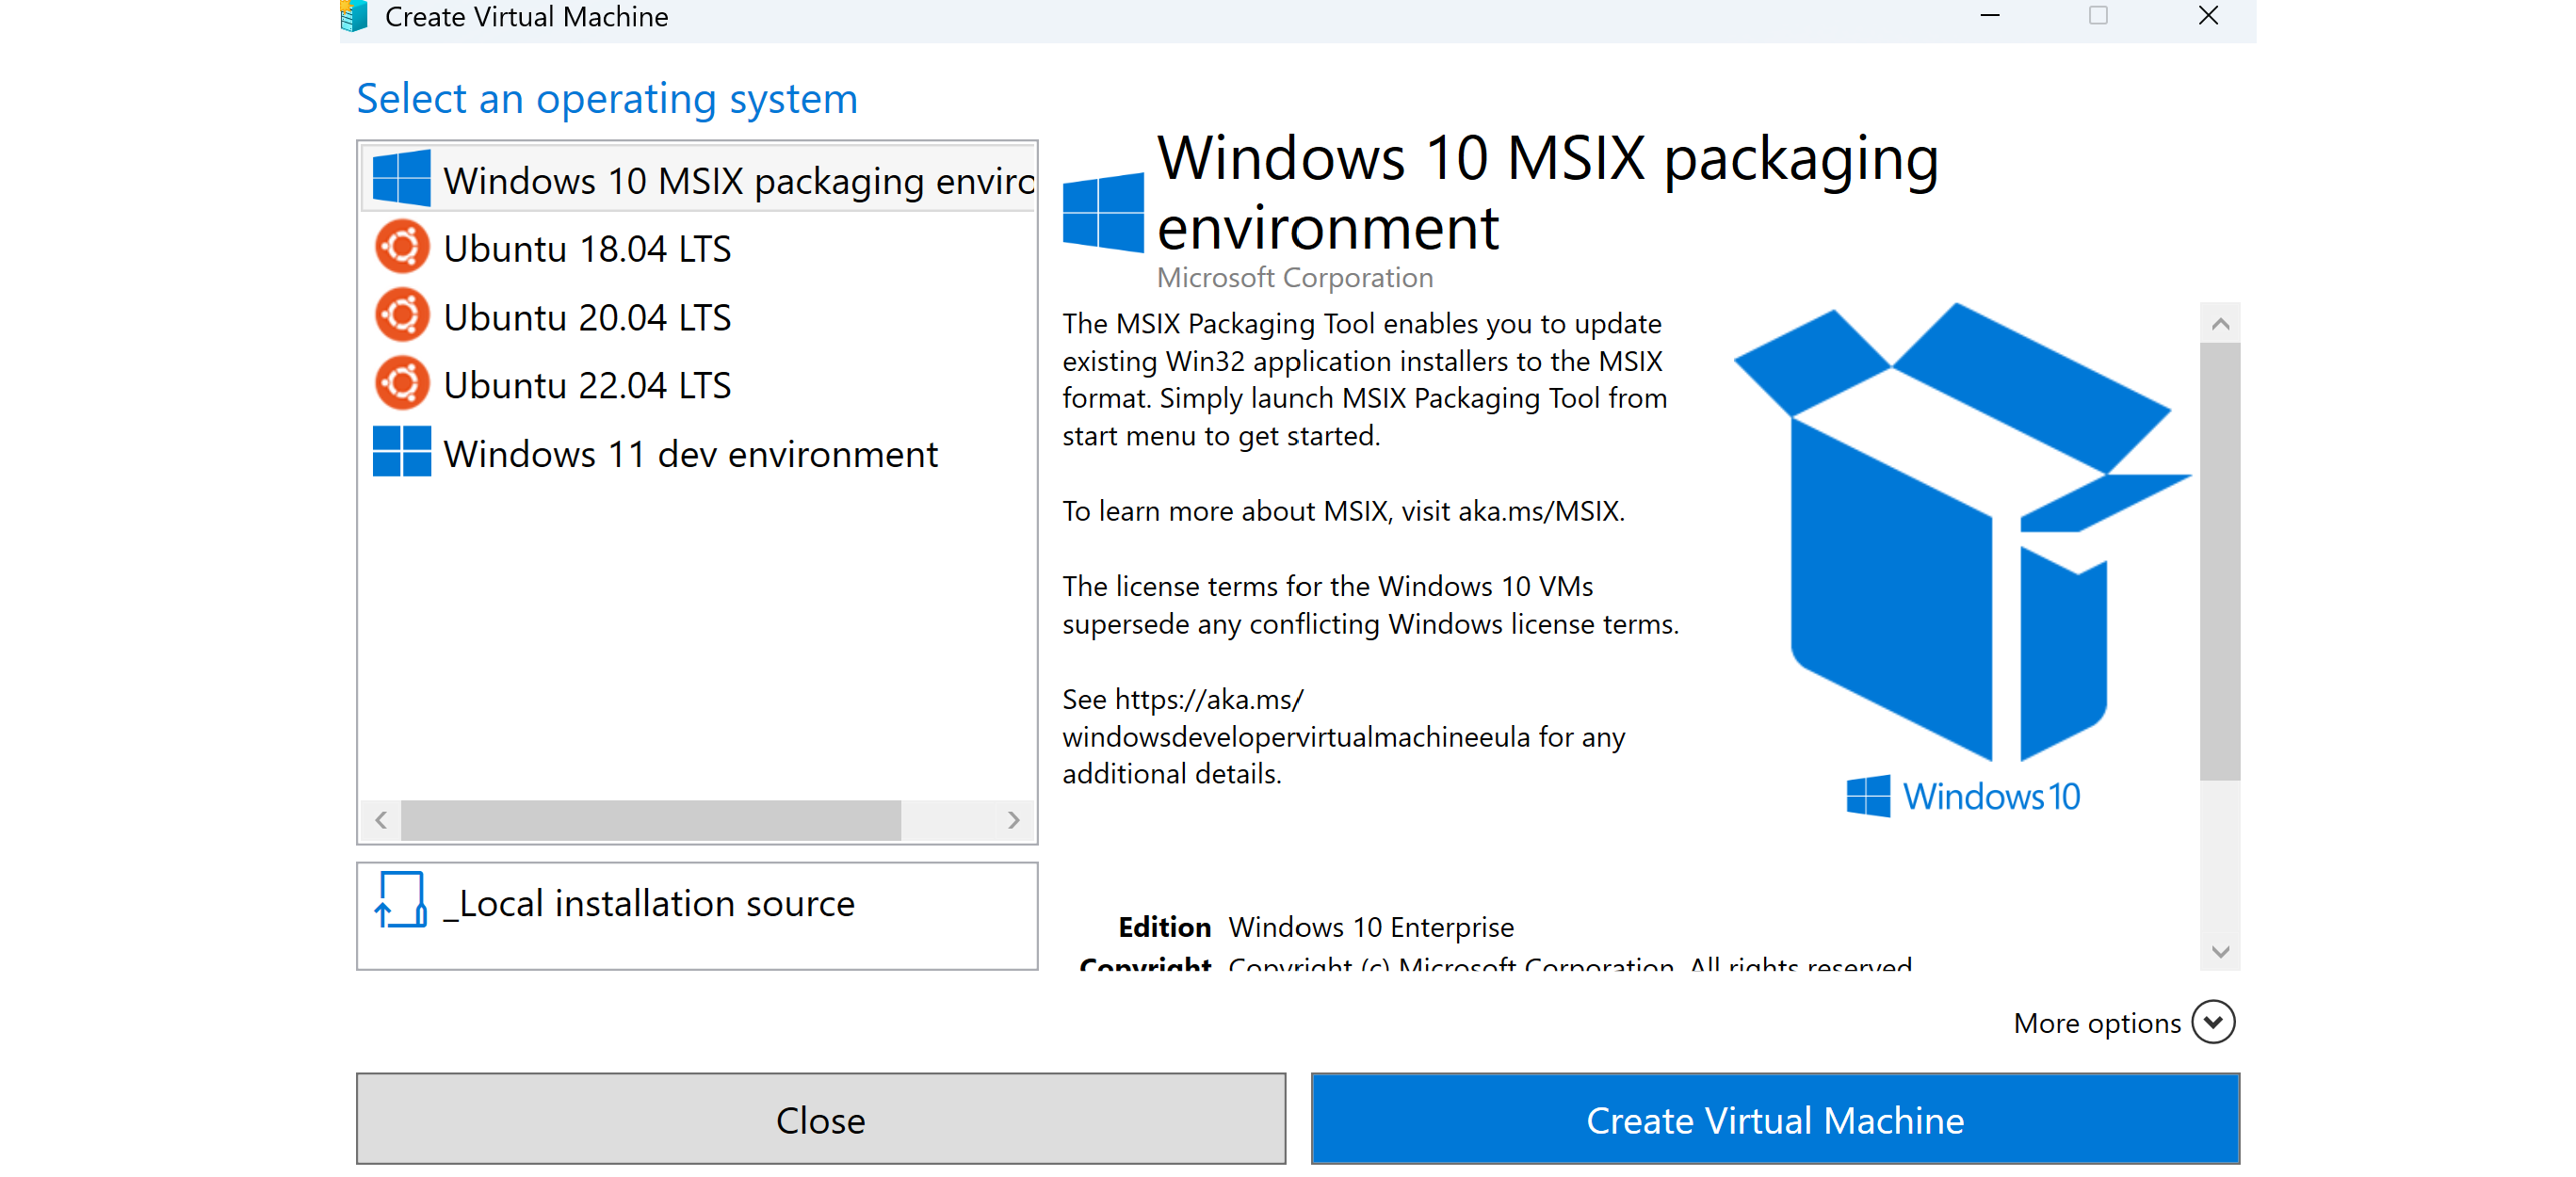
The panel above will open. Select the latest Ubuntu operating system and click on Create Virtual Machine.
Increase disk space
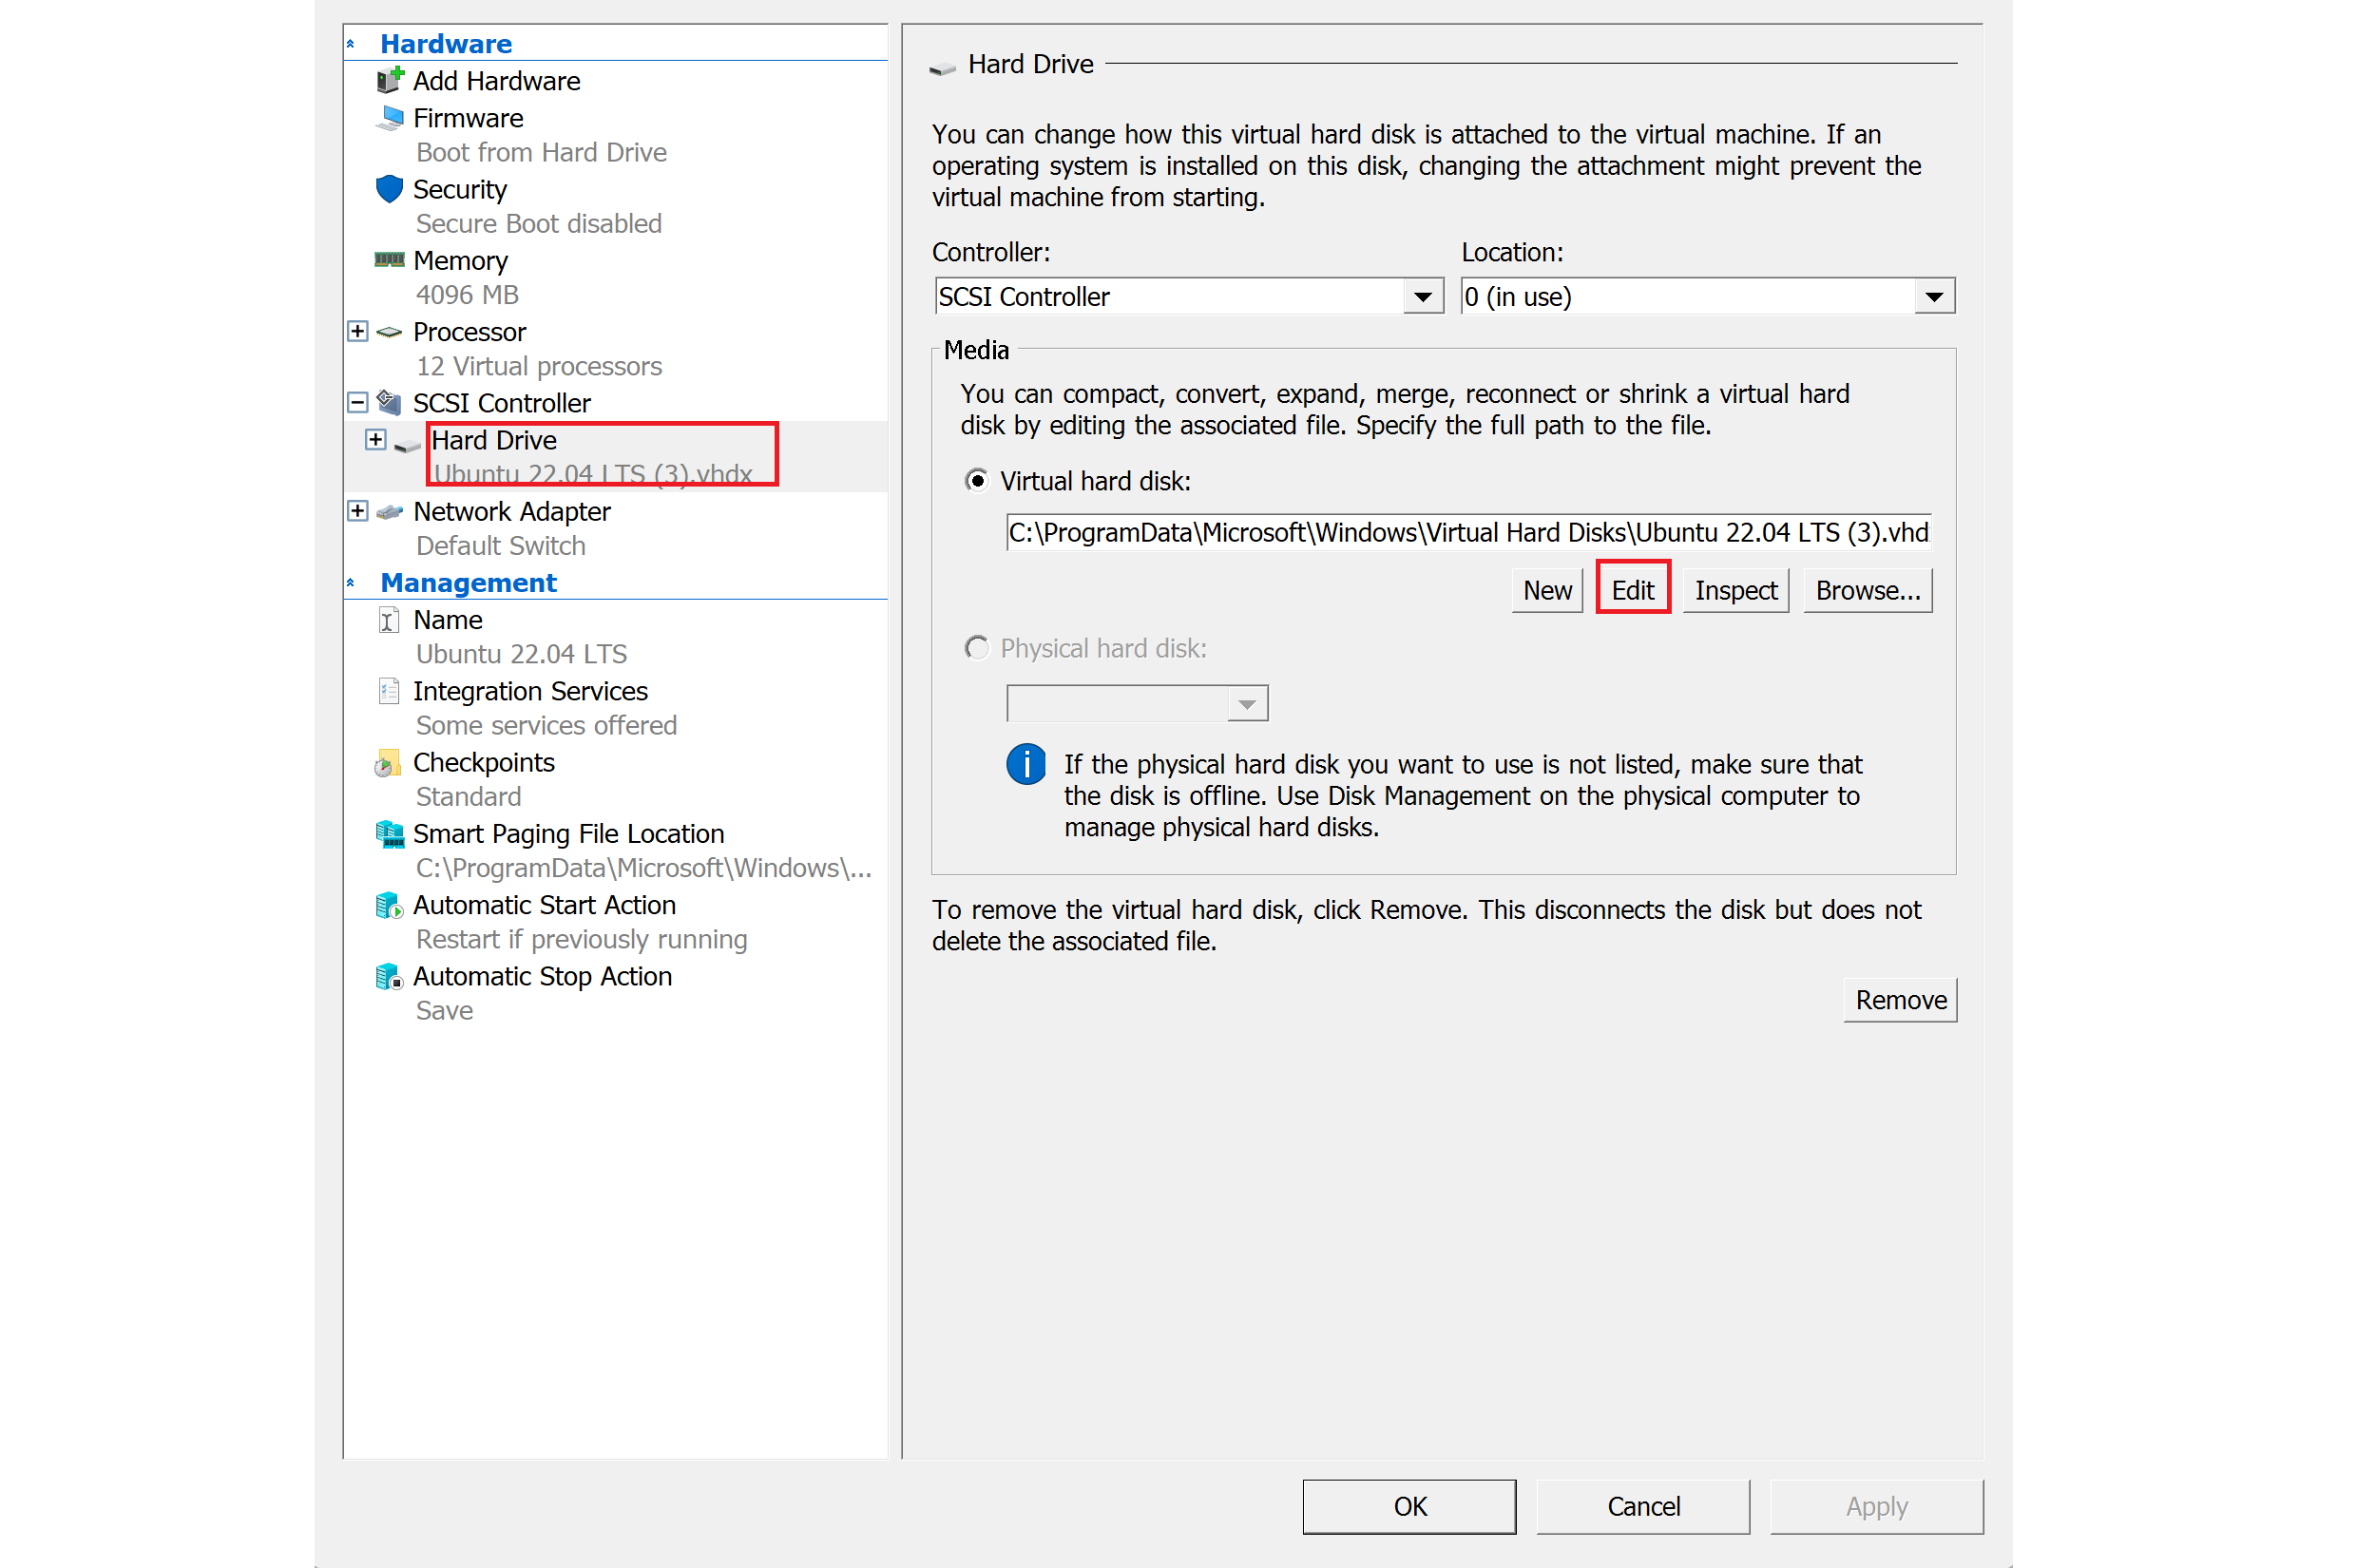
By default the disk space is set to 12GB where 10GB are used by the system already, so you have to increase the space.
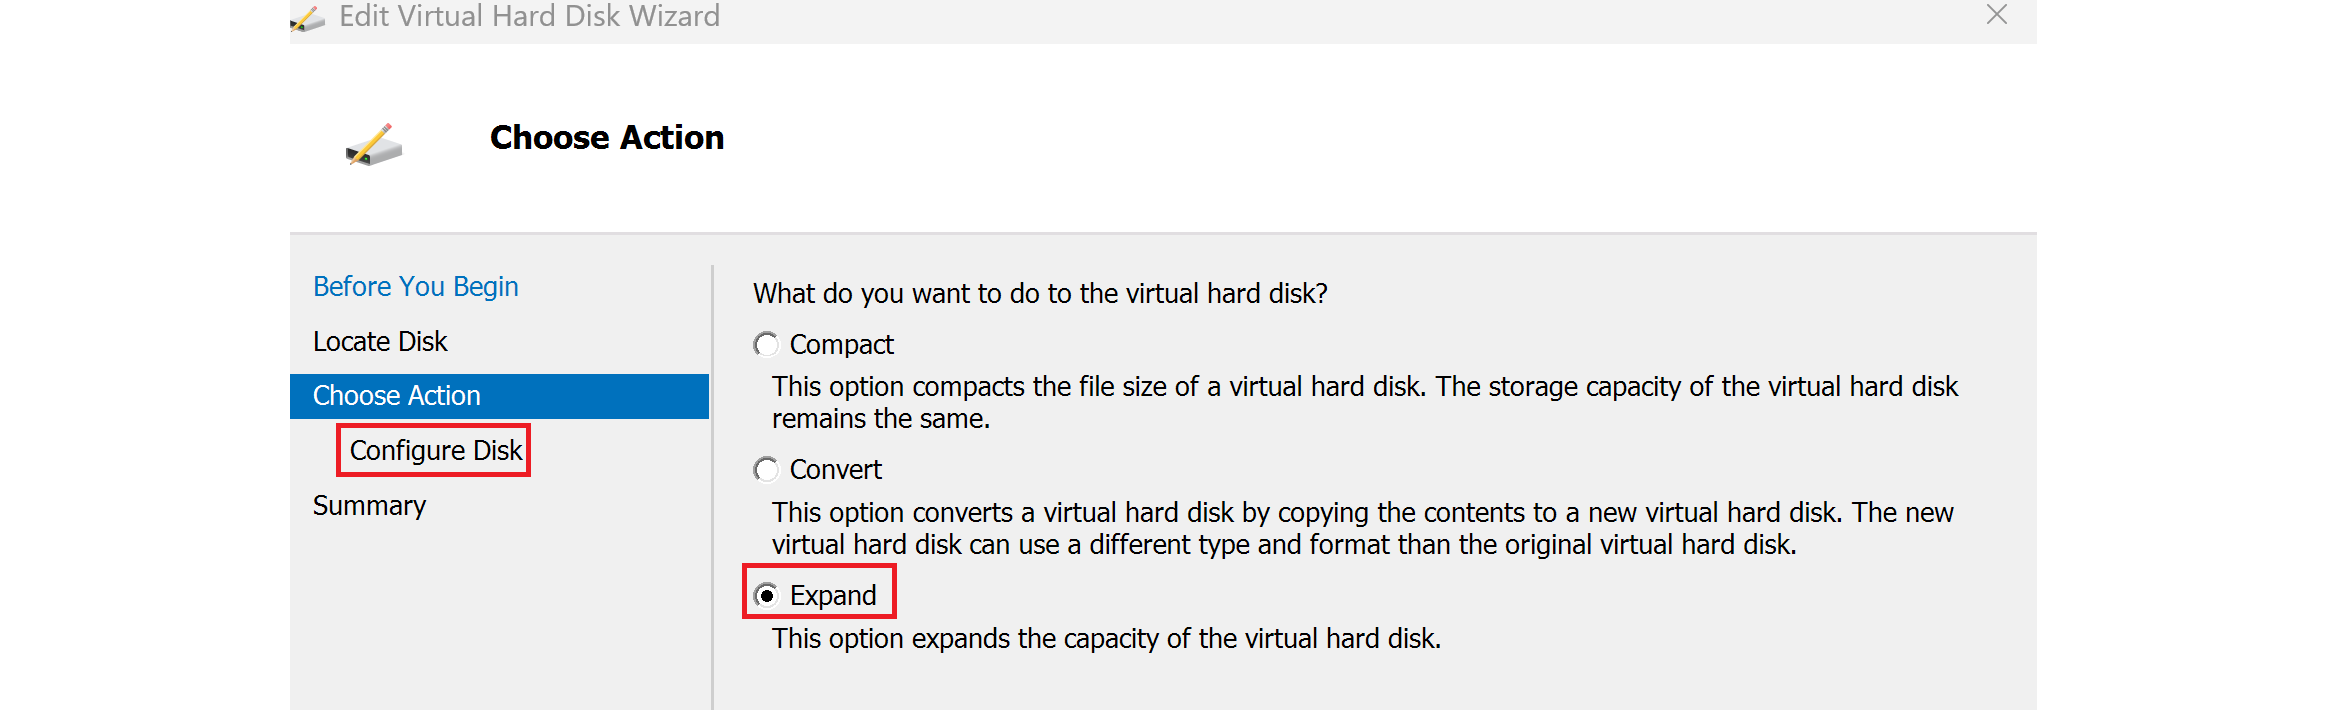
Shut down your machine and go to the settings of your VM in Hyper-V. Navigate to Hard Disk and click on Edit.
Navigate to Choose Action and select Expand from the options. The Configure Disk window will then appear. Click on it and increase the disk space as needed. 25GB in total will be sufficient to follow this post.
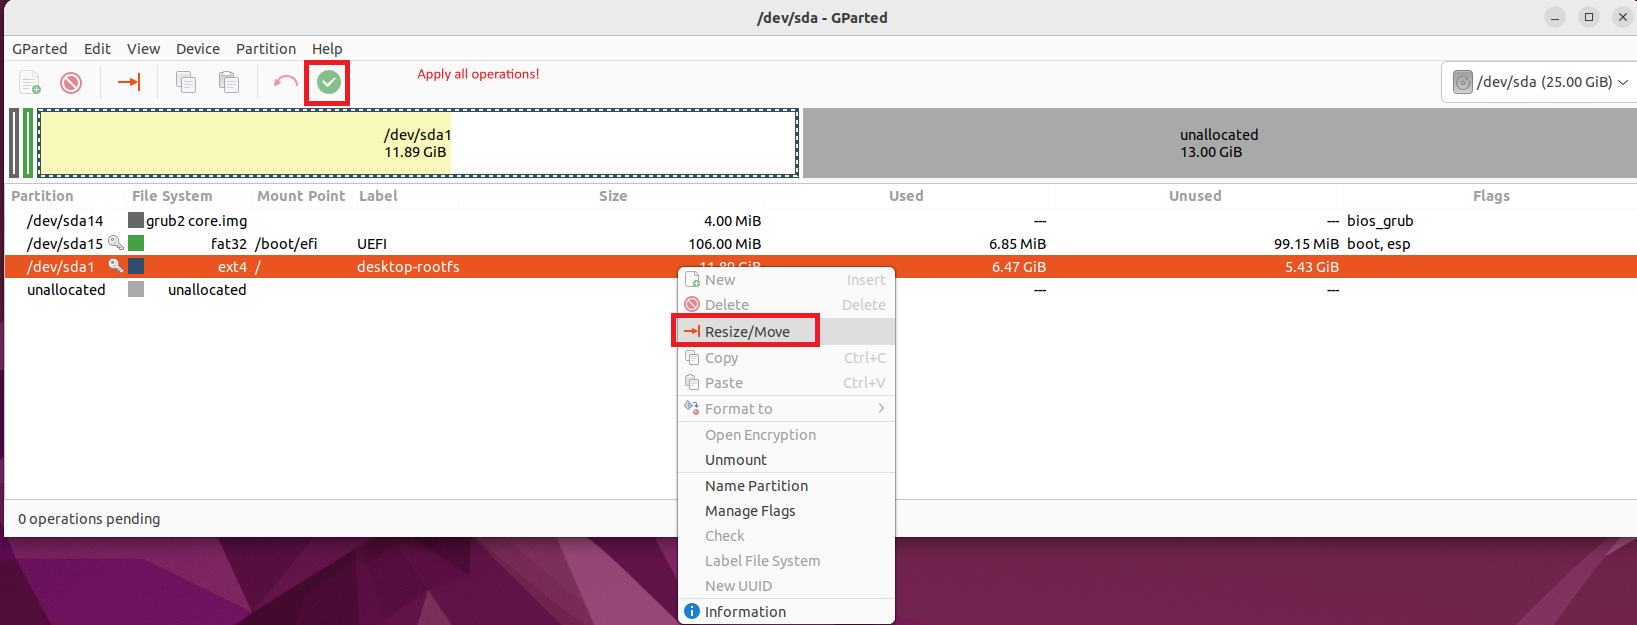
Connect to your VM again and install GParted. GParted is a free and open-source partition editor for graphically managing disk partitions, allowing users to resize, copy, and move partitions without data loss.

Right-click on the partition labeled desktop-rootfs, which has approximately 12 GB, and select resize/move. A panel will appear, allowing you to increase the partition size using the unallocated space you previously added in your virtual machine settings. Make sure to click the green tick icon Apply all operations to save the changes.
Transfer setup files
There are several methods to transfer setup files from your Windows server to an Ubuntu machine, but in this post, enhanced session mode is used to facilitate the transfer.
Right-click on your Hyper-V host to access the Hyper-V Settings. In the Server tab, select Enhanced Session Mode Policy and ensure that Allow enhanced session mode is checked. Additionally, under the User tab, select Enhanced Session Mode and verify that Allow enhanced session mode is also checked.
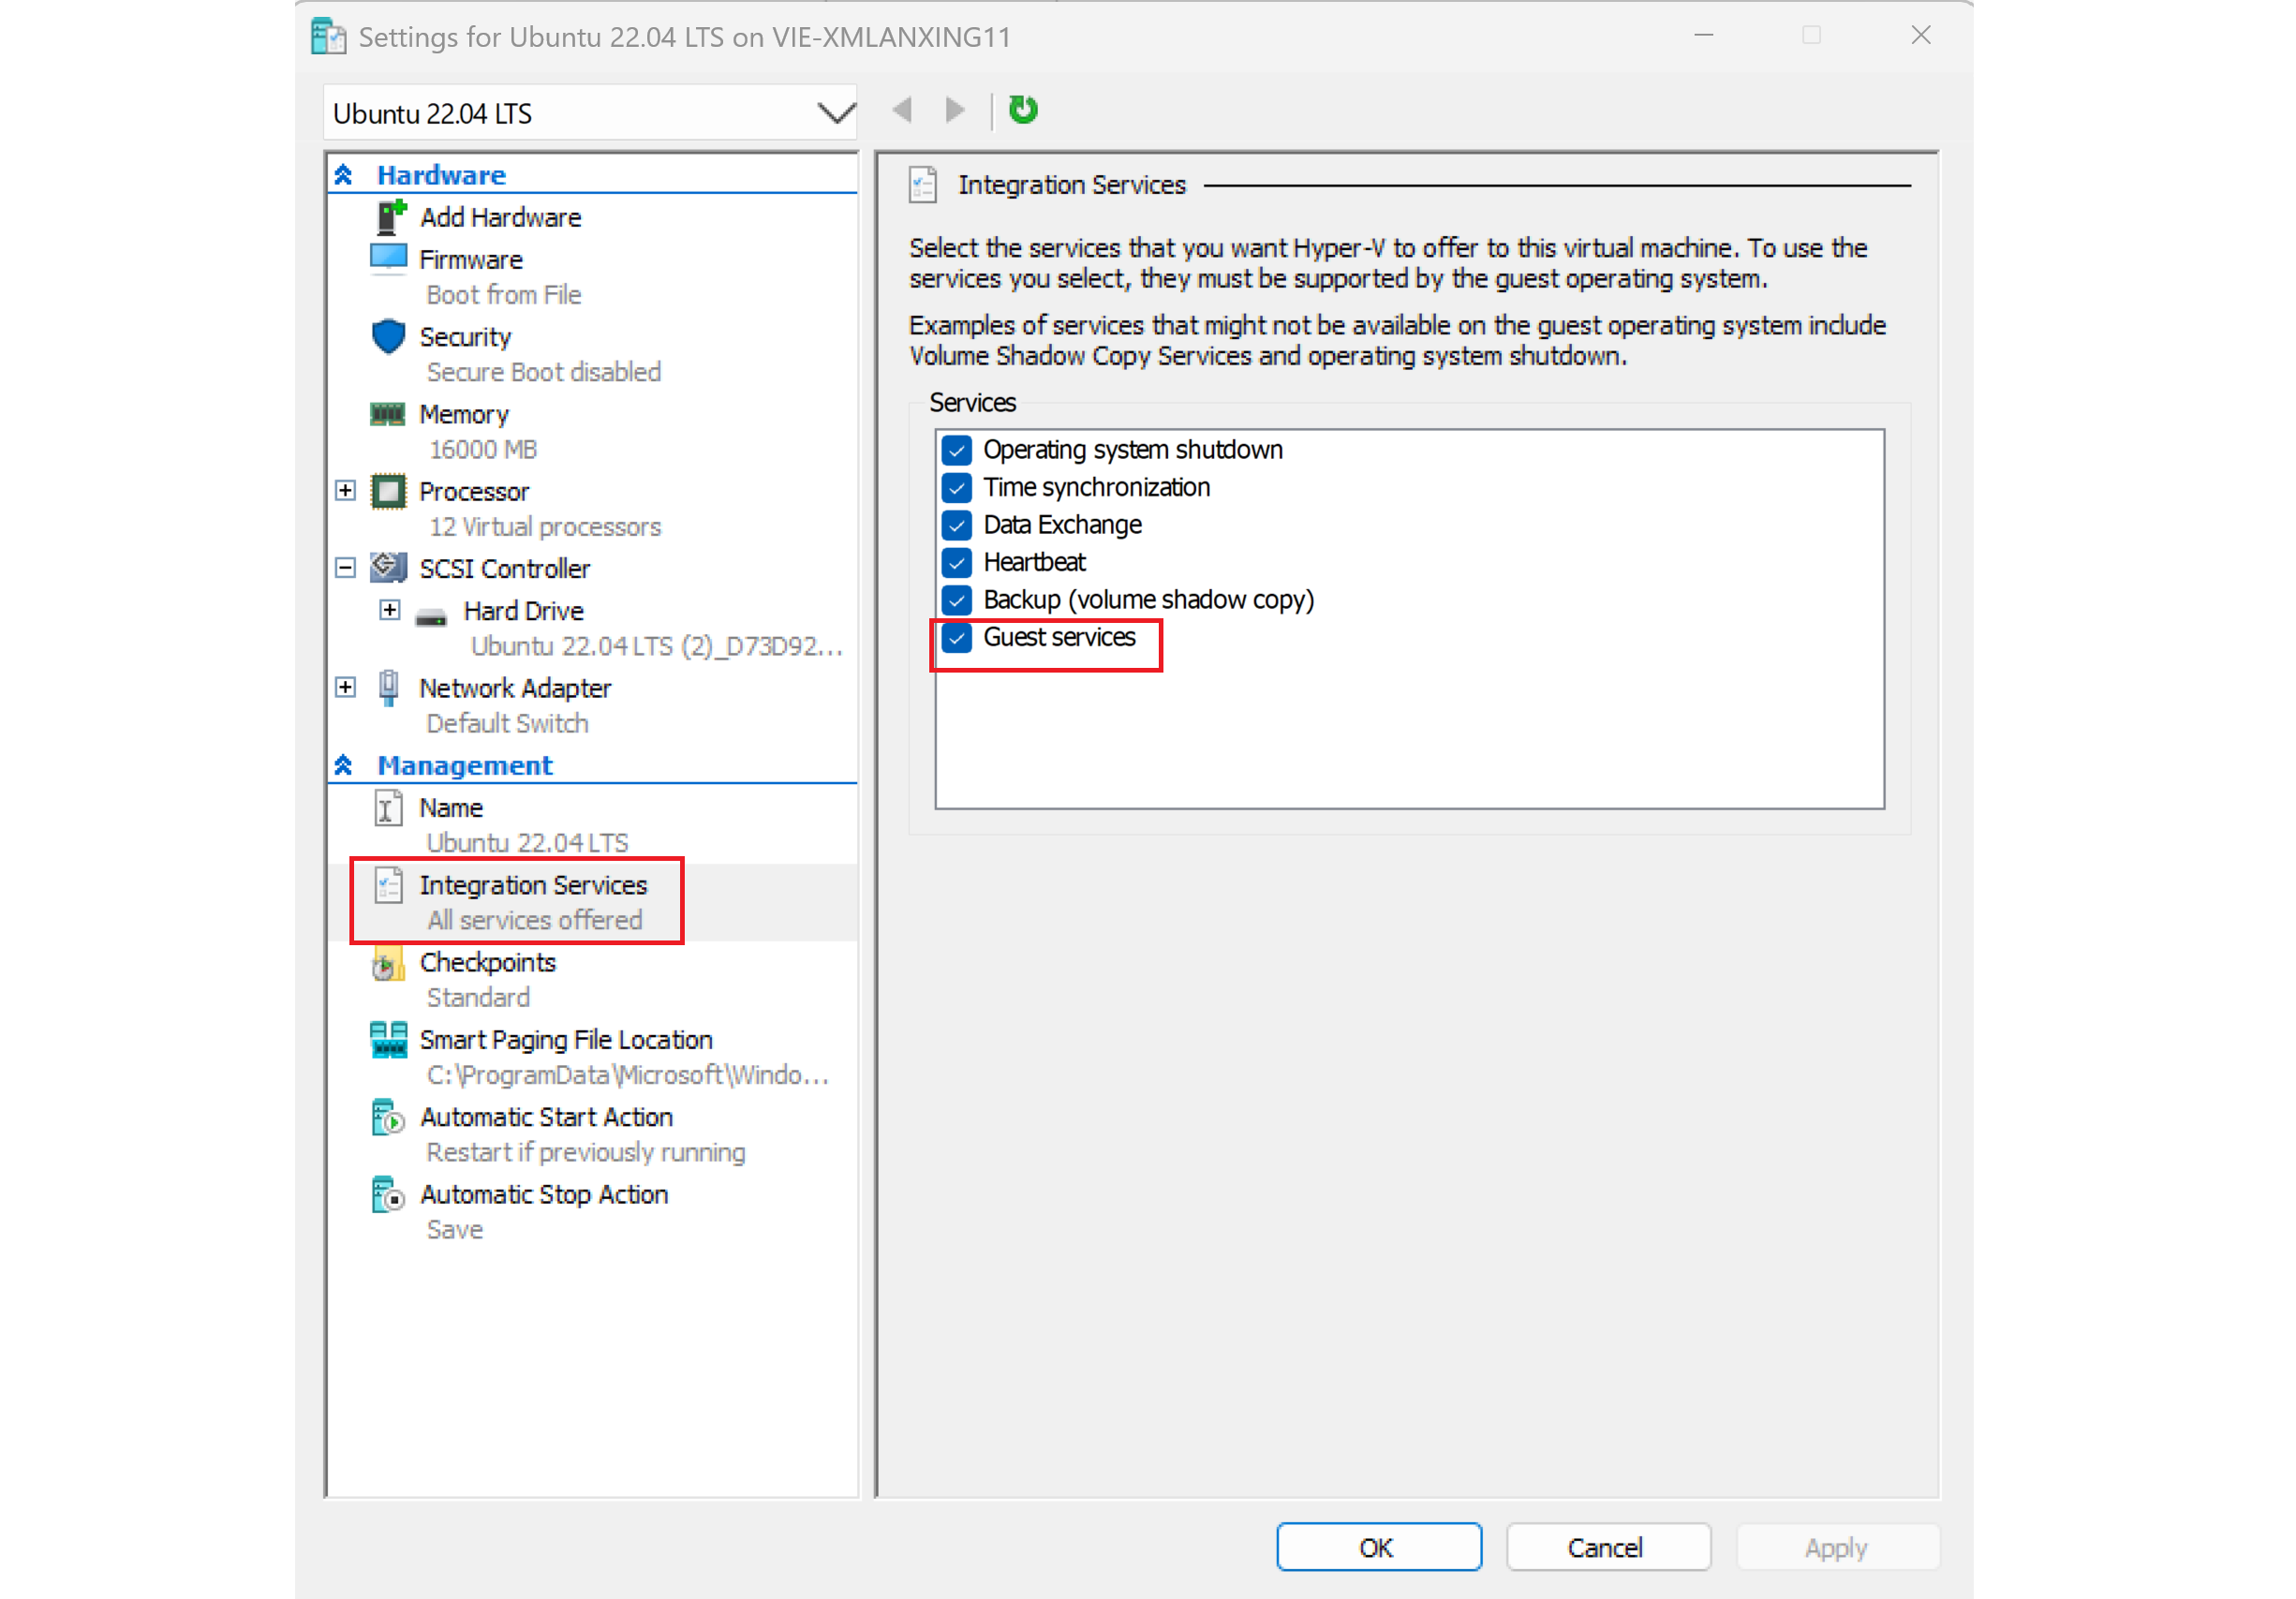
Thereafter, open the settings of your virtual machine and navigate to Integration Services, ensuring that Guest Services is checked.
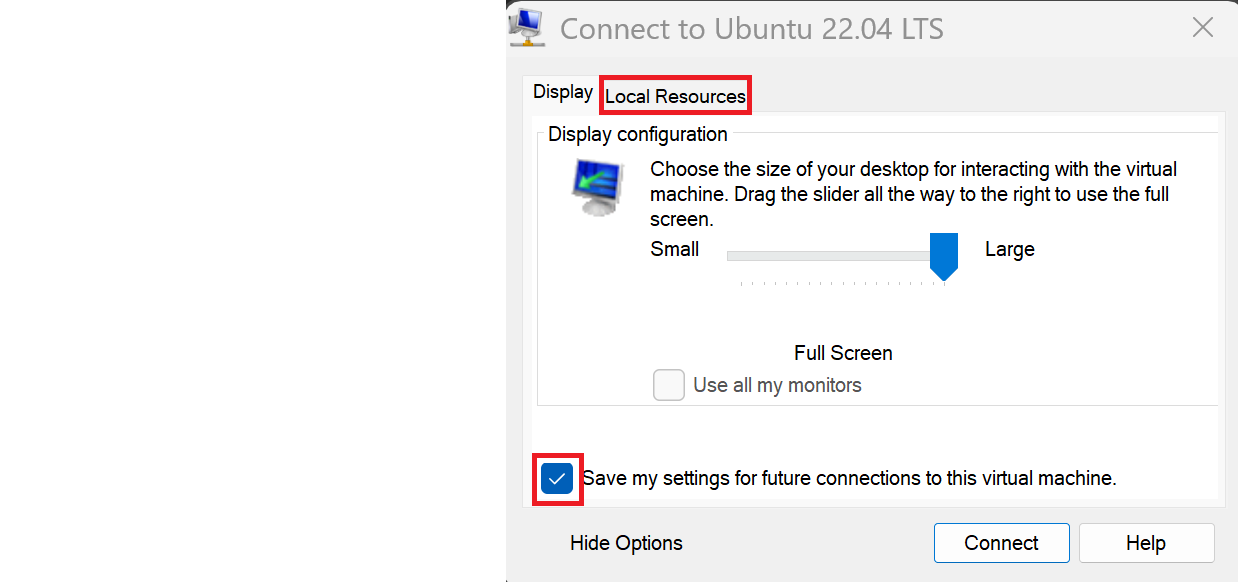
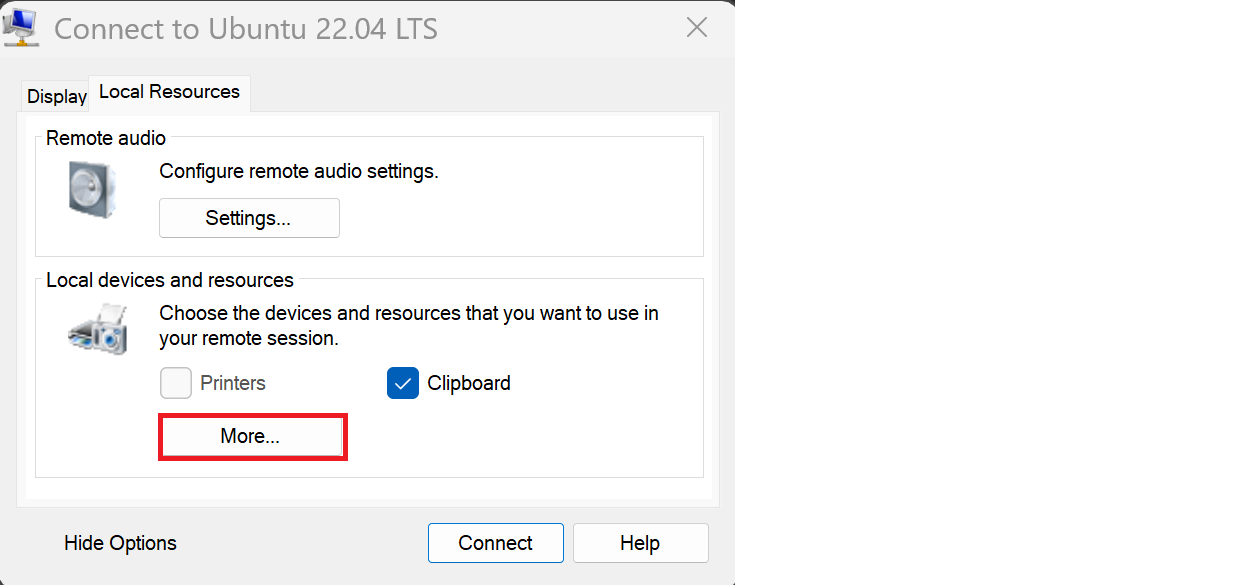
In the next step, right-click on your host and select Session settings. A small window will appear with display configuration options. Choose Show options and ensure that Save my settings for future connections to this virtual machine is checked. Then, navigate to the Local Resources tab, click on More, and select the drive you want to use for your virtual machine.
Now you can use the selected drive to share files with your virtual machine. In this case, ensure that you share the setup files for Luciad Fusion so they are available on your virtual machine.