This tutorial will explain how to set up a workflow to show a list of all available entries in the database - in this case showing all potholes.
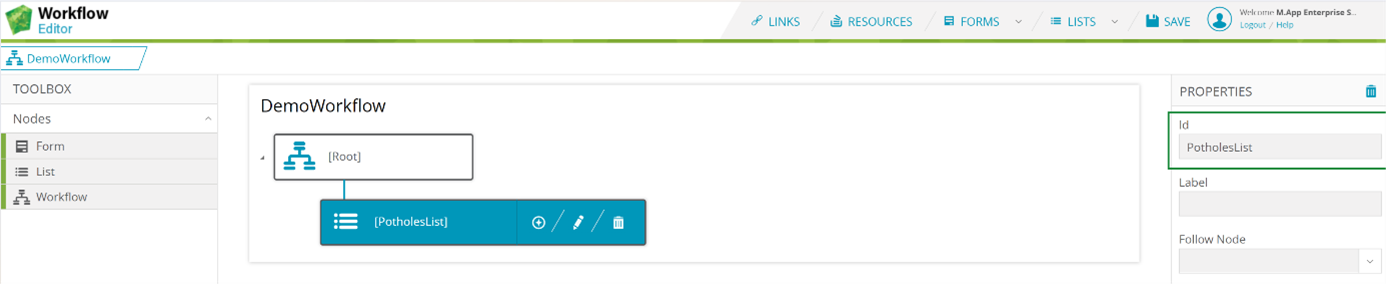
When opening the workflow editor, you should see one Root Node already existing:
In order to add a step to the workflow, a new node has to be added. The node can have one of three types:
Form - A form for adding or editing data
List - A list to display data
Workflow - Another workflow to further edit data
In this example, the first node needed is a List node, to display data. Therefore, Drag & Drop a list node on top of [Root] and set the id to [PotholesListNode].
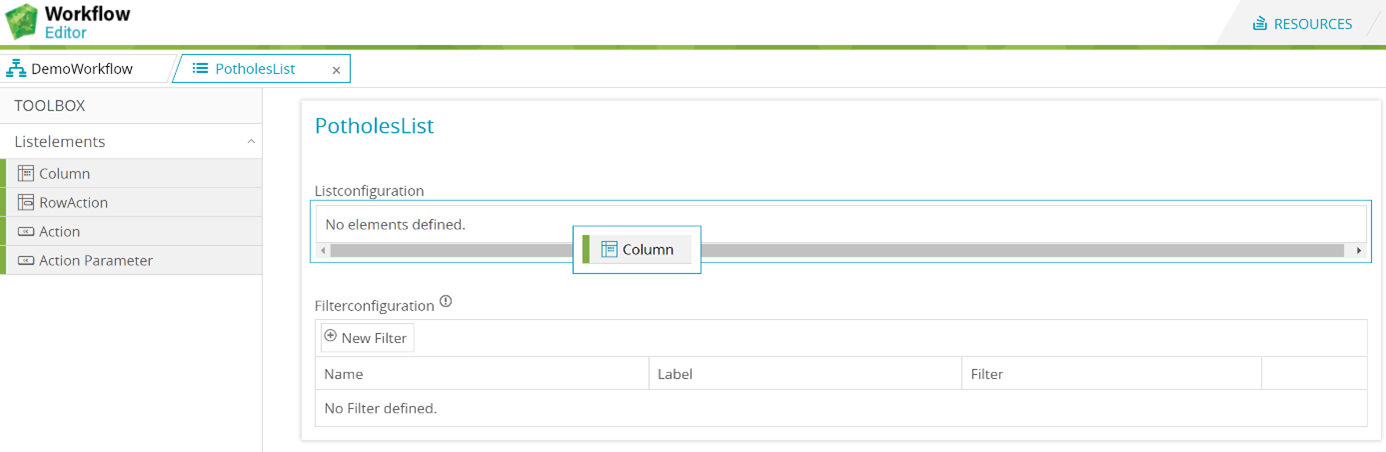
To edit the list definition, click the Pencil (edit) button in the [PotholesListNode].
In order to identify the list, a Name has to be set. In this case we will use PotholesList. This list displays data from the database table set in the Properties, in order to identify the entries an id column also has to be specified. In this case the table is called potholes and the column is called id.
Column - A data column to display in the list
RowAction - An action that concerns a specific row of the list
Action - An action concerning the whole list
To start, a column can be added by Drag & Drop.
For this example, we will use these columns:
Name: id
Datatype: number
Hidden: checked
Name: incident_address
Label: Address
Datatype: string
Name: status
Label: Status
Datatype: string
💡
The field Name has to correspond with the column in your database
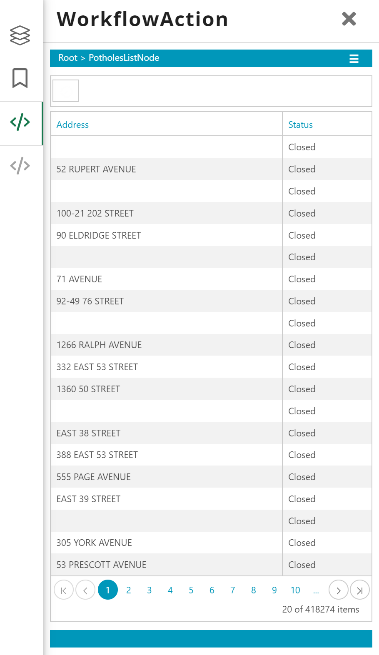
When displaying this workflow in an application, the list could look something like this: