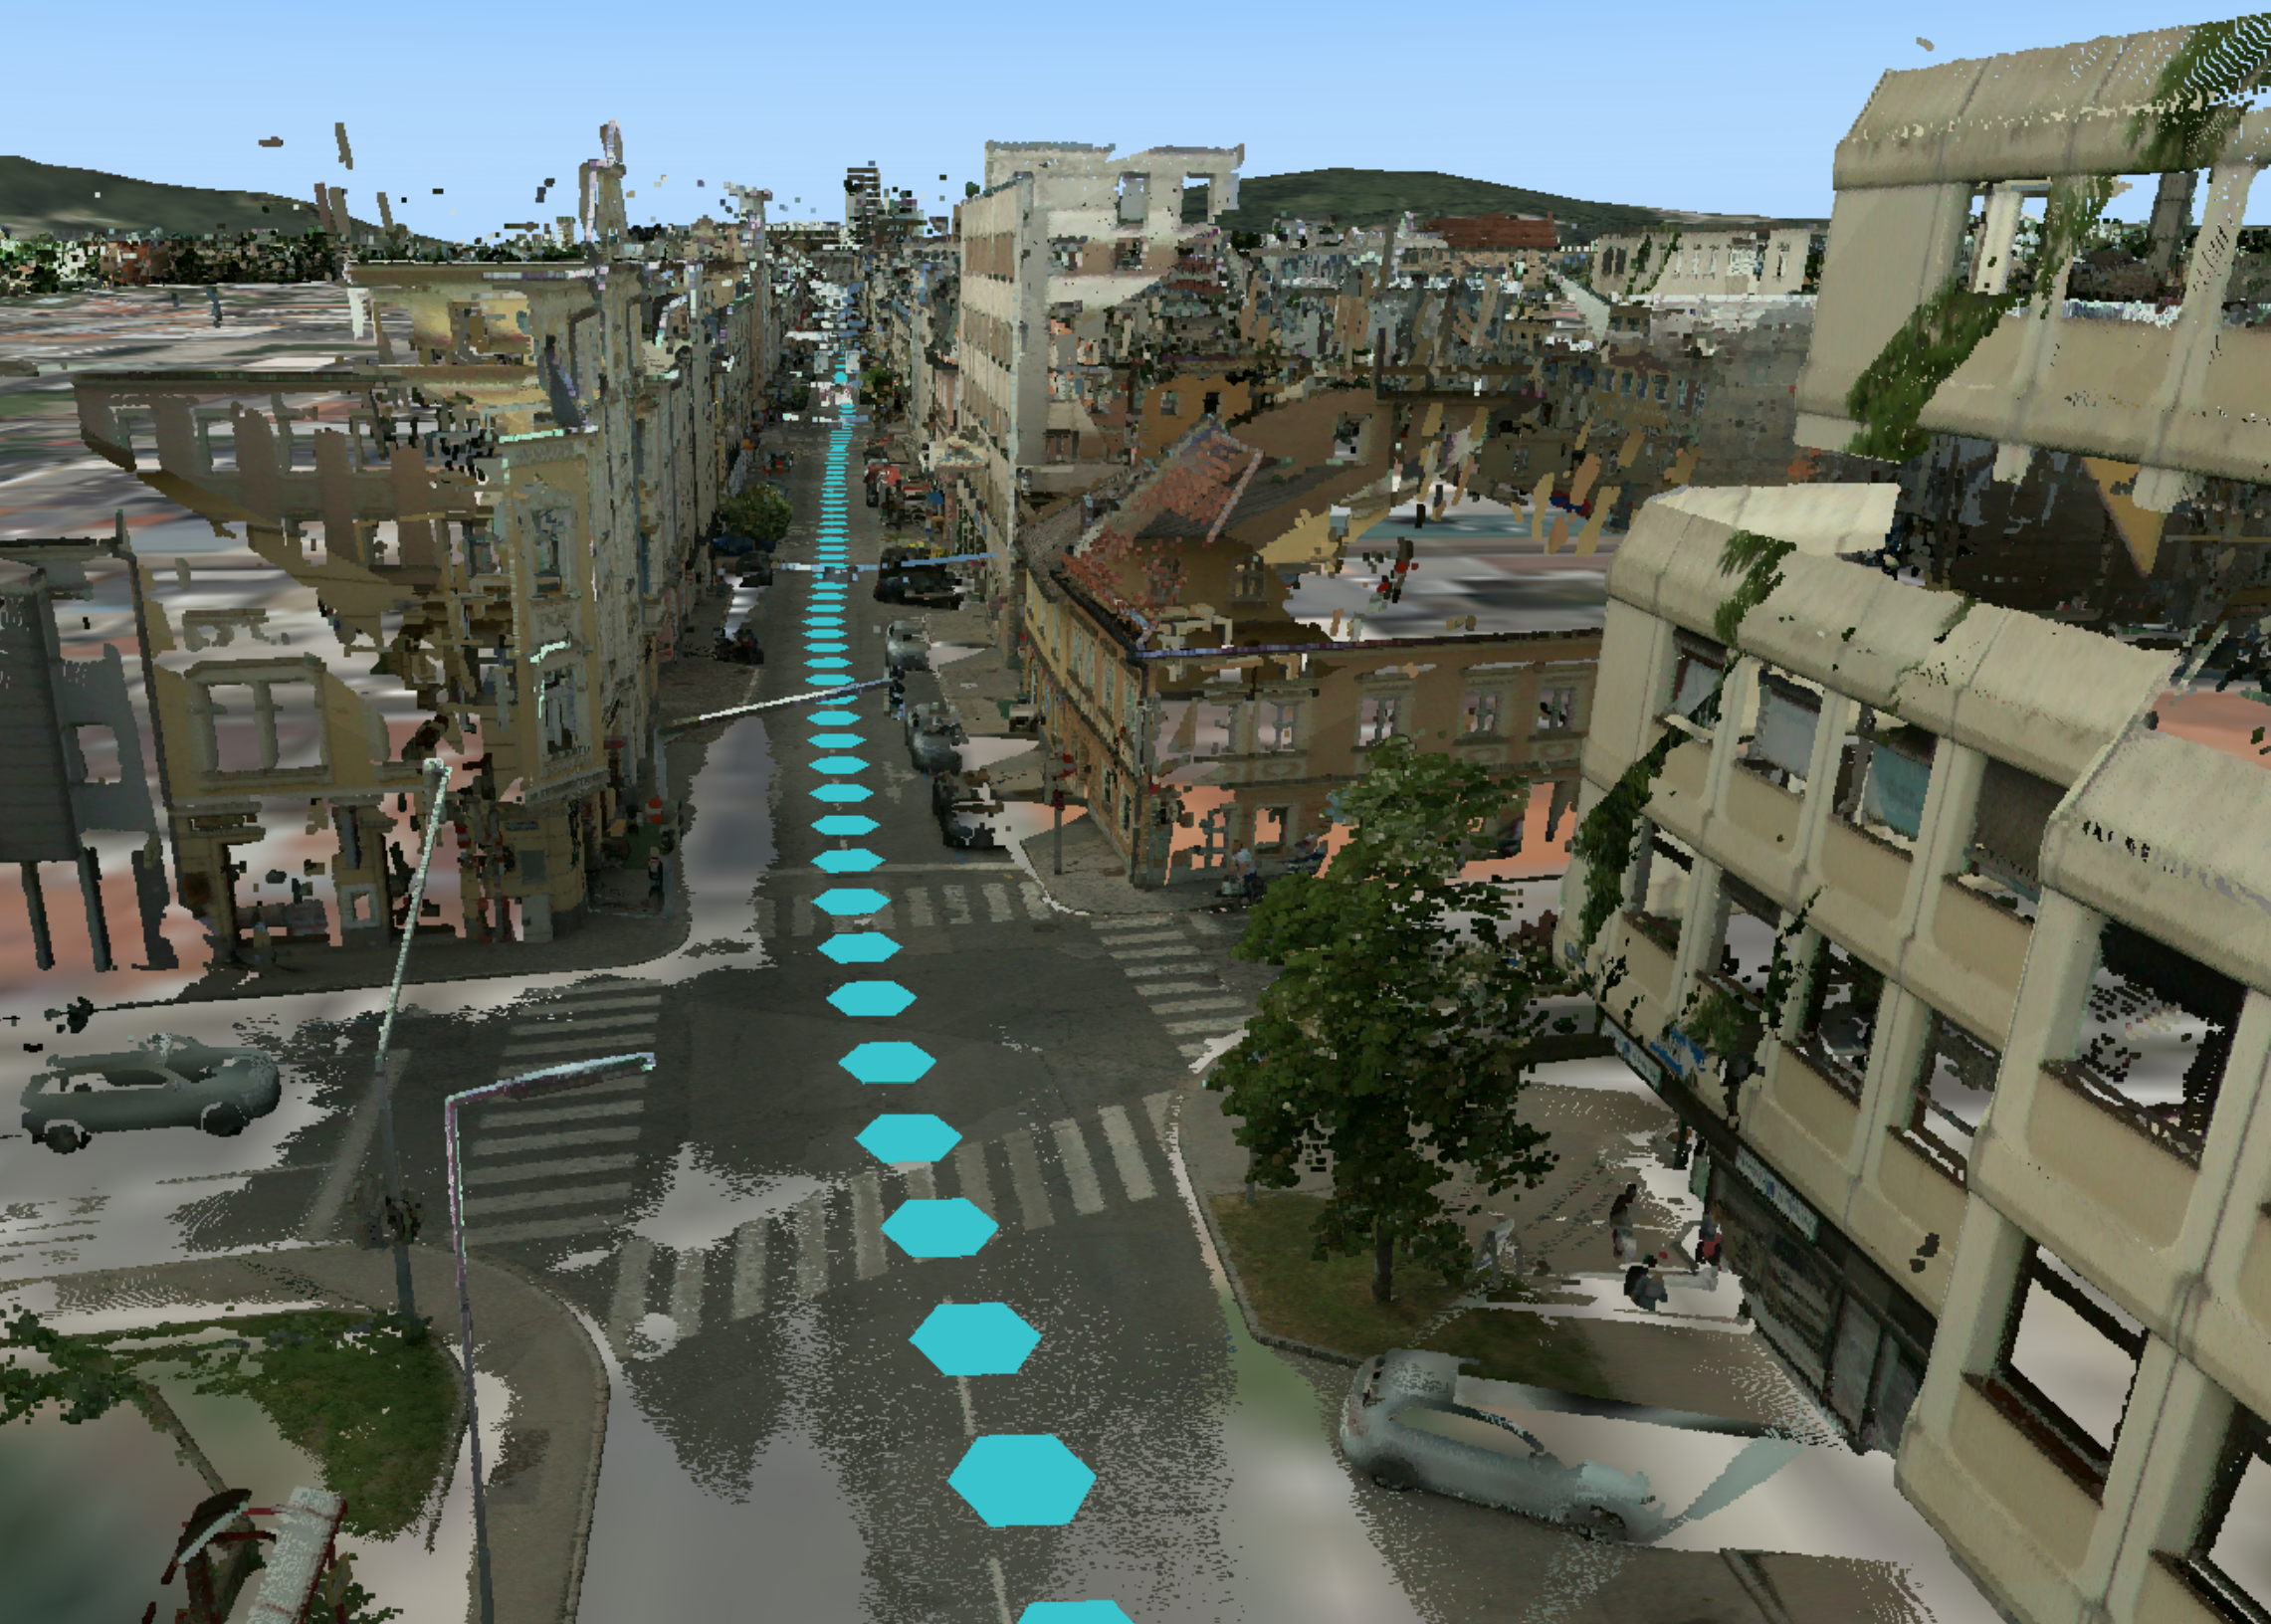
This tutorial will teach you how to add Hexagon Smart Point Cloud (HSPC) and panorama data from PEGASUS into M.App Enterprise.
So, let's dive right in!
1. HSPC
The file structure of HSPC derived from PEGASUS will look like in the image below:
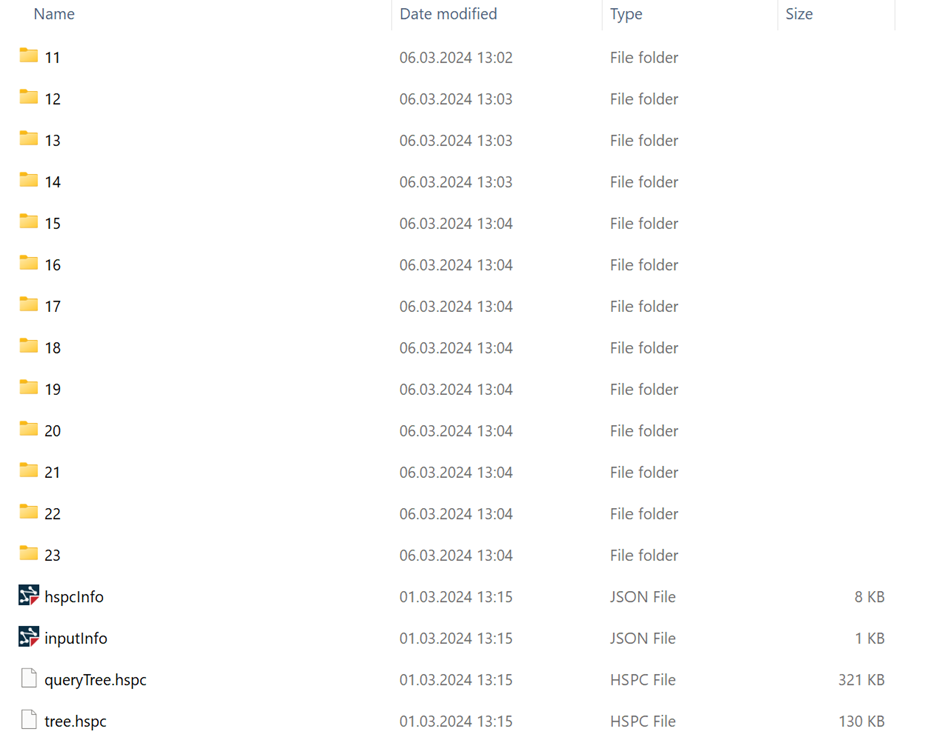
Put all this files in a separate folder and name it for example "HSPC".
Luciad Fusion settings
Proceed to Luciad Fusion for the next steps. Open it through M.App Enterprise, then navigate to Settings in the navigation bar. Select Add Data Root and create a new root directory that points to the specified folder. In our example the path would look like this: C:\Warehouse\HSPC
Now that we have indicated our directory with the HSPC files, we can start to create a service. Navigate to Data and search for a file with the title HSPC and the path C:\Warehouse\HSPC\tree.hspc. Mark it by first clicking on it and then on Create Service.
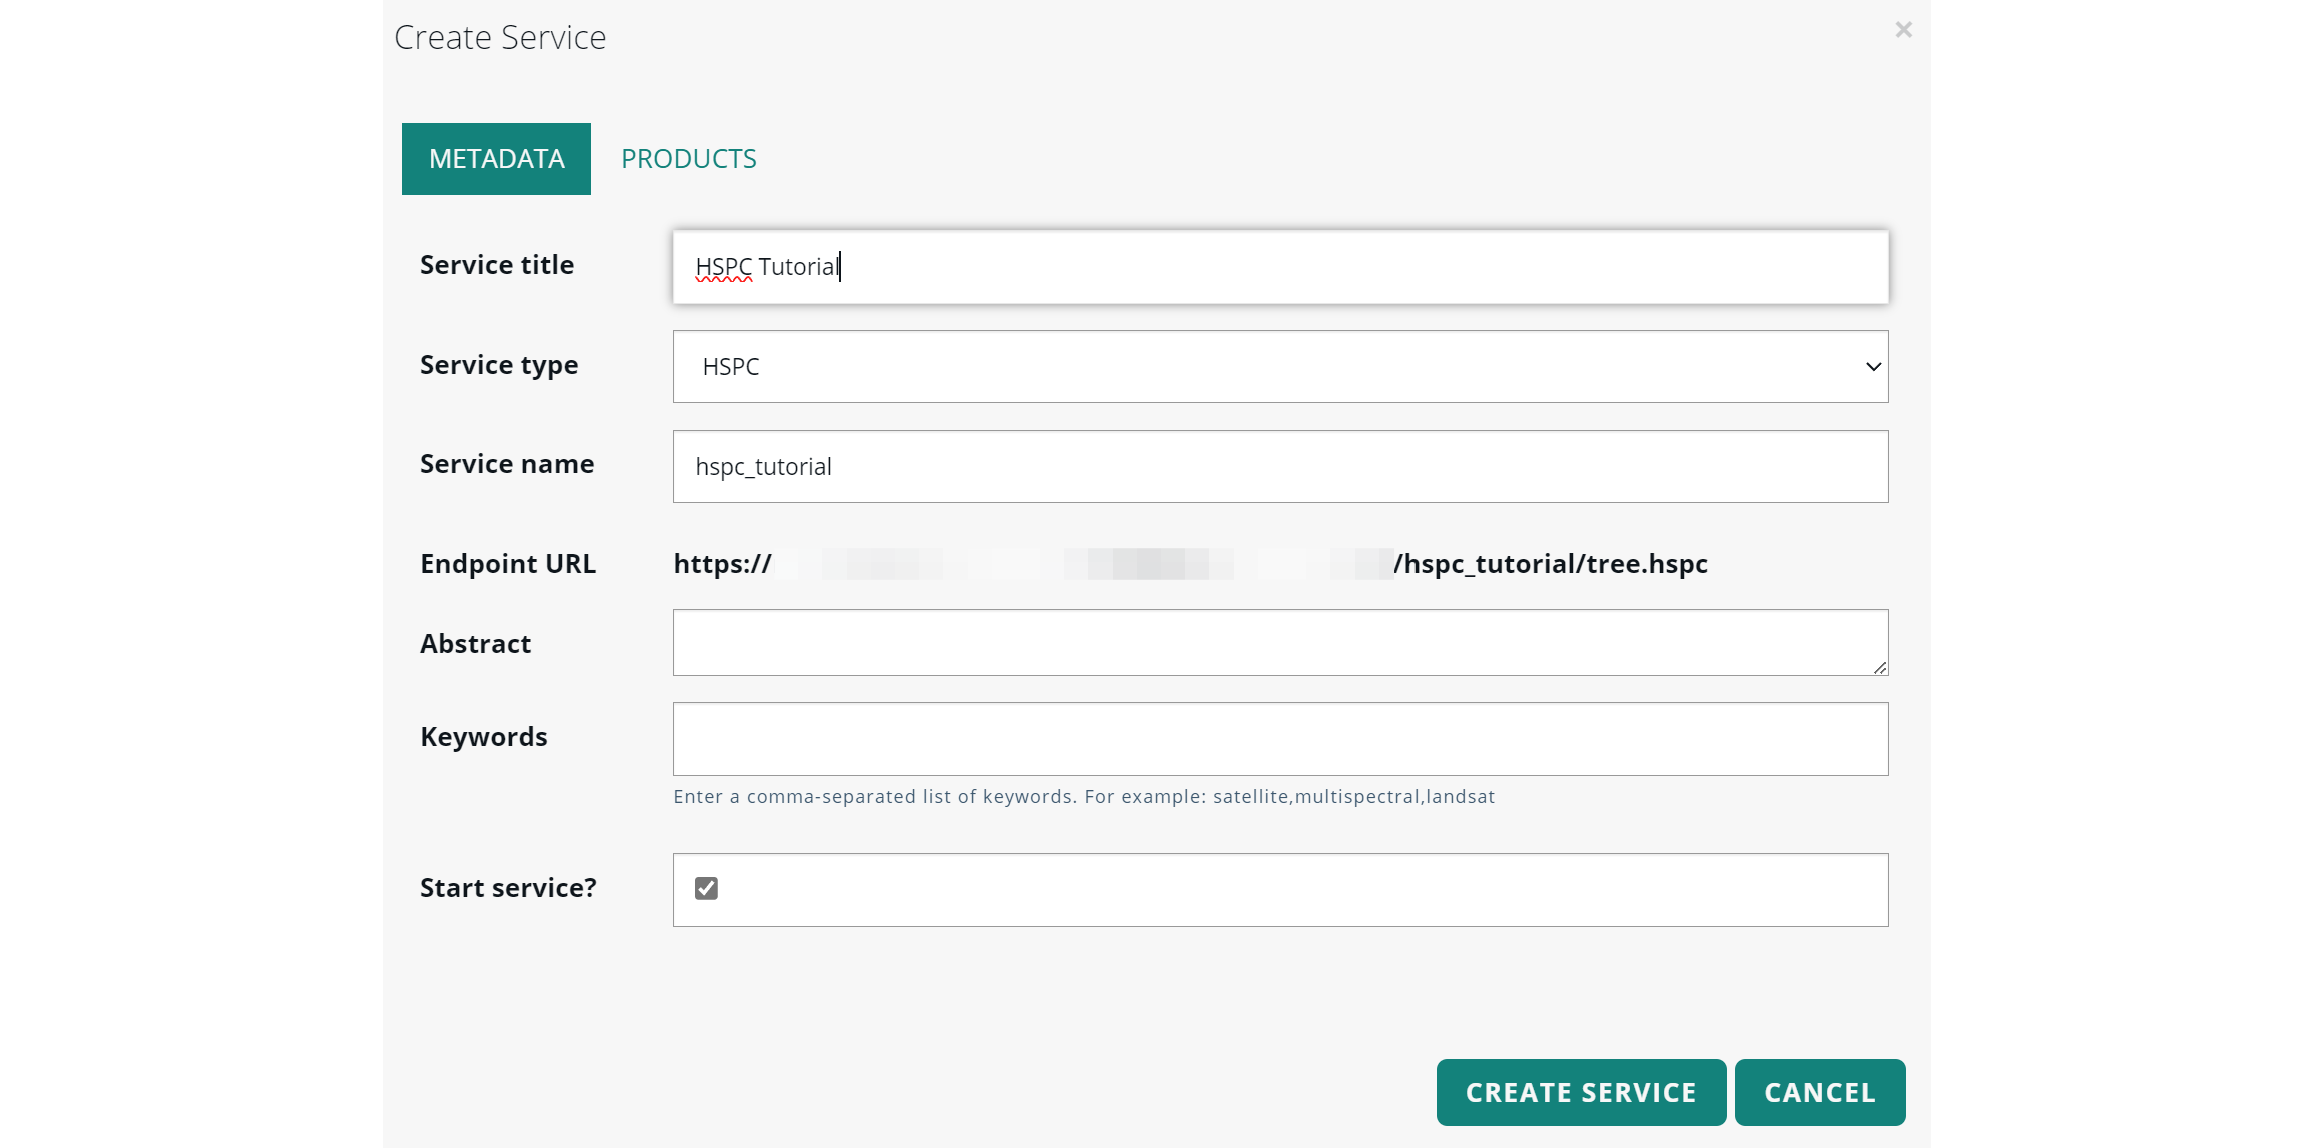
Enter a service title, select the service type as HSPC, and then click Create Service.
MAE Studio settings
WE want to integrate our service now into our M.App Enterprise application. This can be conducted in the App Editor which will be opened via Browser → M.Apps → Open in Editor.
Depending on the desired coloring of the point cloud, you can include one of two different scripts in the JavaScript code.
Colorization classes
This colorization style will assign a color code for each detected class.
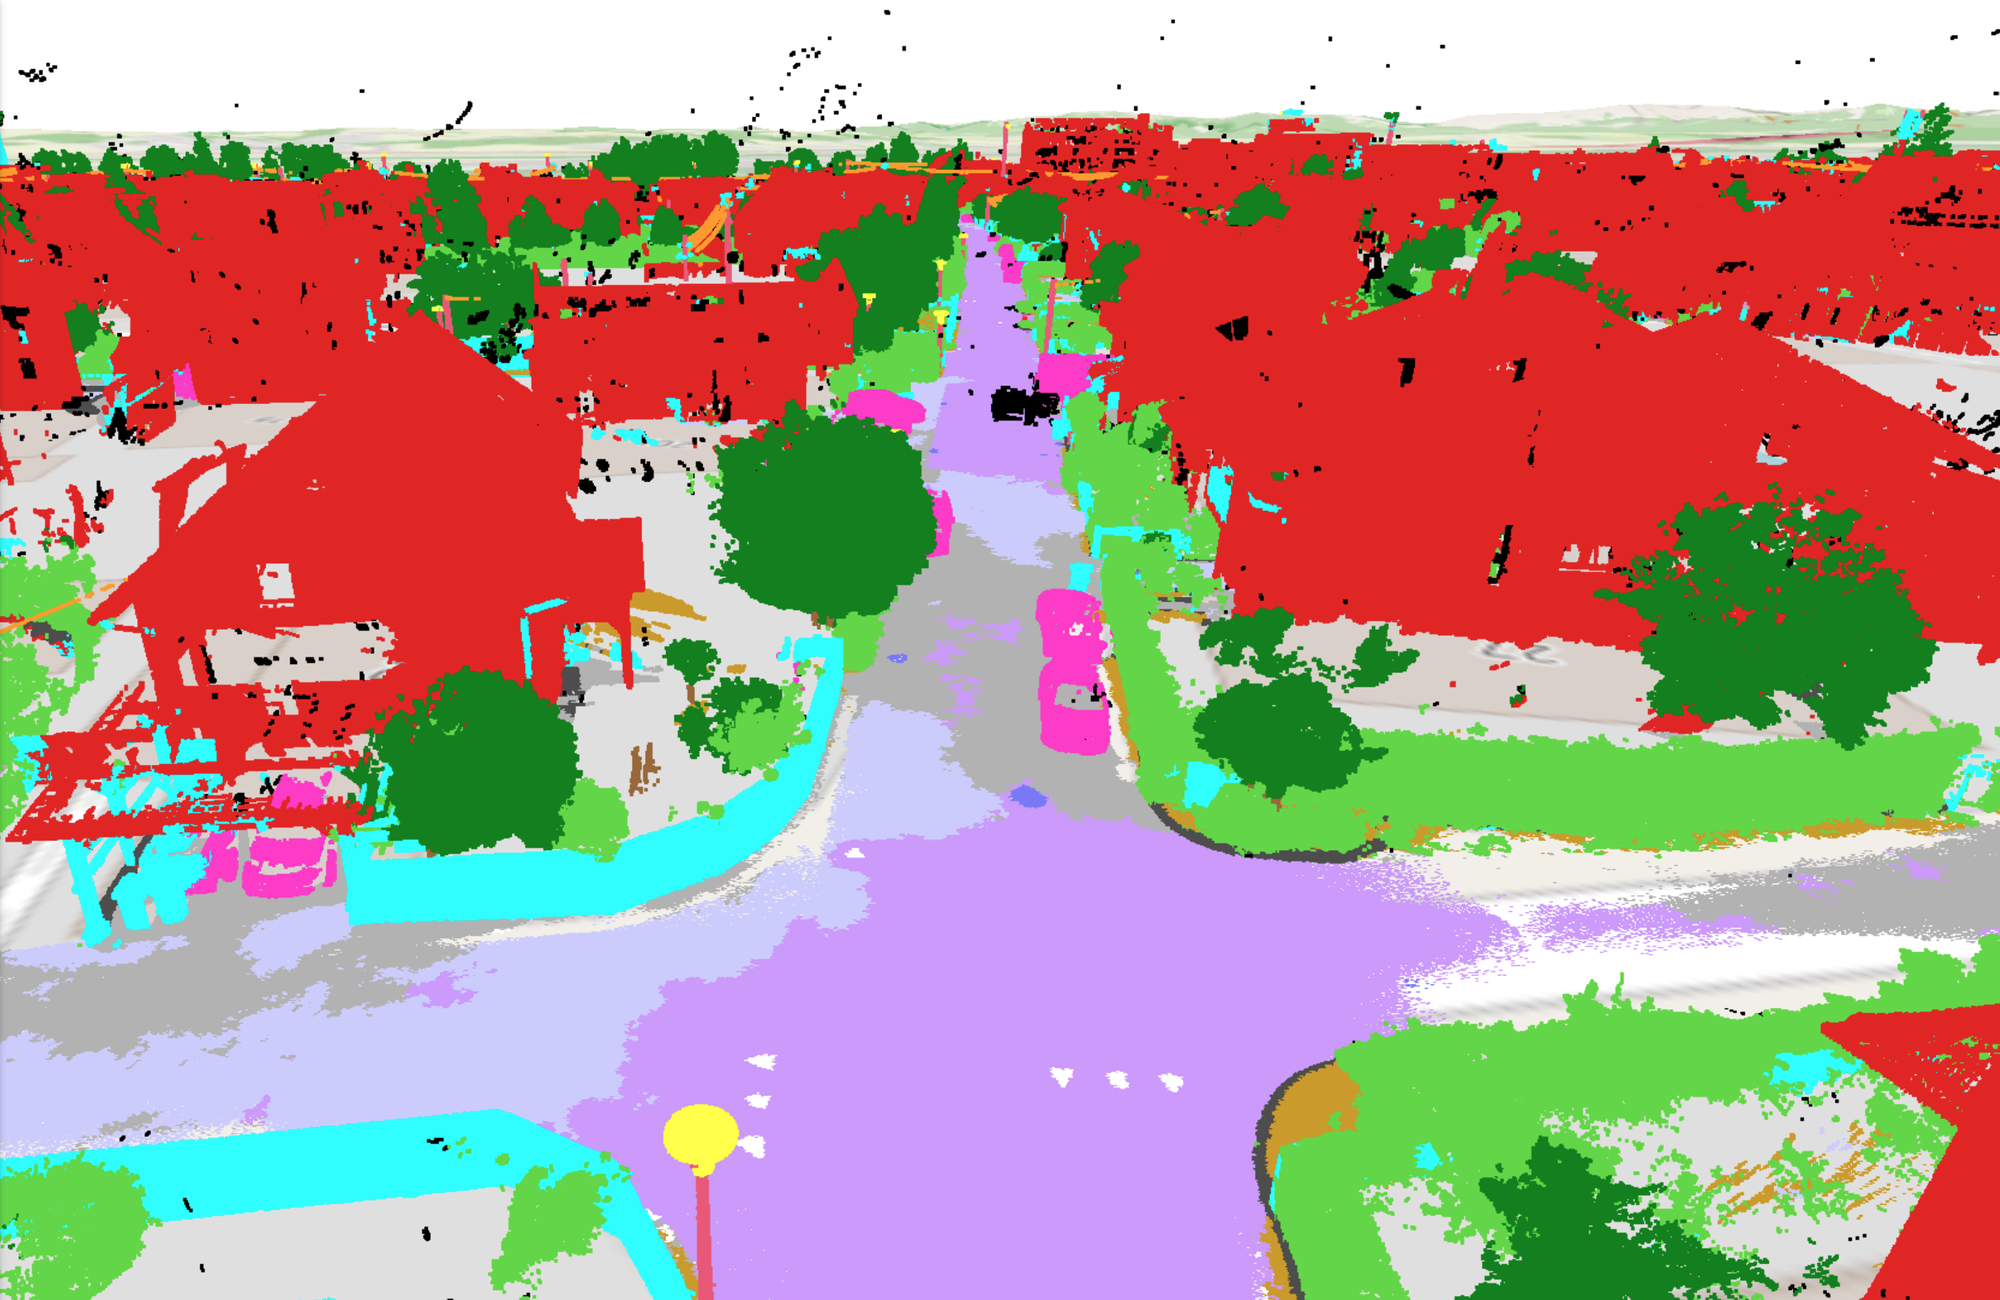
Here is the JavaScript code for it:
import { HSPCTilesModel } from '@luciad/ria/model/tileset/HSPCTilesModel';
import { TileSet3DLayer, TileLoadingStrategy } from '@luciad/ria/view/tileset/TileSet3DLayer';
async function addPointCloudLayer() {

    const model = await HSPCTilesModel.create(`< COPY ENDPOINT URL HERE >`);
    const layer = new TileSet3DLayer(model);
    layer.label = "HSPC - Klassen";
    layer.visible = false;
    layer.qualityFactor = 1.3;
    layer.loadingStrategy = TileLoadingStrategy.DETAIL_FIRST;

    window.map.maxMemoryUsageHint = {cpuMB: 500, gpuMB: 1500};

    const id = layer.id;


addPointCloudClassificationStyle(id, {
                "CLASSIFICATION": [
                    { label: 'Artefakt', color:'#000000', visible: false},
                    { label: 'Busch', color:'#5BD729'},
                    { label: 'Baum Blatt', color:'#008000'},
                    { label: 'Baum Stamm', color:'#996633'},
                    { label: 'Kabel', color:'#FF9900'},
                    { label: 'Clutter', color:'#00FFFF'},
                    { label: 'Fahrzeug', color:'#FF33CC'},
                    { label: 'Gebäude', color:'#e31a1c'},
                    { label: 'Boden versiegelt', color:'#B2B2B2'},
                    { label: 'Boden', color:'#CC9900'},
                    { label: 'Pfosten', color:'#EB5579'},
                    { label: 'Hardscape', color:'#4D4D4D'},
                    { label: 'Brücke', color:'#9933FF'},
                    { label: 'Tunnel', color:'#5F5F5F'},
                    { label: 'Wasser', color:'#0000FF'},
                    { label: 'Clutter', color:'#00FFFF'},
                    { label: 'Leuchte', color:'#FFFF00'},
                    { label: 'Verkehrzeichen', color:'#FF0000'},
                    { label: 'Schacht', color:'#7979FF'},
                    { label: 'Gehsteig', color:'#CCCCFF'},
                    { label: 'Markierungen Fahrbahn', color:'#FFFFFF'},
                    { label: 'Markierungen Linie', color:'#FFFFFF'},
                    { label: 'Markierungen Pfeil', color:'#FFFFFF'},
                    { label: 'Markierungen Zebrastreifen', color:'#FFFFFF'},
                    { label: 'Markierungen Diverses', color:'#FFFFFF'},
                    { label: 'Ampel', color:'#FFCC66'},
                    { label: 'Strasse', color:'#CC99FF'},
                    { label: 'Eisenbahn', color:'#800080'}
                ]
    });

    window.map.layerTree.addChild(layer);
}
addPointCloudLayer();
You can find your Endpoint URL in Luciad Fusion by navigating to Services and selecting the HSPC service you previously created. On the left side, you will see a list displaying the type, status, and URL. Simply copy the URL from there—this is your Endpoint URL.
Colorization RGB
The second colorization option will display the true colors in RGB, reflecting real-world appearances.
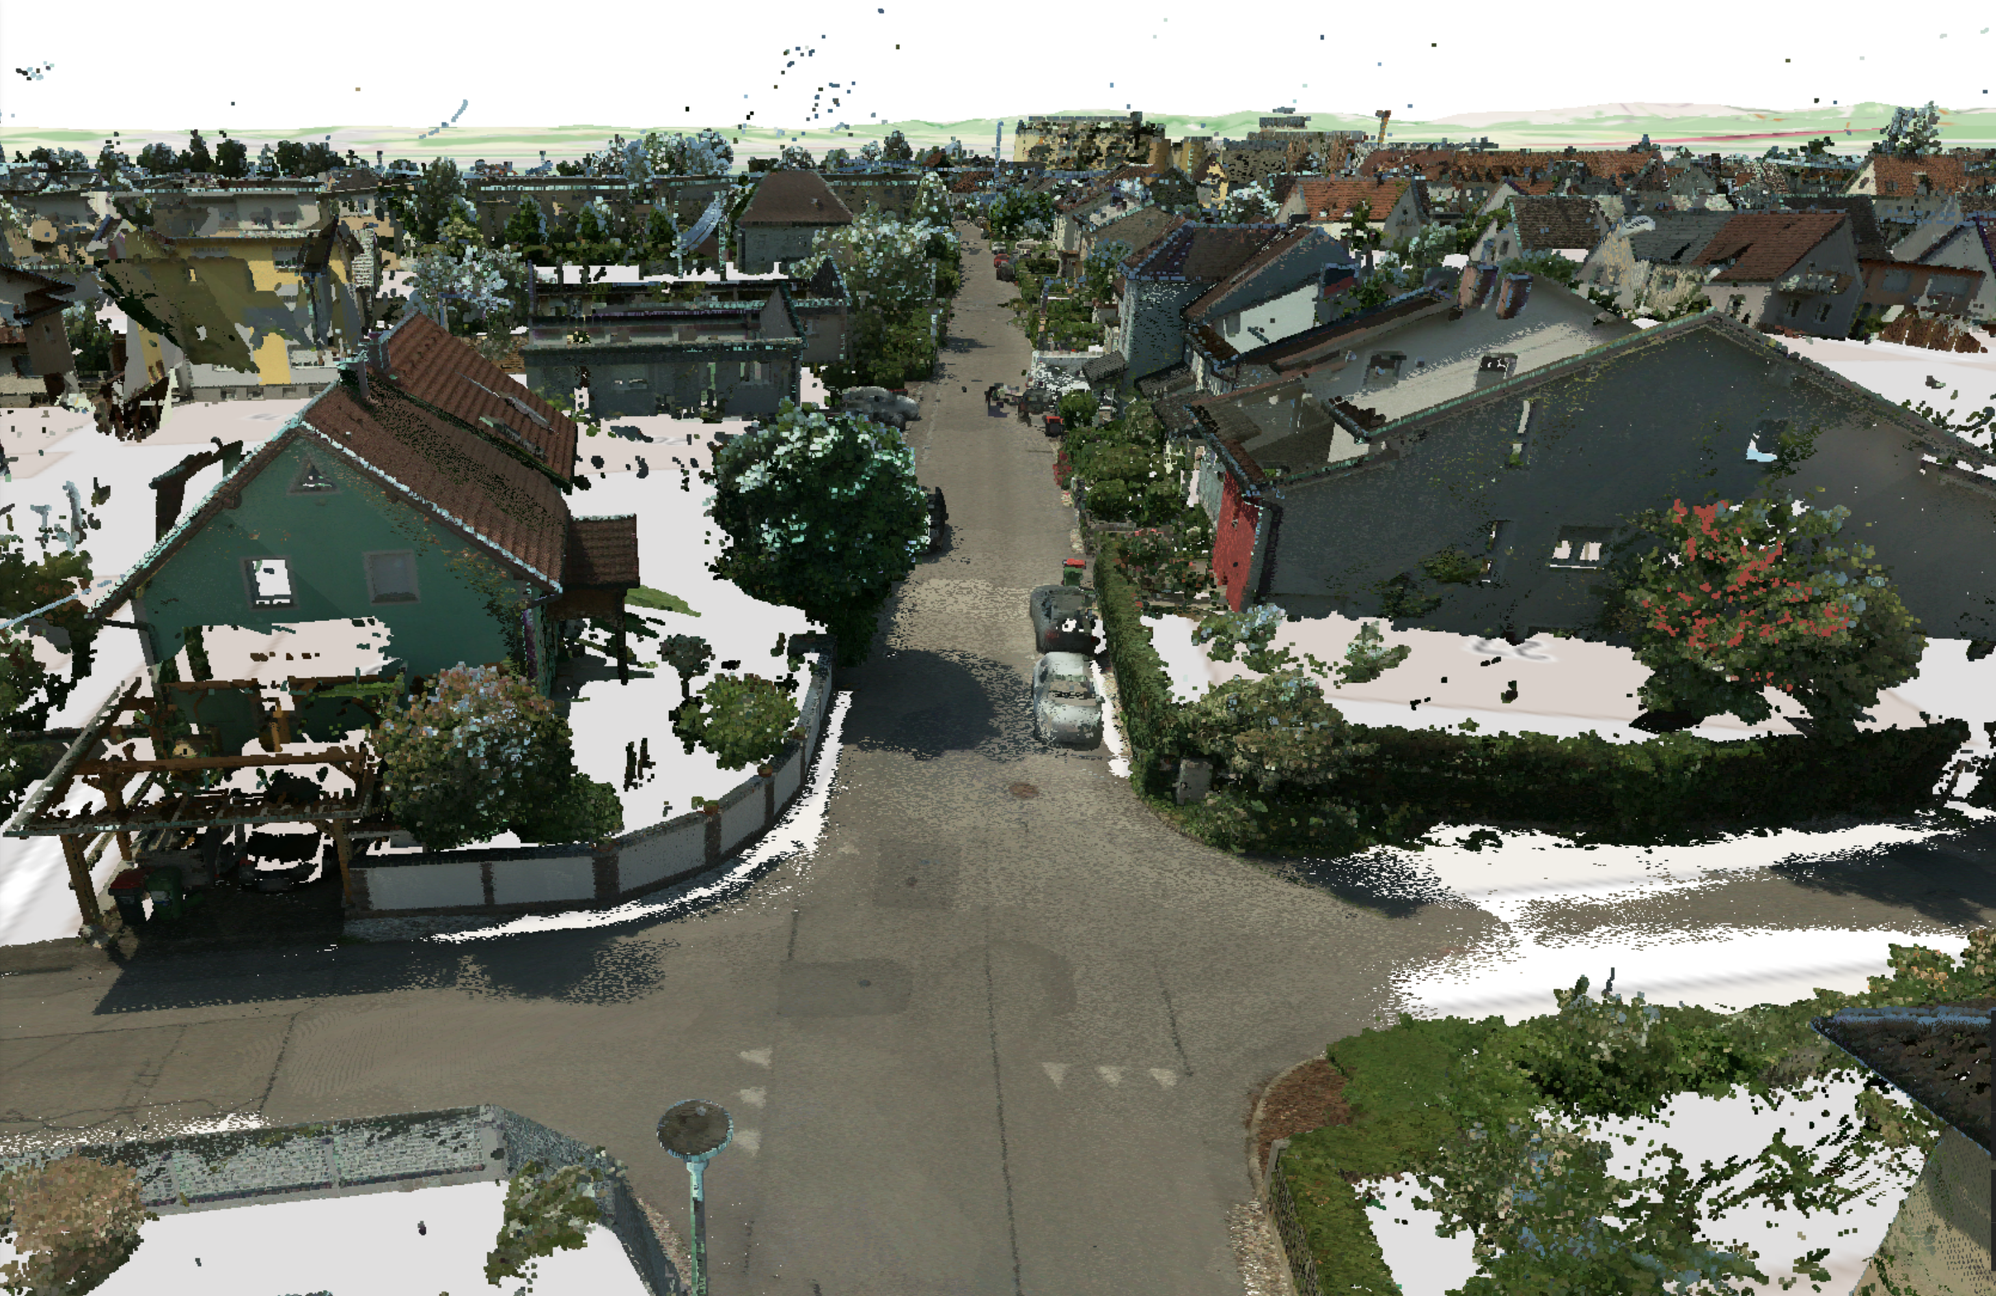
Here is the JavaScript code for it:
import { HSPCTilesModel } from '@luciad/ria/model/tileset/HSPCTilesModel';
import { TileSet3DLayer, TileLoadingStrategy } from '@luciad/ria/view/tileset/TileSet3DLayer';
import { ScalingMode } from '@luciad/ria/view/style/ScalingMode';
async function addPointCloudLayer_rgb() {
	const model = await HSPCTilesModel.create("< COPY ENDPOINT URL HERE >");
	const layer = new TileSet3DLayer(model);
	layer.label = "HSPC - RGB";
	layer.visible = false;
	layer.qualityFactor = 1.3;
	layer.loadingStrategy = TileLoadingStrategy.DETAIL_FIRST;
    layer.pointCloudStyle = {
        pointSize: {
            mode: ScalingMode.WORLD_SIZE,
            worldSize: 0.05
        }
    }

	window.map.maxMemoryUsageHint = {cpuMB: 500, gpuMB: 1500};

	window.map.layerTree.addChild(layer);
}
addPointCloudLayer_rgb();
2. Panoramics
In addition to point cloud data, PEGASUS systems also capture high-resolution 360-degree imagery. This provides a visual context to the point cloud data, capturing the environment in all directions from specific points along the route of the mobile mapping vehicle.
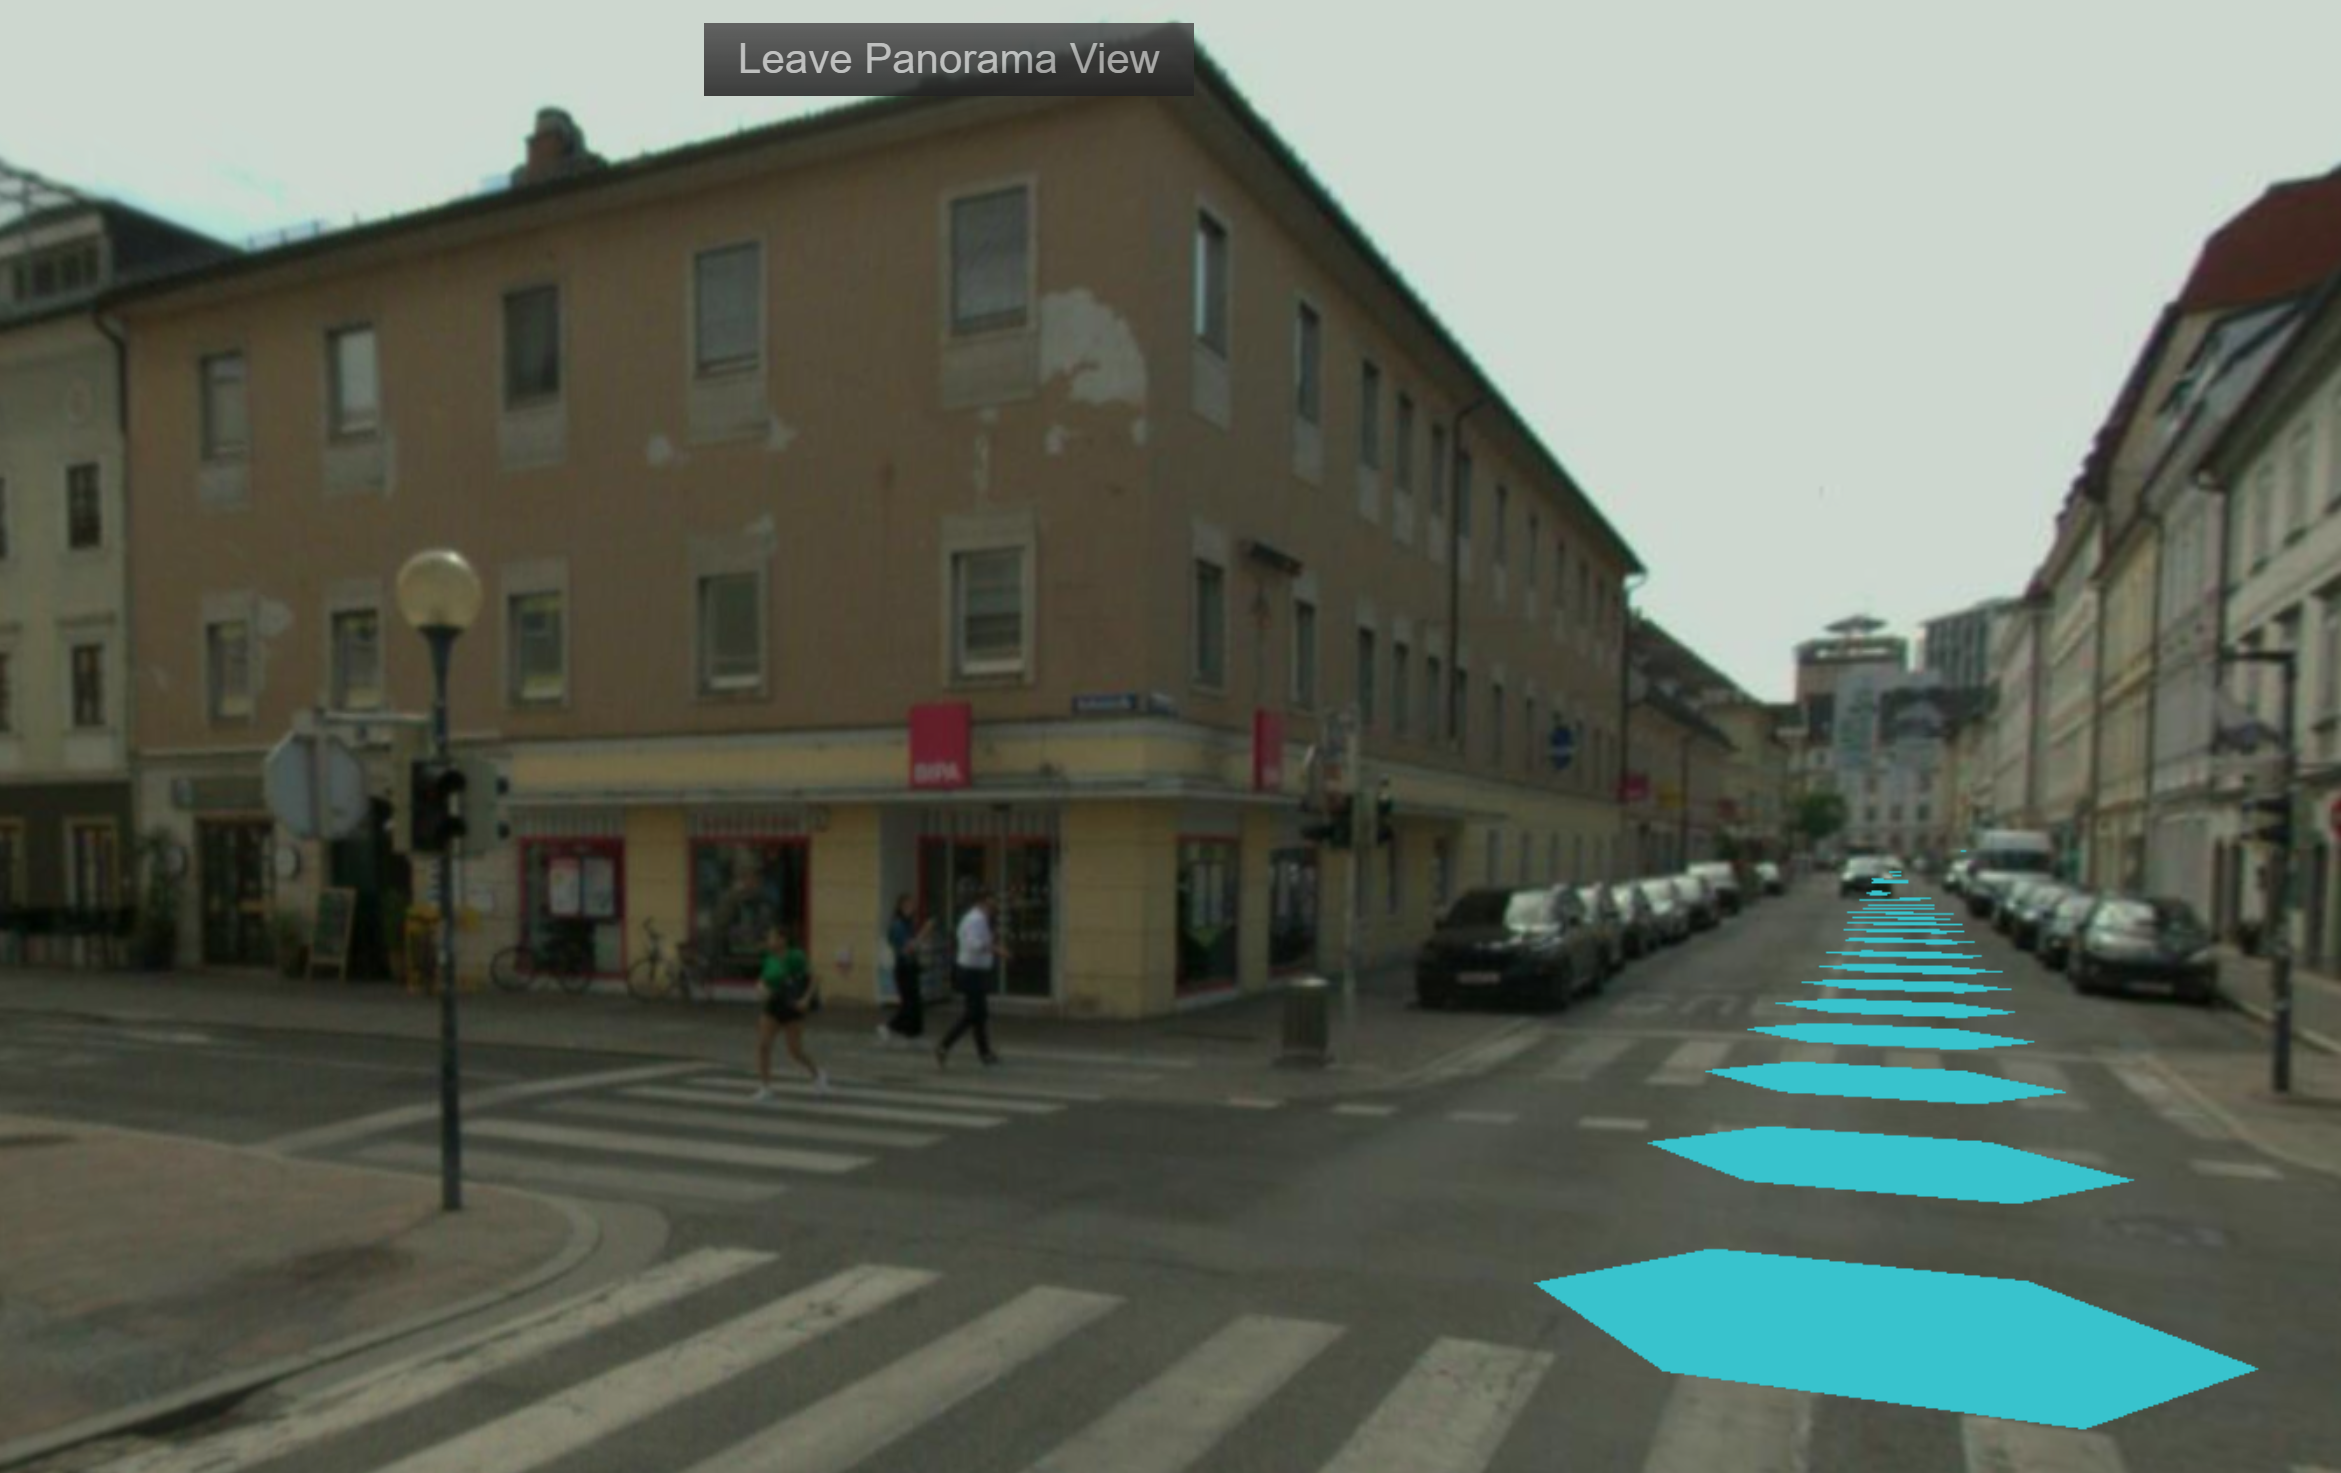
Folder structure
Before you begin, ensure that all your files and folders are named correctly. Place all your files into a folder, which you can name as you wish, but make sure that the .prj file within this folder has the same name as the folder itself. Additionally, name your CSV file "External Orientation" and your text file "Internal Orientation".
- Folder "Panoramics"
- External Orientation.csv
- Internal Orientation.txt
- Panoramics.prj
- All JPEG files...
Luciad Fusion settings
Again, choose Add Data Root and create a new root directory that points to the specified folder where our panorama imagery is saved. In our example, the path would look like this: C:\Warehouse\Panoramics
In the Data section, search for your file, in this example with the name "Panoramics", format PEGASUS and the path similar to this: C:\Warehouse\Panoramics\External Orientation.csv
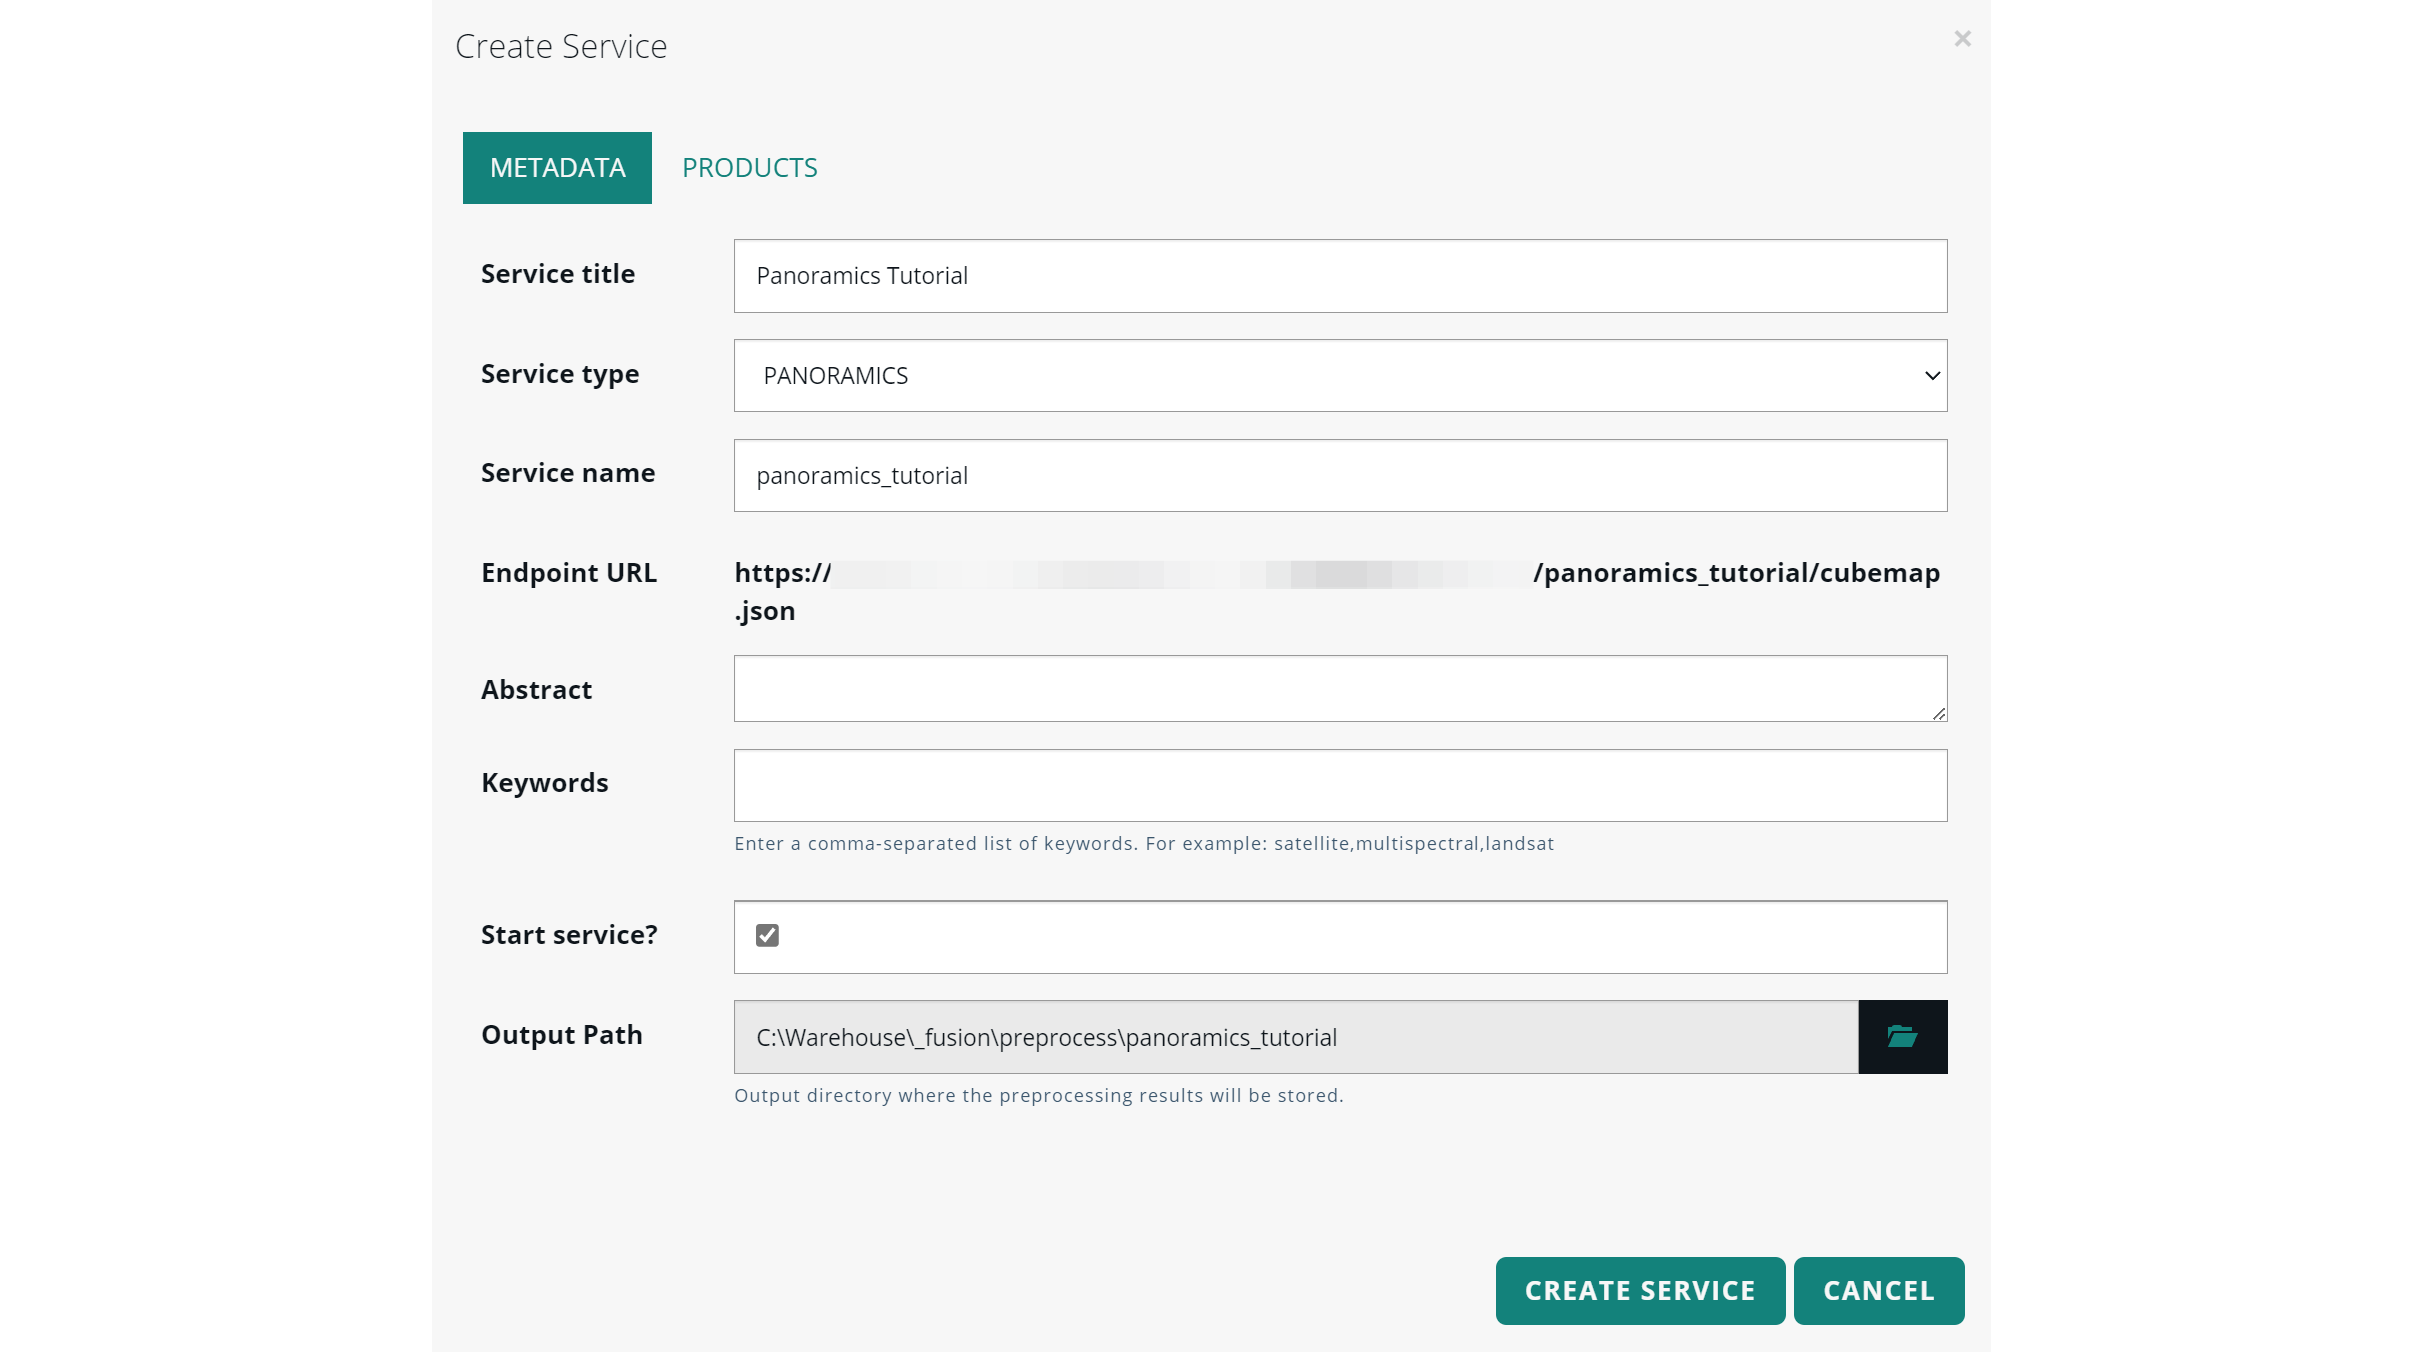
Select it and click on Create Service. Name your service and select the correct service type: Panoramics.
MAE Studio settings
Your panoramics service can now be added in M.App Enterprise. Just navigate to Content → 3D Data → New → Panoramics.
You will see a list of all available services, each selectable via checkboxes. Choose the appropriate one, give it a name, and click Save. Now you can just add it to your legend for the respective app.
Change height and styling
By default, the panoramas are positioned at the sensor height. In the panorama view, however, this can appear too high, so it is necessary to adjust this setting in the App Editor JavaScript code.
Additionally, the script shown below allows you to change the color of the panorama points in the panorama view. You can also enhance the aesthetics by giving them a 3D-like appearance.
import { FeatureLayer } from '@luciad/ria/view/feature/FeatureLayer';
    function addSphereToPanoramaLayer(layer: FeatureLayer) {
    layer.painter._sensorHeight = 2.1;
    layer.painter._regularStyle3D = {
        meshUrl: '../api/v1/appengine/warehousefiles/public/sphere/scene.gltf',
        scale: {x: 0.05, y: 0.05, z: 0.05},
        color: '#f00',
        pbrSettings: {
            material: {
                metallicFactor: 0,
                roughnessFactor: 1
            }
        }
    };
    layer.painter.invalidateAll();
}
Add the following code into your main function:
window.map.applyToAllLayers(l => {
        if(l instanceof FeatureLayer && l.panoramaModel) {
            addSphereToPanoramaLayer(l);
        }
    });
When assigned a value like 2.1 meters in line 2, it means that this value will be subtracted from the original sensor height. Accordingly, the smaller the value you set, the higher the panoramas will appear.
Panoramas should be close to the ground level in the panorama view for a realistic perspective, but they shouldn't be set too low to avoid any conflict with the terrain model. By carefully setting the sensorHeight, you can ensure that your panoramas are positioned realistically and accurately in relation to both the terrain and the original panorama view.
The optimal value for sensor height might vary depending on your specific use case and the landscape you are working with. Make sure to take these factors into account when you are setting up your PEGASUS panoramas.
