To add a new item, in this tutorial a pothole, we create a new Form node. Set the id to [NewPotholeNode] and set the Follow Node to our existing list node [PotholesListNode] from the previous tutorial step. This step will assure we return to our list view after adding a new pothole. As we want to create a new pothole we do not want the form to be prefilled with data, therefore we check the Empty Form property.
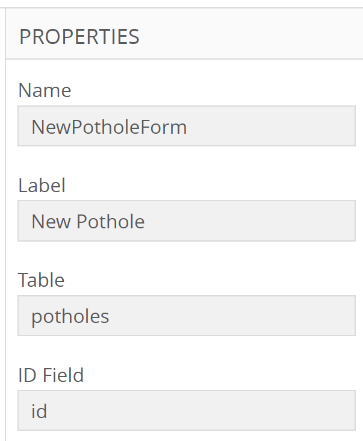
By clicking the edit button on the [NewPotholeNode] we can create a new form and call it NewPotholeForm. Besides the Name, the Table and ID Field have to be added.
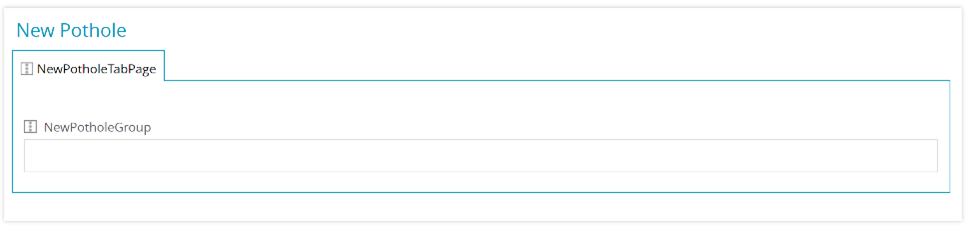
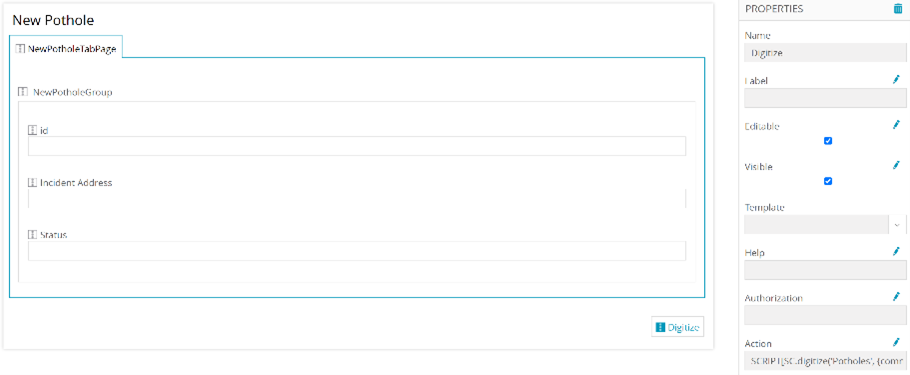
A form consists of TabPages and Groups, in this case we will give a name to both and the form editor will look like this:
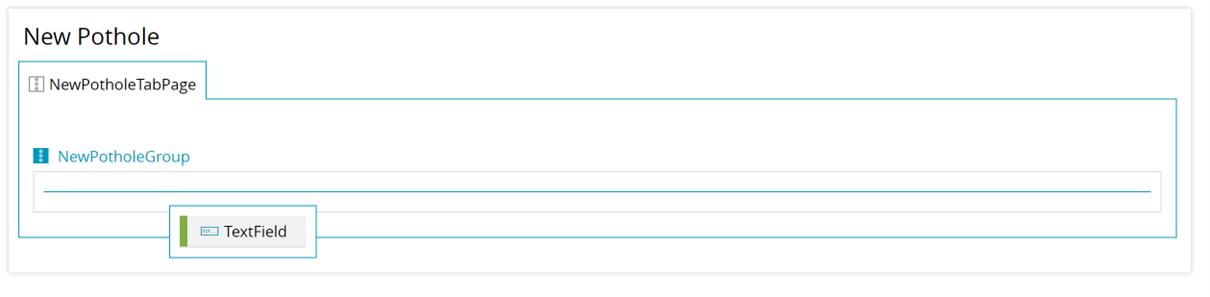
Now we need to build our form for adding a new geometry.
For this we need three TextFields:
id
incident_address
status
In most cases you will not enter the id but the field still has to be added as we choose it as the ID Field. You can uncheck the Visible checkbox to hide it. To add a new TextField you can Drag & Drop it into the existing group.
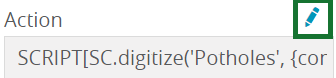
To add a new pothole, we need to place a marker on our map. In order to do this, we need to add a button to digitize our new pothole. We can Drag & Drop an Action into our existing form. Besides setting the name for the new action we also have to set the action itself by pressing the edit button on the action property in the property list.
This can be done by Sql, Object-Provider, Placeholder, Static value or JavaScript. In this example we will use JavaScript and add the following command:
Potholes refers to the layer on which we want to add our new geometry point. The finished form should look like this:
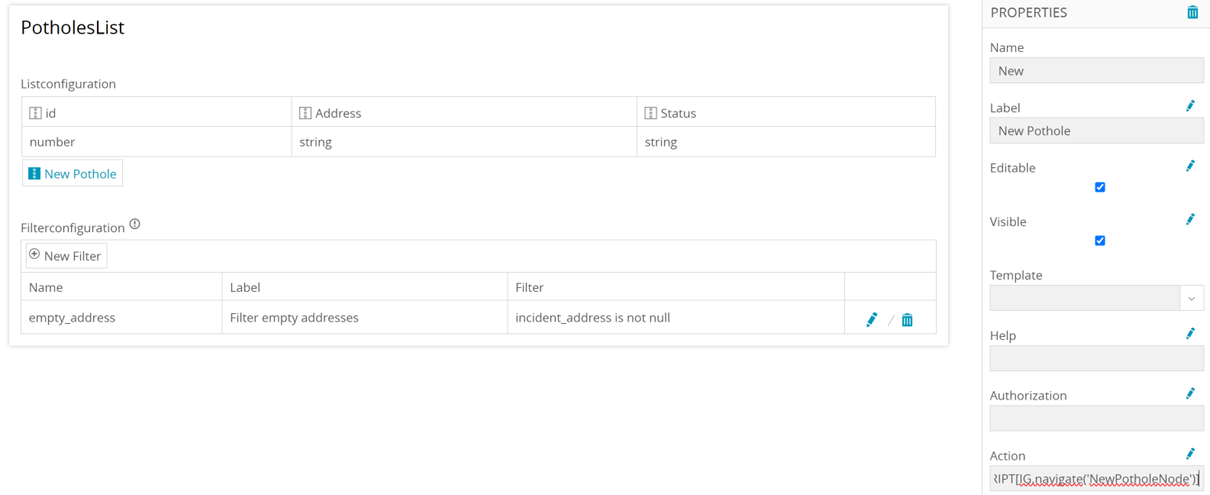
To get to the node from the previously created list an action has to be added to the PotholesList. For this we return to the overview and edit the [PotholesListNode]. Drag & Drop an Action onto the Listconfiguration to add it, afterwards add a Name and optionaly a Label and edit the Action to add a command. To Navigate to the previously created node, we can use the command IG.navigate() as shown below.
The finished list should look like this:
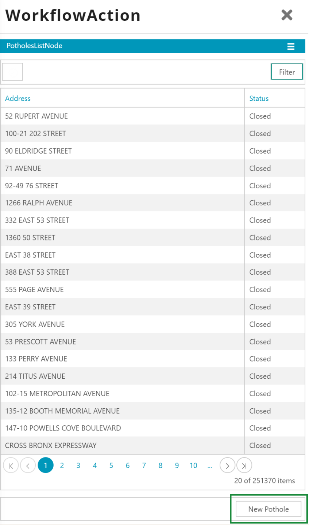
After saving the workflow we can view it the app, there is now a button New Pothole beneath the list:
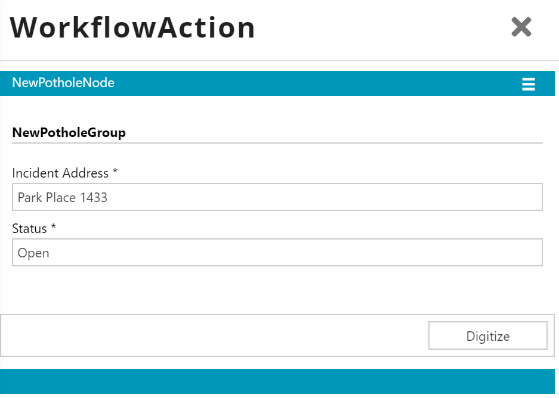
After clicking the newly added button, the [NewPotholeNode] is called. At this point we have to give an Incident Address and Status for the newly created Pothole.
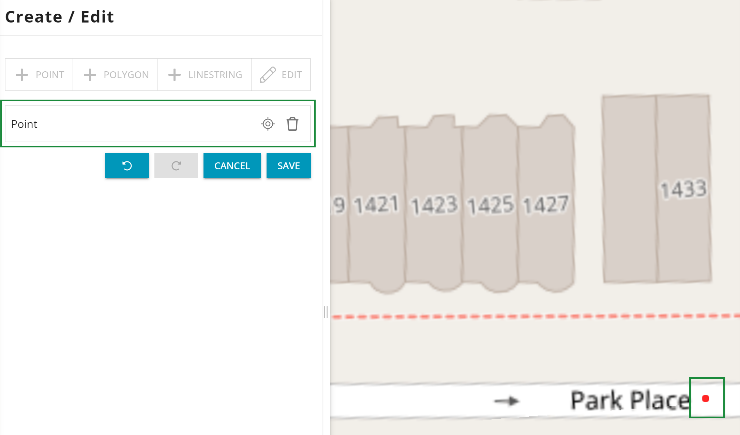
After entering the details and pressing the Digitize button, we get a window for creating a new Point. To do so you click on the Map to place a red marker. This Point is then shown in the sidebar. After the placement, click Save to save the newly created Pothole.
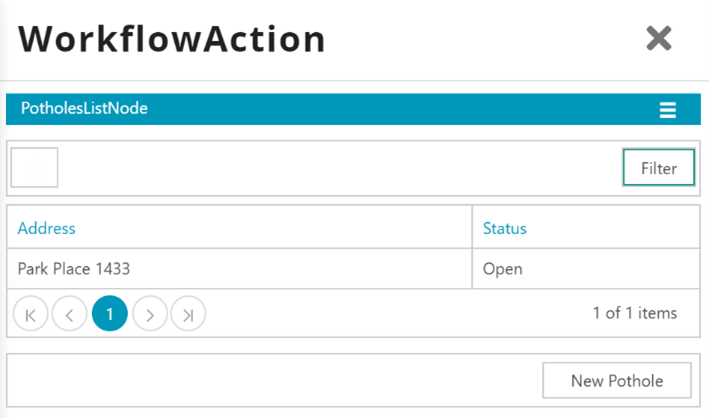
After saving the workflow returns to the [PotholesListNode], we can now use the filterable attribute to check if the newly added pothole shows up in the list. As we see, it was successfully added and is now visible in the list: