
In this article, we will demonstrate how to extend theM.App Enterprise Serverwith a custom C#.NET Controller. Additionally, we will show how to protect the controller from external access usingAPI Key Authentication.
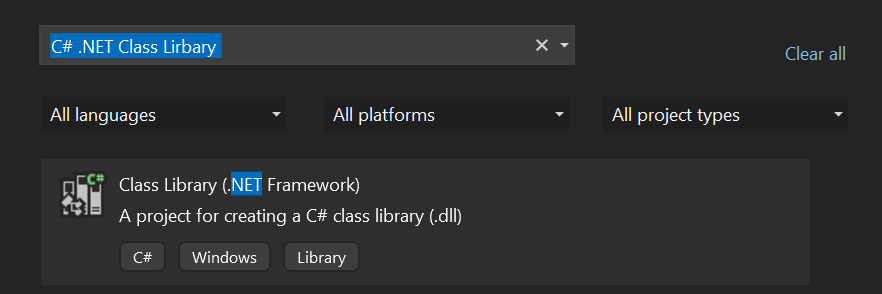
Microsoft.AspNet.WebApi.Core for your project.

💡
We recommend to install version 5.2.9 if you want to add custom controller for M.App Enterprise 16.9 onwards
MApp.Code.dll and MApp.Endpoints.dll. You can find these in the bin directory in the installation folder of M.App Enterprise. We recommend copying the dll files to your own project directory first and creating the reference from there.
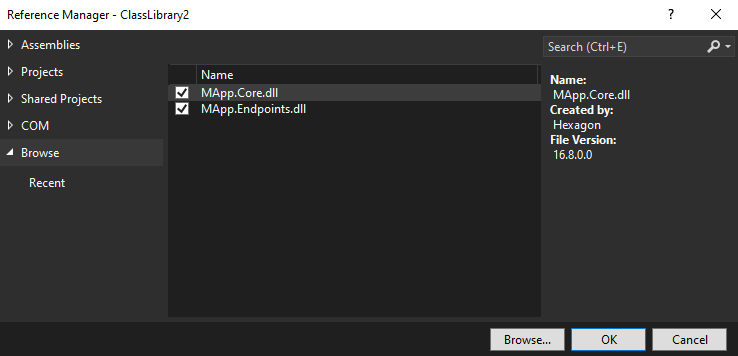
[HttpGet] action.
💡
Naming convention: If you create a custom controller, please make sure you always follow the ASP.NET naming convention. The class name of your controller must end with ‘Controller’
using MApp.Endpoints;
using MApp.Core;
using System.Runtime.InteropServices;
using System.Threading.Tasks;
using System.Web.Http;
using MApp.Data;
using System.Collections.Generic;
using System.Linq;
using Newtonsoft.Json;

namespace CustomControllers
{
    [MAppAuthentication(AllowedClients.ApiKey)]
    public class CustomController : MAppTenantController
    {
        [HttpGet]
        [Route("api/v1/custom/action1")]
        public async Task<IHttpActionResult> Action1()
        {
            //Fetch and process data
            var responseObject = new
            {
                message = "Hello World!"
            };

            return this.JsonData(JsonConvert.SerializeObject(responseObject));
        }
    }
}
MAppTenantController. In this example we also added an ApiKey authentication attribute, which limits the public access to the actions of this controller. So calling this action is only allowed with a valid access token.
⚠️
An access token for your ApiKey authorization, can be created in M.App Enterprise
Studio → Security → API KeysFurthermore, it would also be possible to allow access only for requests from M.App Enterprise Apps. To do this, you need to change the authorization attribute to [MAppAuthentication(AllowedClients.App)] only.
The [Route("...")] attribute defines the public url for this action. In our case the http-get will be available at http://{YOUR MAE WEB PATH}/api/v1/custom/action1.
By extending from our basic controller MAppTenantController you get access to various functions and properties provided by M.App Enterprise Server.
Selecting the Database Connections stored in your M.App Enterprise environment.
List<Connection> connections = (await GetTenant().Database.SelectAsync<Connection>()).ToList();
Executing a SQL query command.
Database database = new Database({ConnectionString}, DbProviderType.PostgreSql);
database.ExecuteNonQuery("UPDATE mytable SET column1 = 'value1'");
.dll files to your M.App Enterprise installation directory and paste the files into the bin folder
💡
Any change in this directory leads to a rebuild of the M.App Enterprise Server. You might notice this, as the initial loading of an M.App Enterprise App or Studio could take a bit longer than usual.
After placing the .dll files into the bin folder of M.App Enterprise, your controller actions become available to be called.
As an example, you can call a function to fetch the data in your app:
  //custom script placed in M.App Enterprise AppEngine
  function fetchData() {
    fetch('../api/v1/custom/action1', {
      headers: {
        'Tenant': {TENANT},
        'Authorization': `ApiKey {ACCESS TOKEN}`
      }
    })
    .then(response => {
        debugger;
        return response.json();
    })
    .then(data => {
        debugger;
        console.log(data);
    });
  }

  fetchData();
⚠️
Replace
{TENANT} with your tenant id and {ACCESS TOKEN} with your ApiKey token generated in M.App Enterprise Studio.Congratulations! You have created your first custom controller and extended successfully our base M.App Enterprise controller.

Updated on May 8, 2024