Using OpenID Connect for M.App Enterprise Login

This tutorial will guide you through the process of setting up OpenID Connect for your MAE applications using Keycloak.
1. Preliminaries
To make use of OpenID Connect for M.App Enterprise Apps and Studio access, we have used Keycloak in our tutorial. Keycloak is an open-source tool for managing user identities and access. It makes it easy to secure applications with features like single sign-on and social login.
If you haven't installed Keycloak yet, you can follow the instructions at this link:
2. Keycloak settings
Login into your account and let's get started.
Create a realm
To begin, create a new realm by selecting the dropdown menu at the top of the left navigation panel and click onCreate realm.
You should have at least one realm in the list named "Keycloak," which acts as the master realm and should not be used for our configuration settings.

Simply provide a name for your realm and click Create.
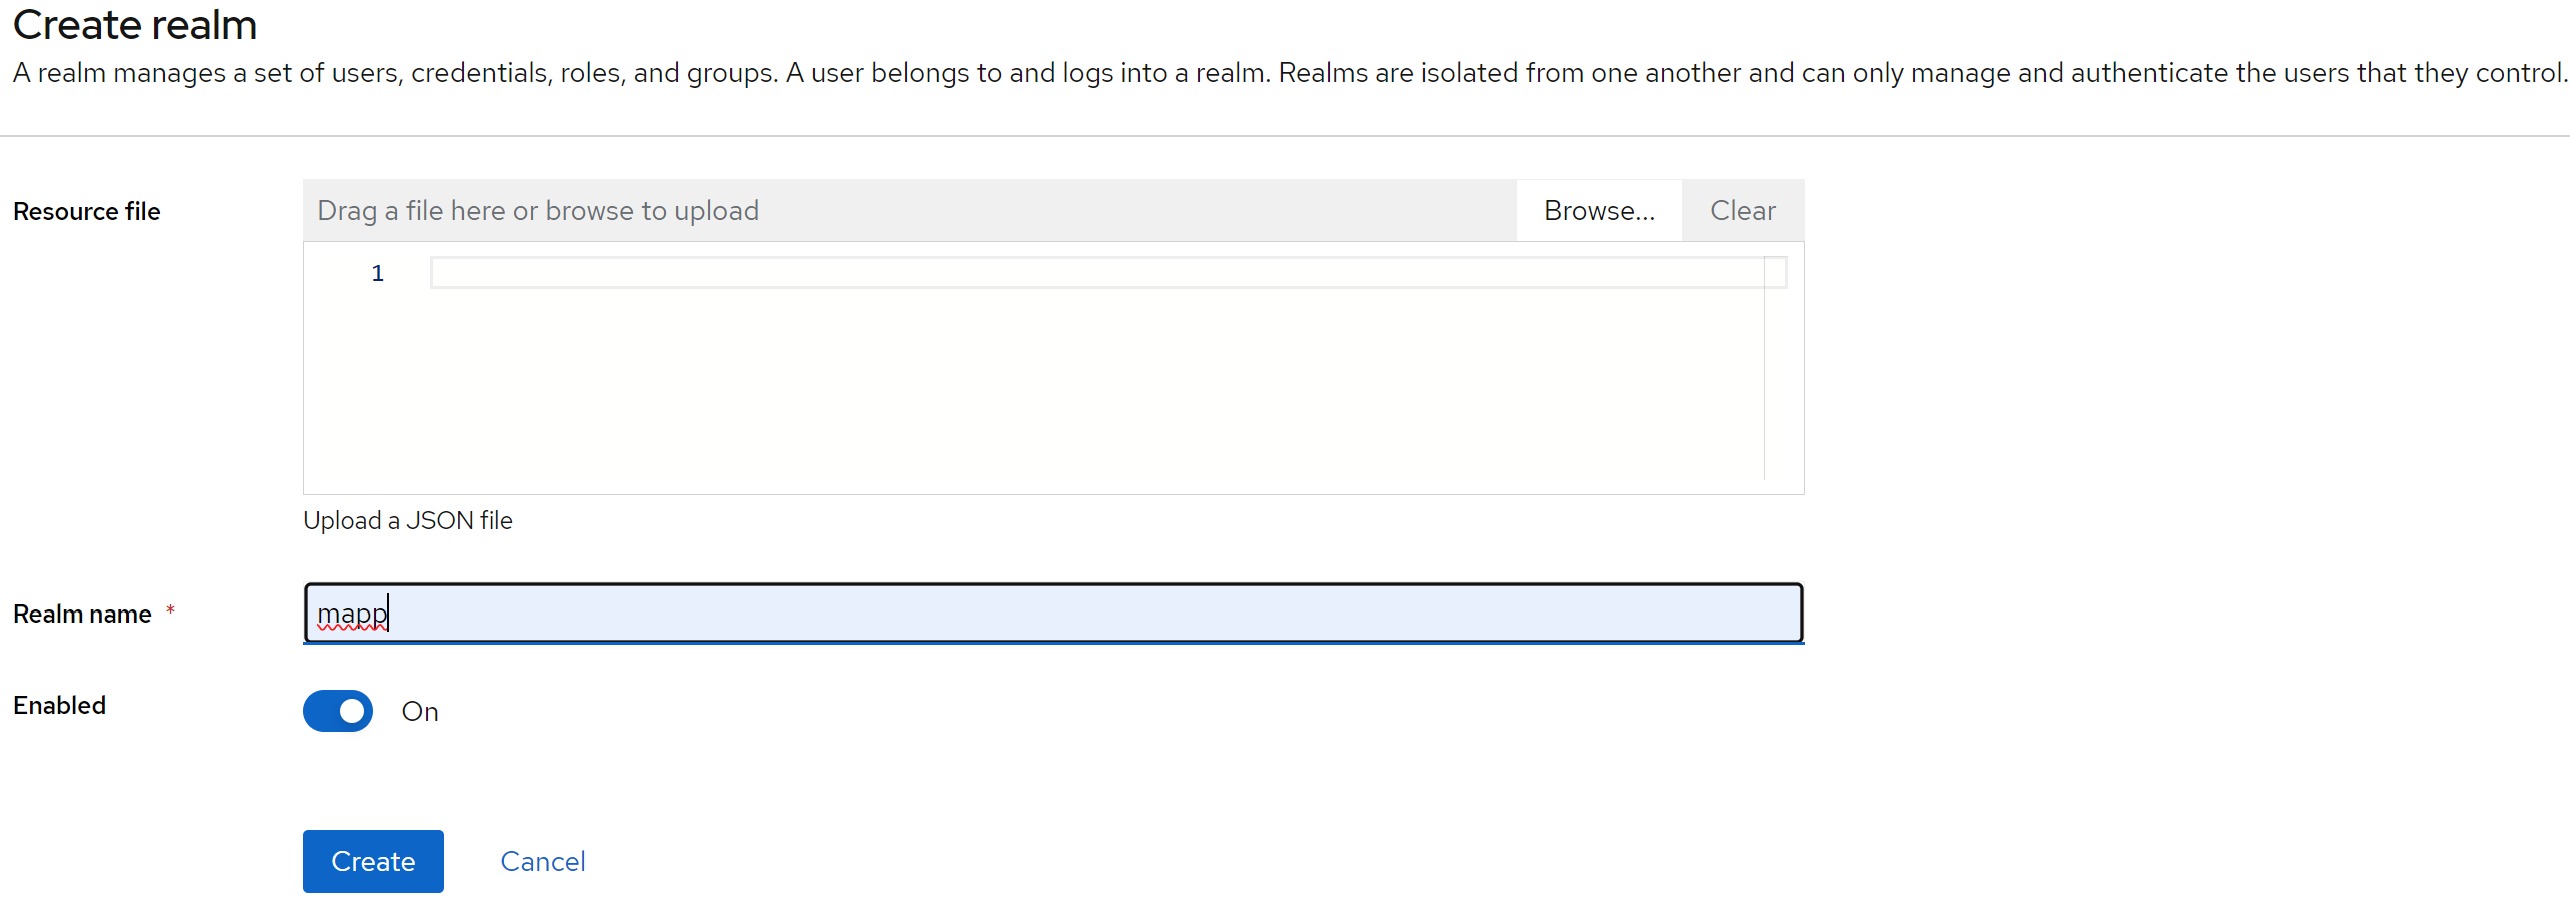
Now that you have created a realm to handle all aspects of OpenID Connect, it's time to configure the settings.
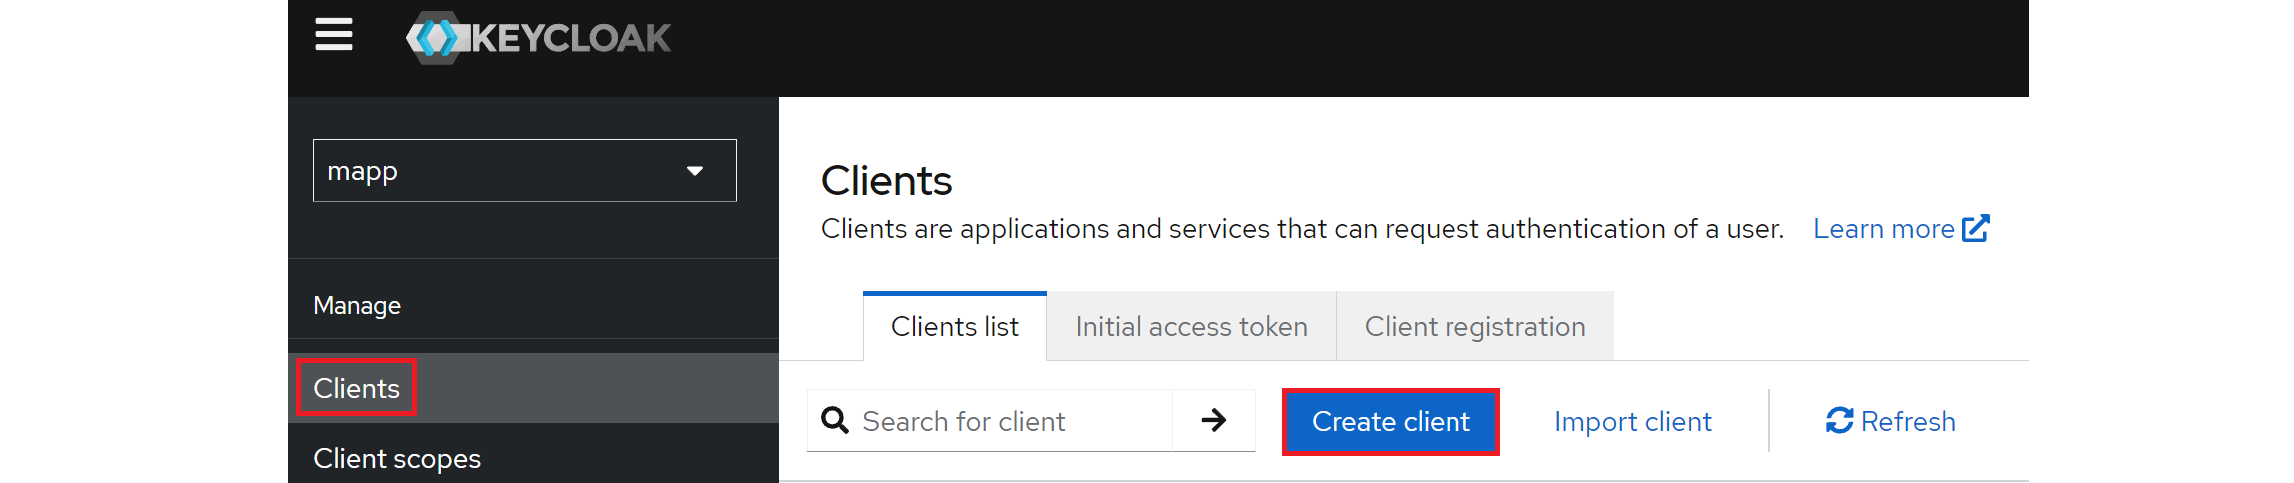
Create a client
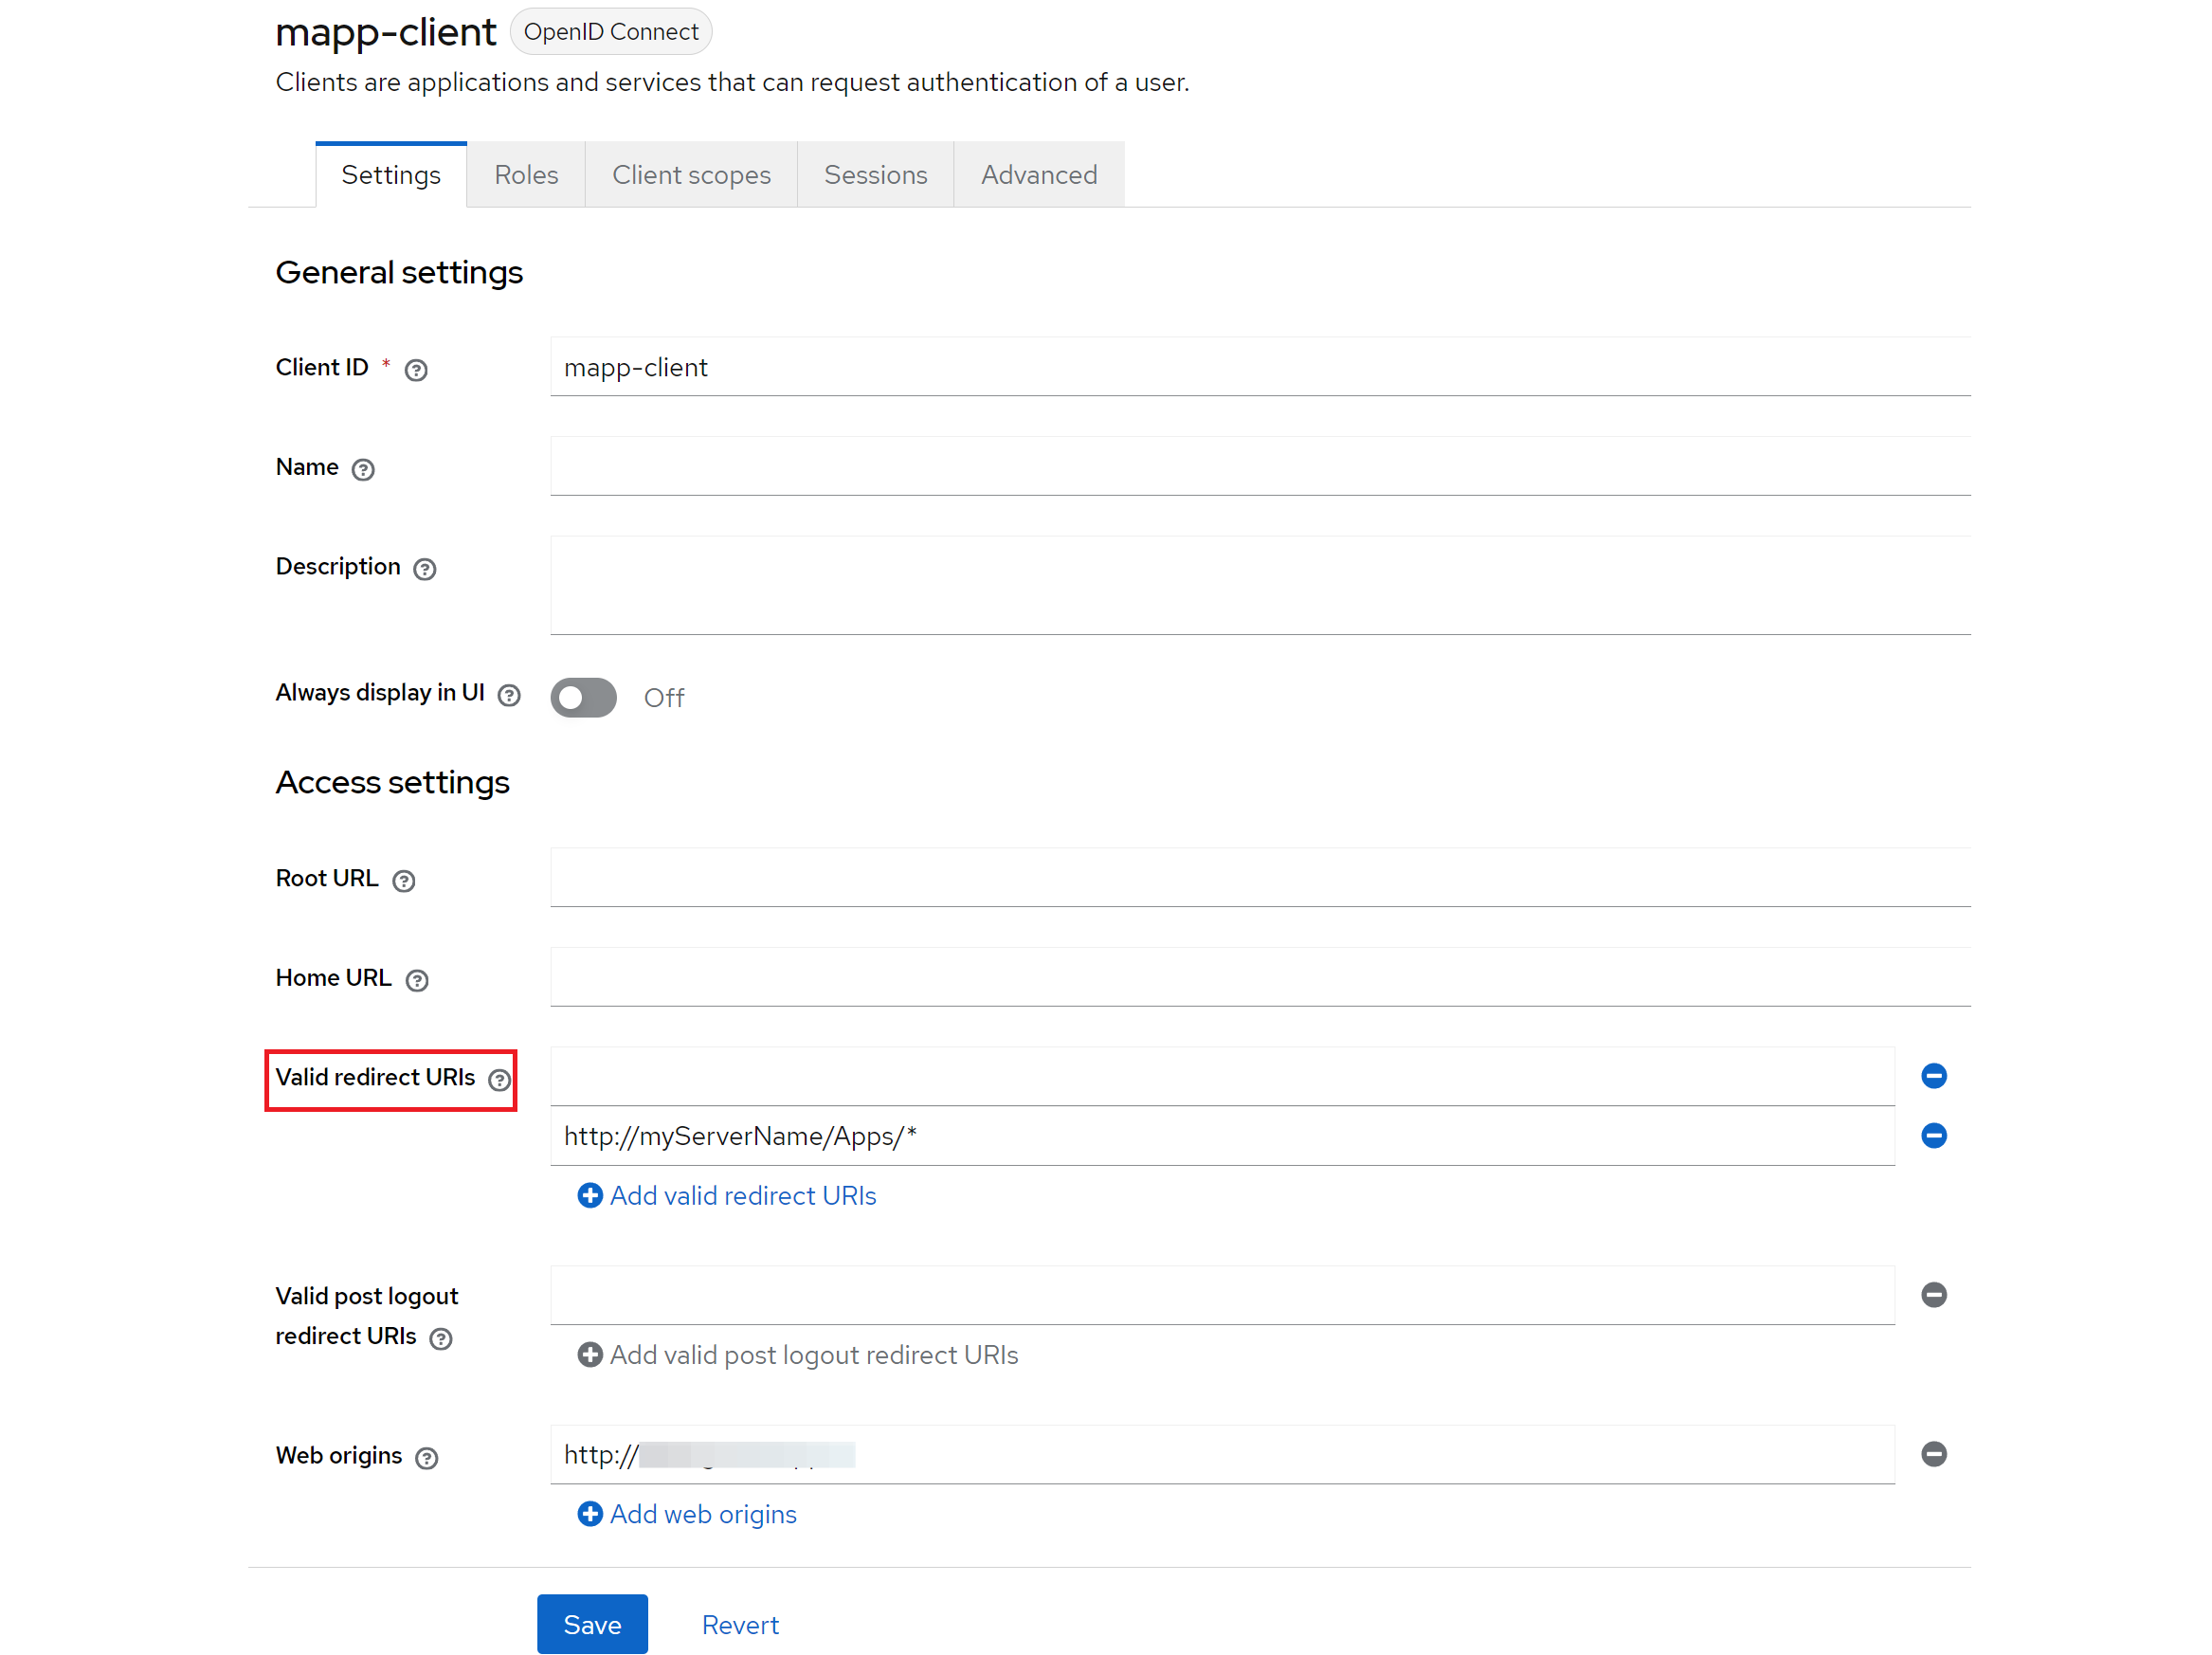
Create a new client by navigating to Clients in the left menu panel and click on Create client. Clients are the applications that use Keycloak to handle user login and access control.
Enter a Client ID for your M.App Enterprise client, which in our example is "mapp-client." Then, provide the URL from your M.App Enterprise apps page in the Valid redirects URls field. It marks the URl where you request OpenID Connect access and it should look like this:
http://< yourServer >/Apps/*
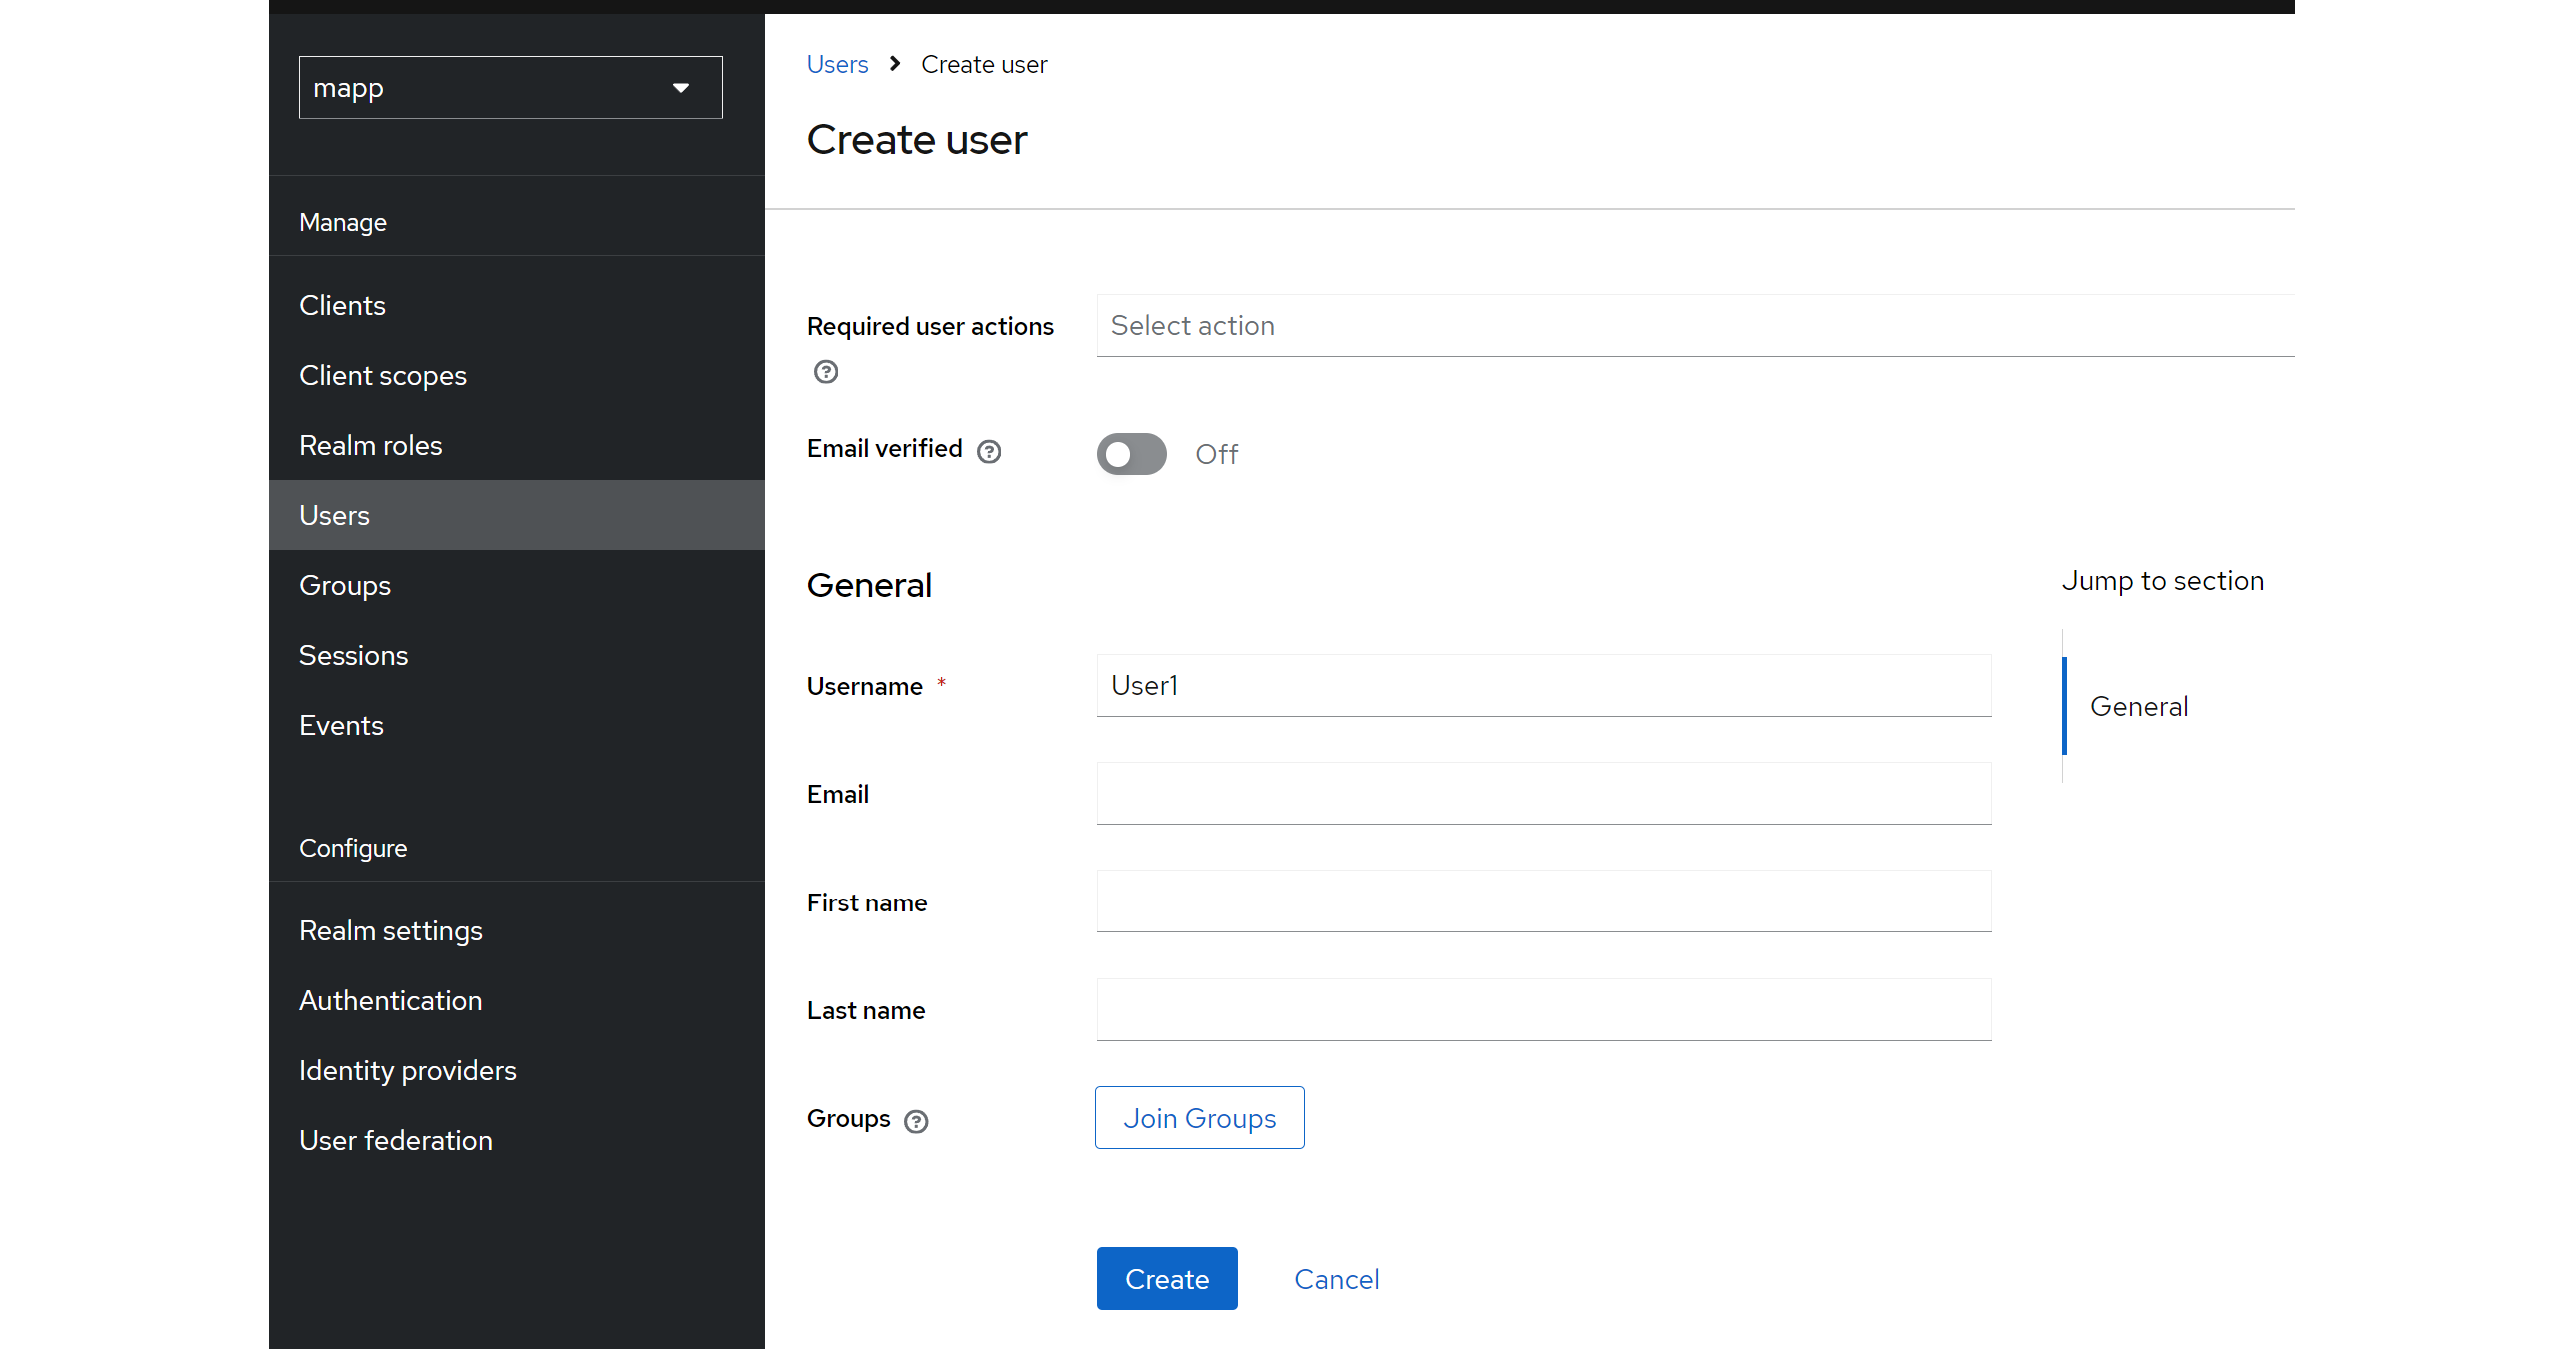
Create a user
The next step is to create a user, representing an individual who can log in and interact with applications and services managed by Keycloak, including M.App Enterprise. To do this, go to the left menu, select Users, and create a new user Provide a username, email, first name and last name, or you will be asked to add this information during the first login.
To set a password for your user, click on the created user in the user list and go to the Credentials page. Click on Set Password and enter a password of your choice.
Create a group
Finally, creating a new group enables you to define claims for your users. In Keycloak, groups are collections of users that can be assigned shared roles and permissions for easier management. So with a group we want to set permission for specific Apps in M.App Enterprise.
Simply navigate to Groups and click on Create group, then enter a name (e.g claim1) and create it.
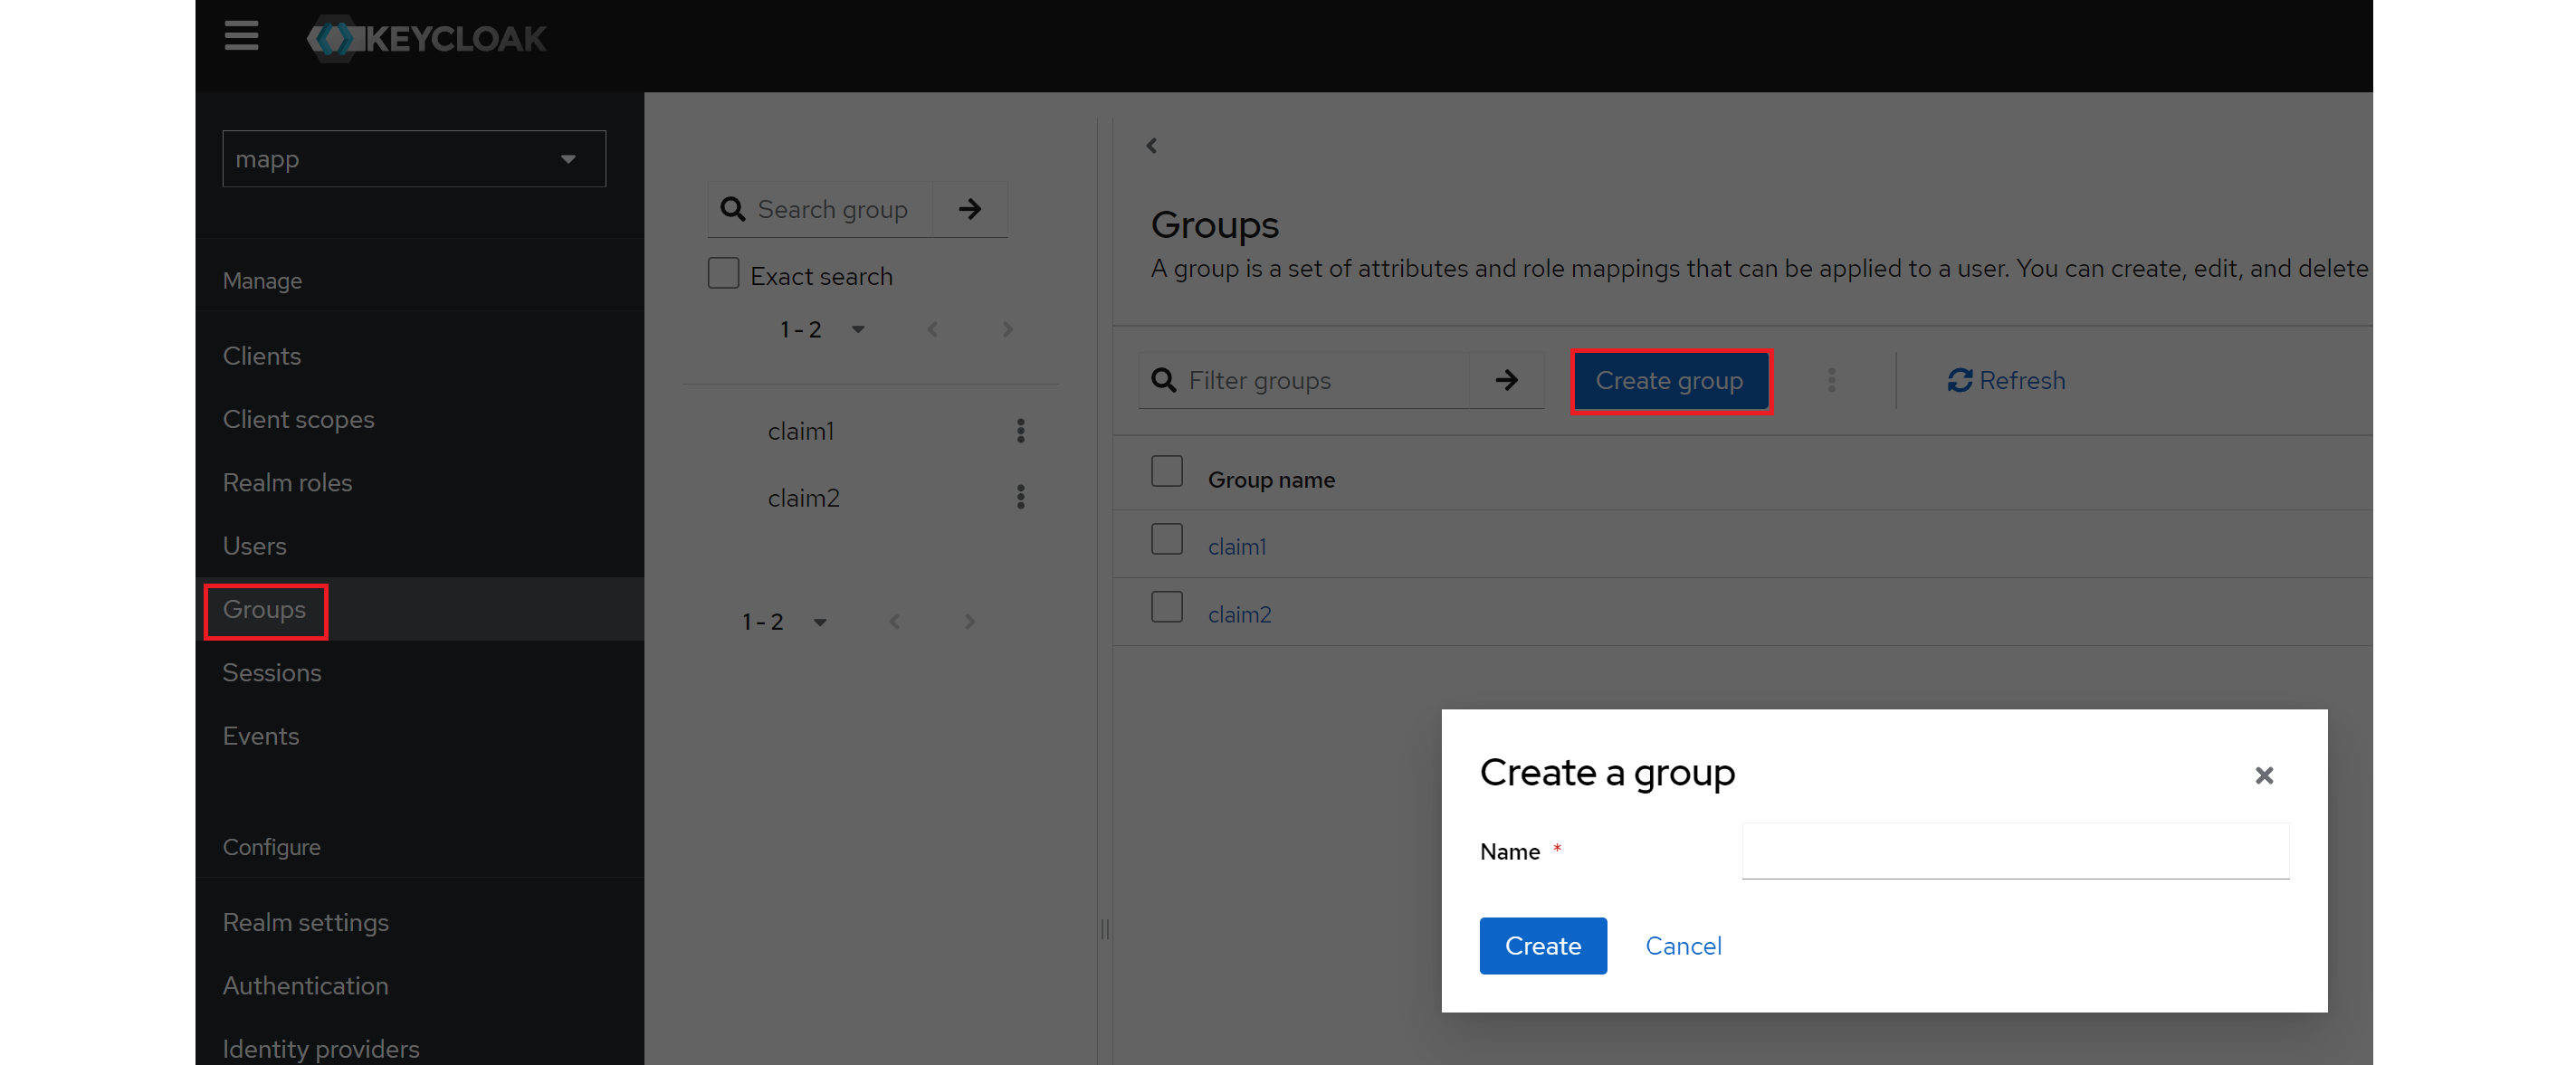
To assign now the group to the relevant users, open the settings for the user you created (simply click on a user in the list) and go to the Groups section, where you can add the appropriate group.

Set Client scope
A client scope defines a set of roles and permissions that can be assigned to clients, controlling what data and actions they can access.

So, create a new client scope, set a name and move to the Mappers section for further settings. A mapper is used to specify what user information (like email or roles) is included in the tokens sent to applications.
Add a new Mapper by clicking on the button that says Configure a new mapper.

A window will open with a list of mapping elements. Select Group Membership and you will be directed to the page below.
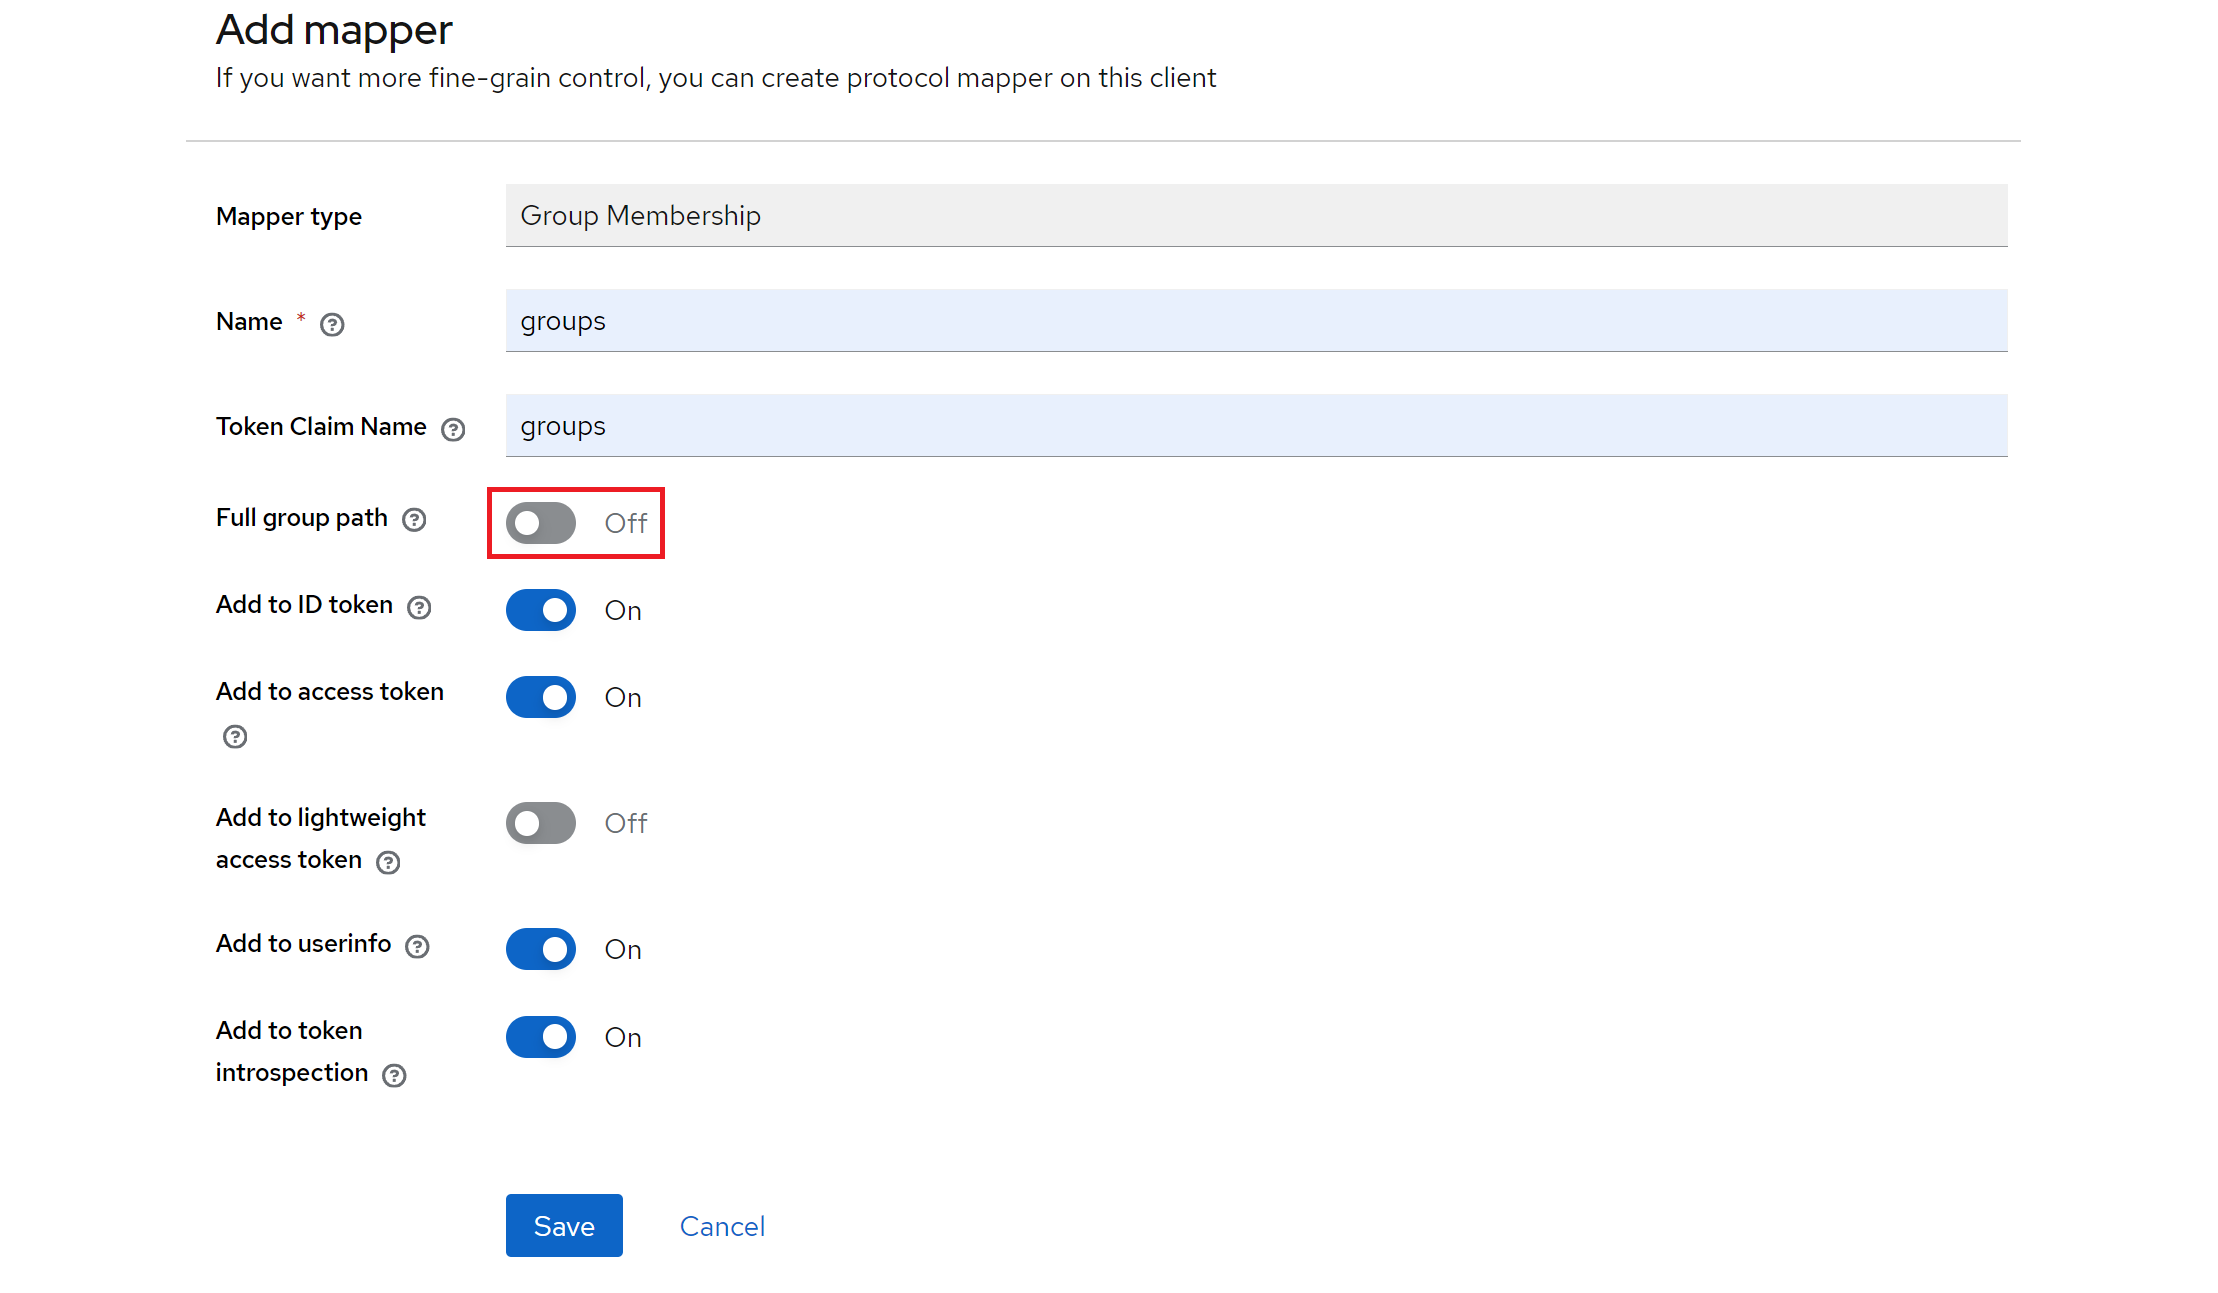
Insert a Name and a Token Claim Name, and make sure to untick Full group path before saving it.
The final step is to assign the newly created client scope to the appropriate client. To do this, navigate to your client (e.g. mapp-client) and go to the Client Scopes section, where you can add the client scope.

3. M.App Enterprise settings
Management
The settings for OpenID Connect are found in Management of M.App Enterprise within the tenant form. Either create a new tenant or edit an existing tenant from the tenants list.
Either way, select OpenID Connect from the Radio buttons. This will expand input form to look like the one below.
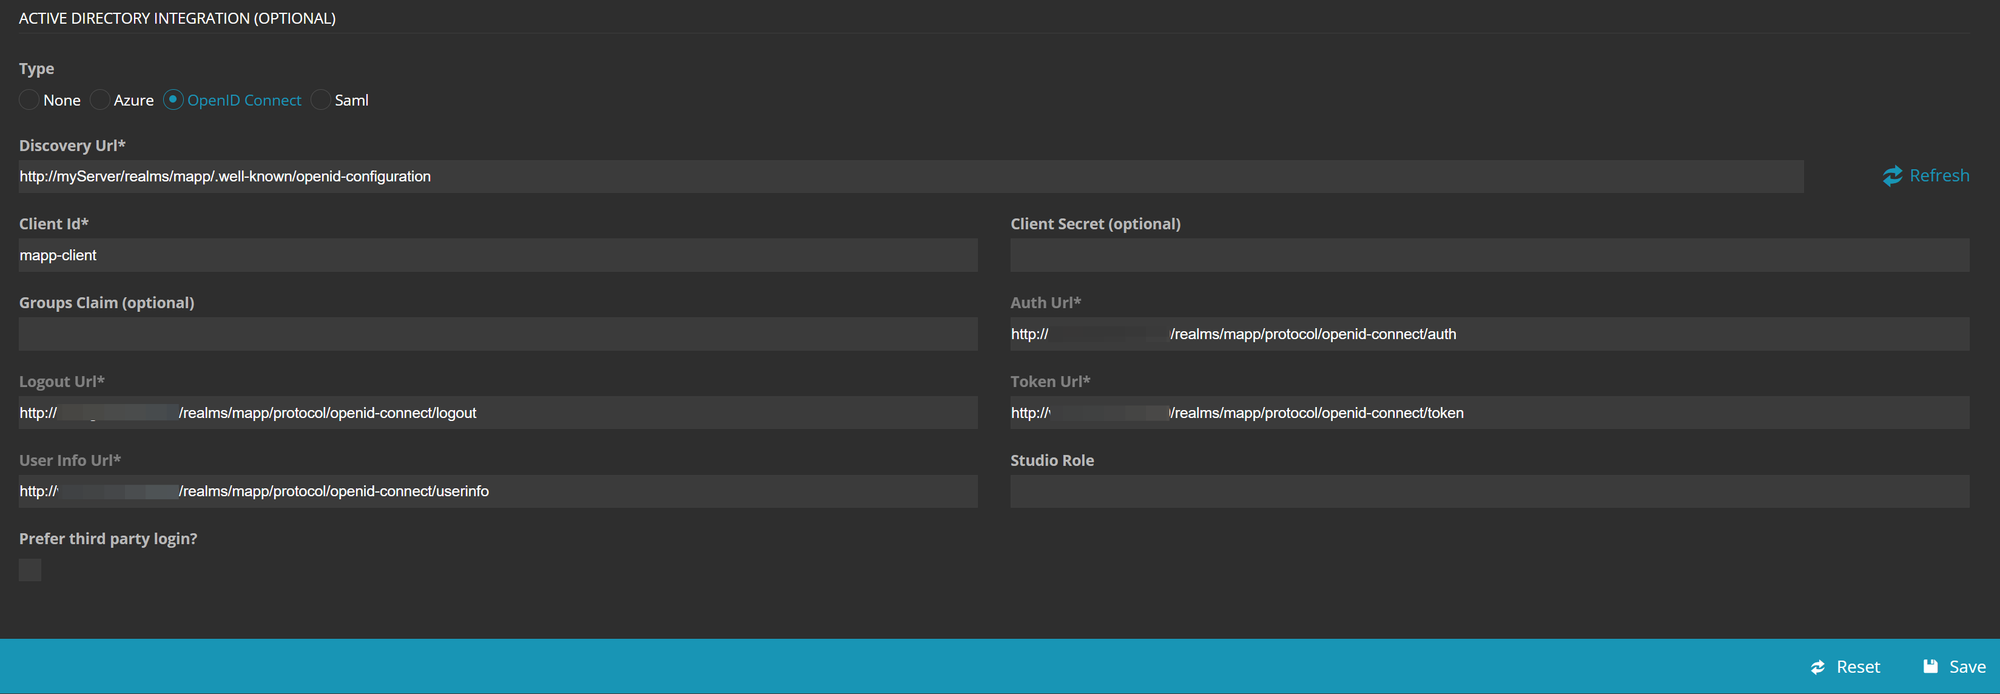
Discovery URL: This Url can be found in Keycloak underRealm Settings → Endpoints. Right click onOpenID Endpoint Configurationand chose "Copy link". Your link will look similar to the example below:
http://< yourServer >/realms/mapp/.well-known/openid-configuration
Enter the URL into the designated field and click on Refresh. The form will then update to display all the other required URLs.
Client ID: Enter the client name you used in Keycloak. In our example, this would be "mapp-client".
Save the page and you are almost finished ;-)
OpenID Connect for Studio (optional)
To enable OpenID Connect also for M.App Studio, you will need to set a few things. Within M.App Management, edit your tenant again and write the name of your keycloak group in the field Studio Role.

In Keycloake you will have to navigate to the settings of your client (e.g.mapp-client) and add a valid redirect URL for Studio. It should look similiar to the example below.
http://< yourServer >/Studio/*
Studio
The last step to make OpenID Connect work with your MAE login, is to create a claim as well in M.App Enterprise Studio. Therefore, create a new claim to specify the access of apps for certain users created in Keycloak.
Navigate to the content menu on the left and click on Security → Claims.
 Stefan Schüttenkopf
Login
You're all set to test your new login option!
When you access the M.App Enterprise Apps page, your login screen will now appear like this:
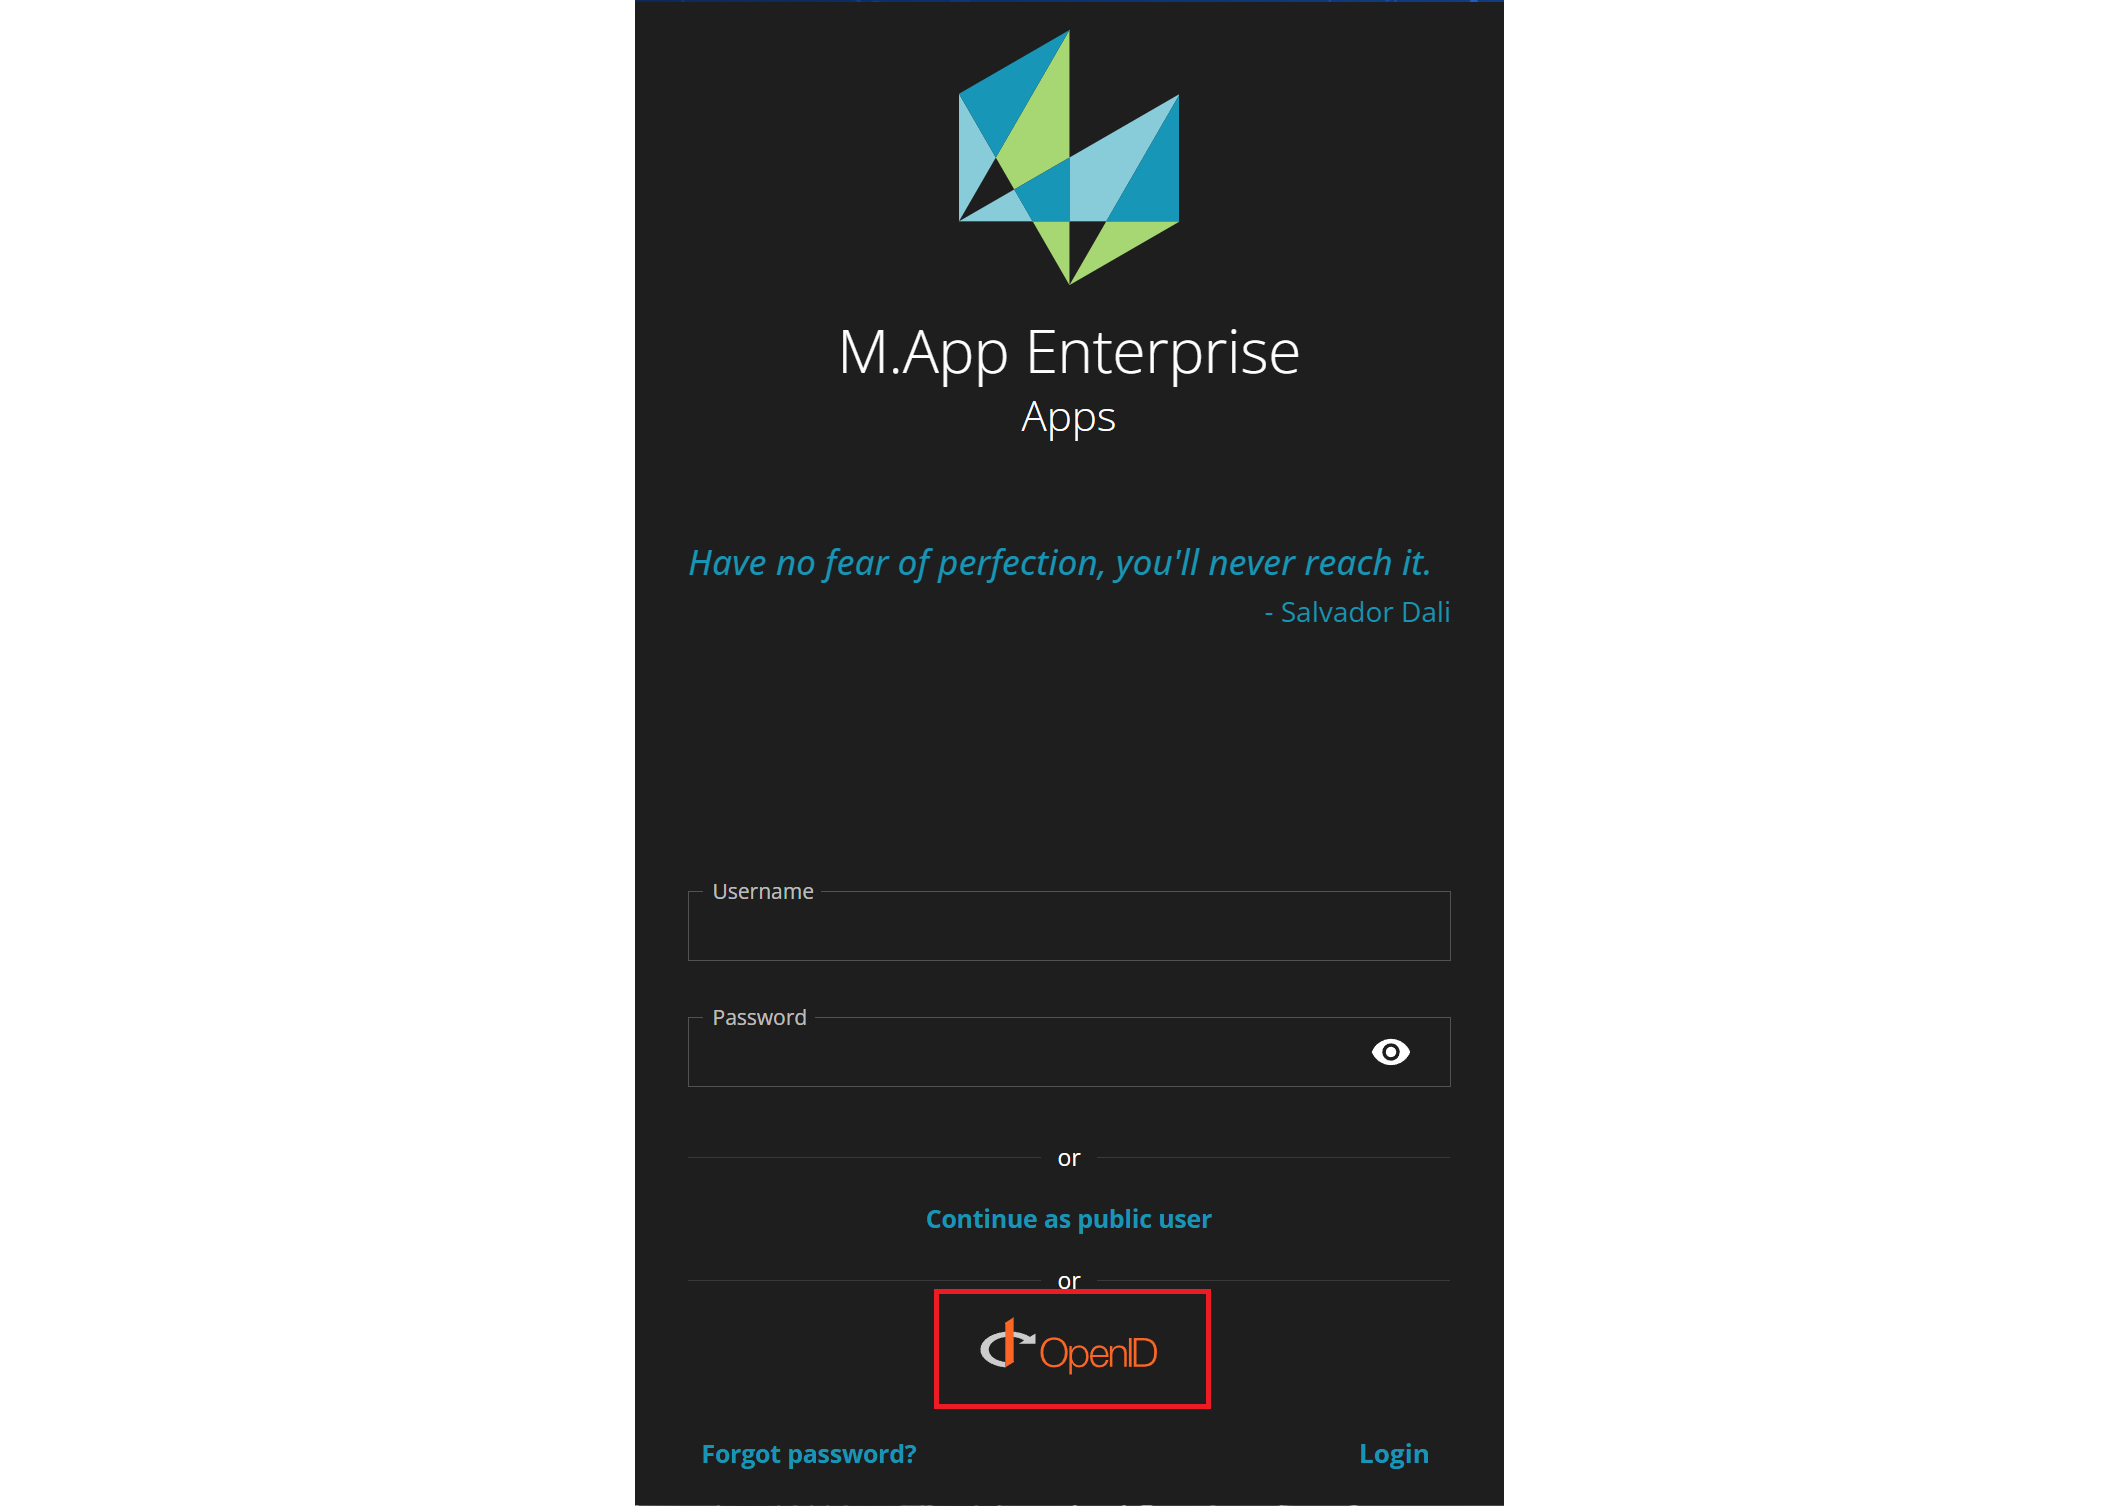
Click on the OpenID Connect logo, then log in using the credentials of the user you previously created. You will now see all the apps that have been granted access to this user via claims.