Queries
Queries enable filtering of geographic objects based on specified attributive and spatial constraints. This post will explain the basics of queries in a step-by-step approach.
Creating a Query
Whether you want to use a Query for a Desktop application or a Browser app, you have to navigate to the content menu and create a new Query.
Content → Queries → New
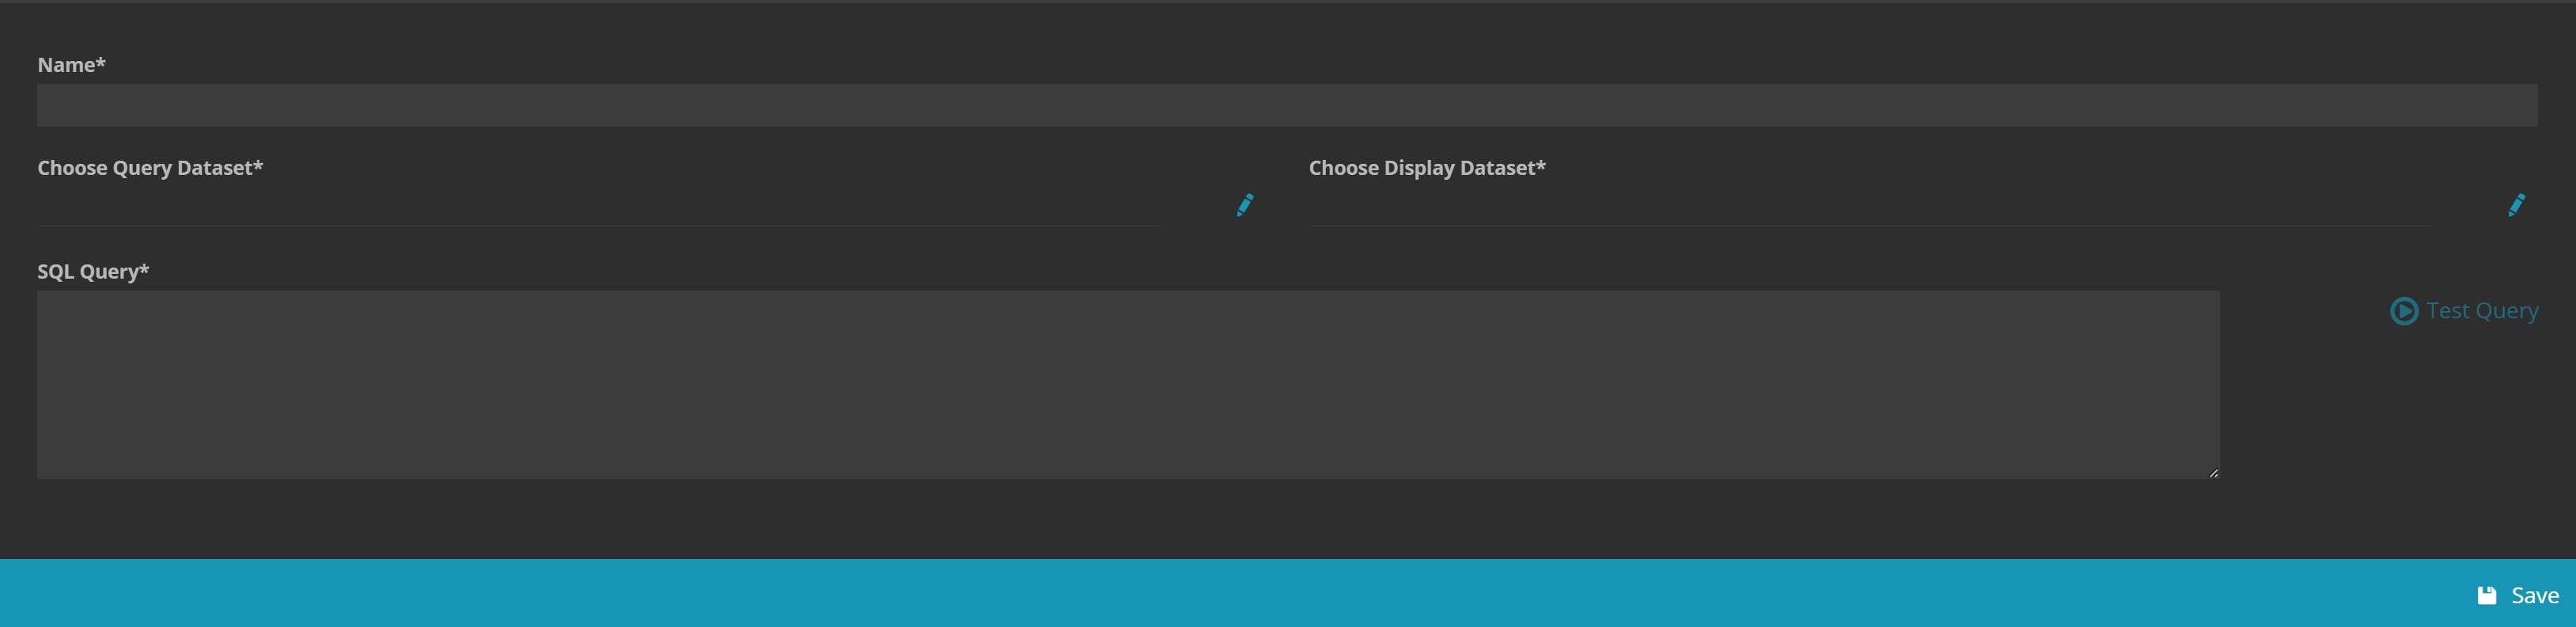
Besides the name indication you have to define the Query Dataset and the Display Dataset. This can either be the same or different datasets depending on your spatial question.
Example: Let's consider that you want to evaluate subway entrances within a certain radius to a specific building. In this case, the query dataset would be the one with the building geometries, because it is the start point of the query. On the contrary, the display dataset would be the one with the subway entrance geometries.
ST_Distance and ST_Buffer work properly.Once you have entered your SQL Query, you can instantly check if the query is correct by clicking on Test Query. Either Query definition is valid or Entered value is not valid will appear to verify the statement.
Defining your query
There are two possibilities to define your Query and both contains Placeholders:
{Entity.IdFilter}: at runtime will be replaced with the a list of comma separated IDs which represents the objects selected on the map, e.g.:SELECT *, ST_Area(Geometry) as Area FROM Buildings WHERE gid in ({Entity.IdFilter}){Entity.MyTextfield}: at runtime will be replaced with a textbox in which the user can provide input text to be searched, e.g.:SELECT ID,ZipCode, Borough, Address, OwnerName, ST_Area(Geometry) as Area, NumBldgs as "Number of Buildings", NumFloors as "Number of Floors", YearBuilt FROM tax_lots WHERE ID = {ENTITY.TaxLot}-
you can combine multiple placeholders in one query, e.g.:
SELECT s.id, s.name, ST_Distance(s.geometry, ST_Transform(b.geometry,2831)) as Distance FROM subway_entrances s JOIN buildings b ON ST_Intersects(s.geometry, ST_Buffer(ST_Transform(b.geometry,2831), {ENTITY.Distance})) AND b.gid IN ({ENTITY.IdFilter}) order by distance
Desktop App Queries
To start a desktop query, fill out the general query form and specify the desired SQL statement. Have a look at our example and follow the stepwise approach.
Example
Let's start with creating a nice query.
SELECT kg as Kadastralgemeinde, flaeche as "Fläche in m²", wid_kaptie as Flächenwidmung, wid_unterk as "Flächenwidmung Unterkategorie", tre_fla_su as "Fläche (Vegetation)", imp_fla_su as "Fläche (verbaut)", shr_fla_su as "Fläche (Büsche)",gra_fla_su as "Fläche (Gras)",roo_fla_su as "Fläche (Dächer)",san_fla_su as "Fläche (Sand)" FROM dkm_grundstueck_melown_flaewi WHERE id in ({ENTITY.Idfilter})
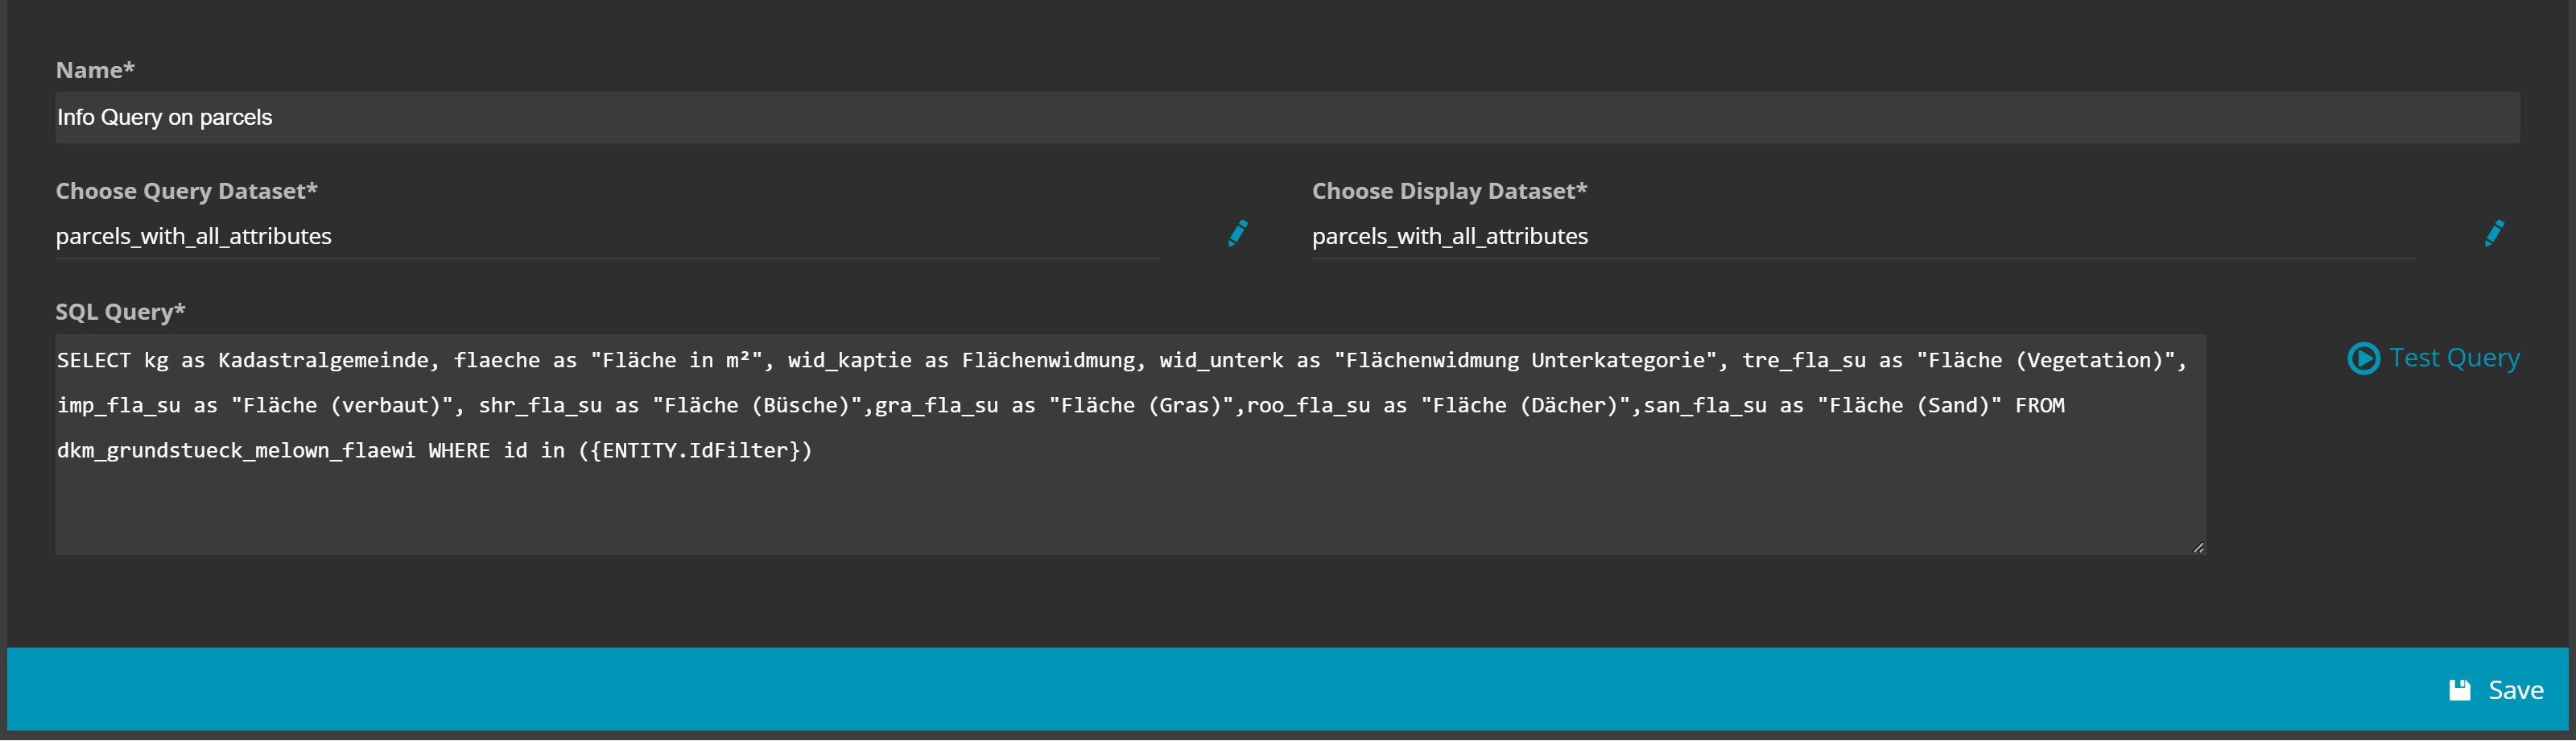
Great news! Your query is ready to be executed without any additional configuration.
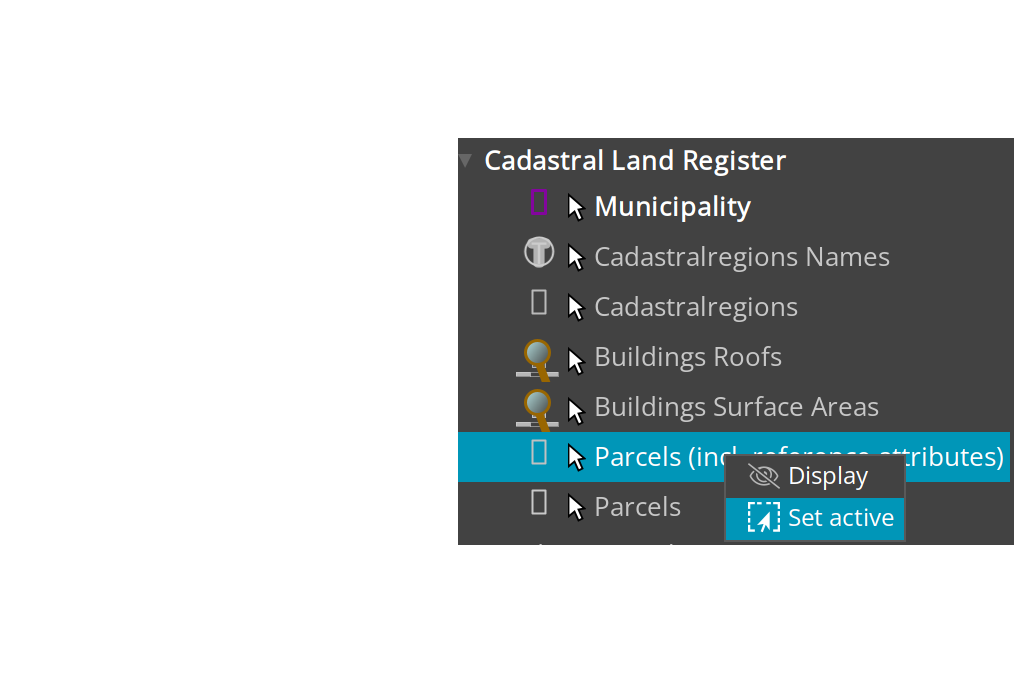
Considering that you have created your query already, open your corresponding desktop app. There are two ways to execute the query now.
Either way set the query layer active and select some geometries in the map. Then select as many geometries as desired before you open the map context menu to execute your query.
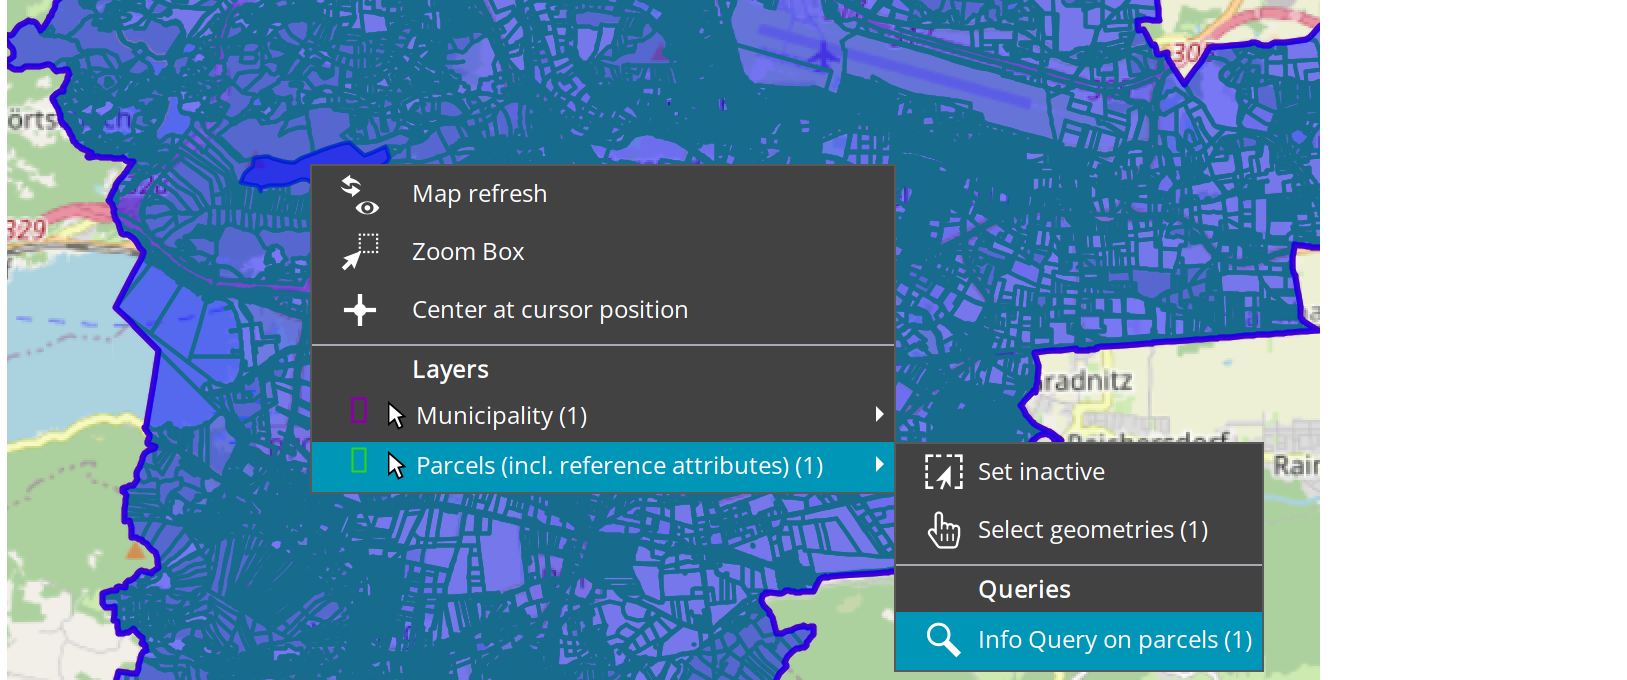
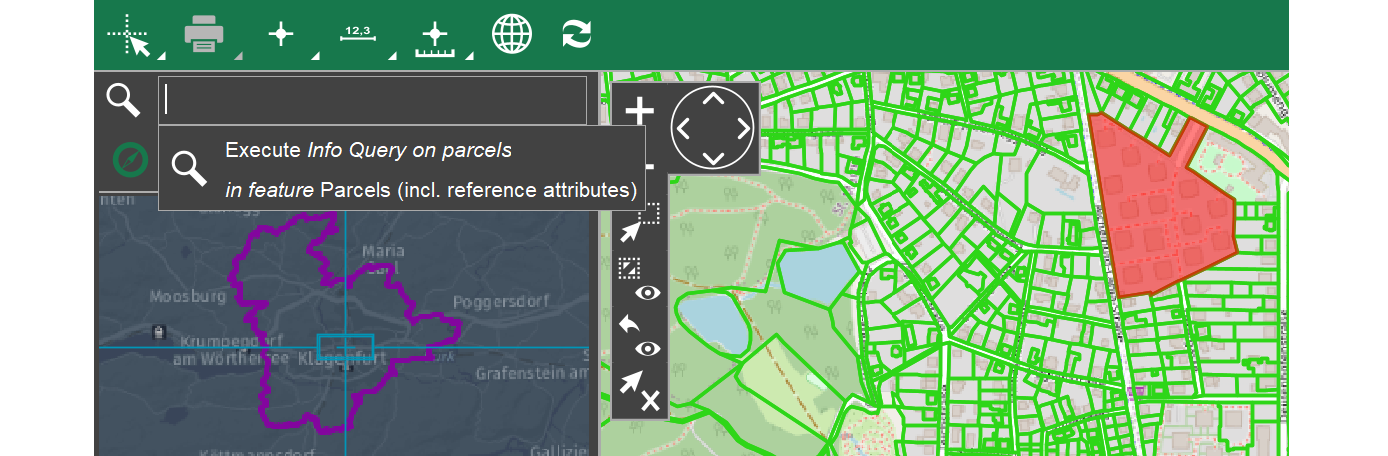
Another way to initiate your query is by clicking into the search bar in the top left corner after selecting a geometry. The name of your query will appear, and you can start it by double-clicking on it.
A table with your queried information will appear at the bottom of your map window as soon as you execute the Query. Have a look at our example below.
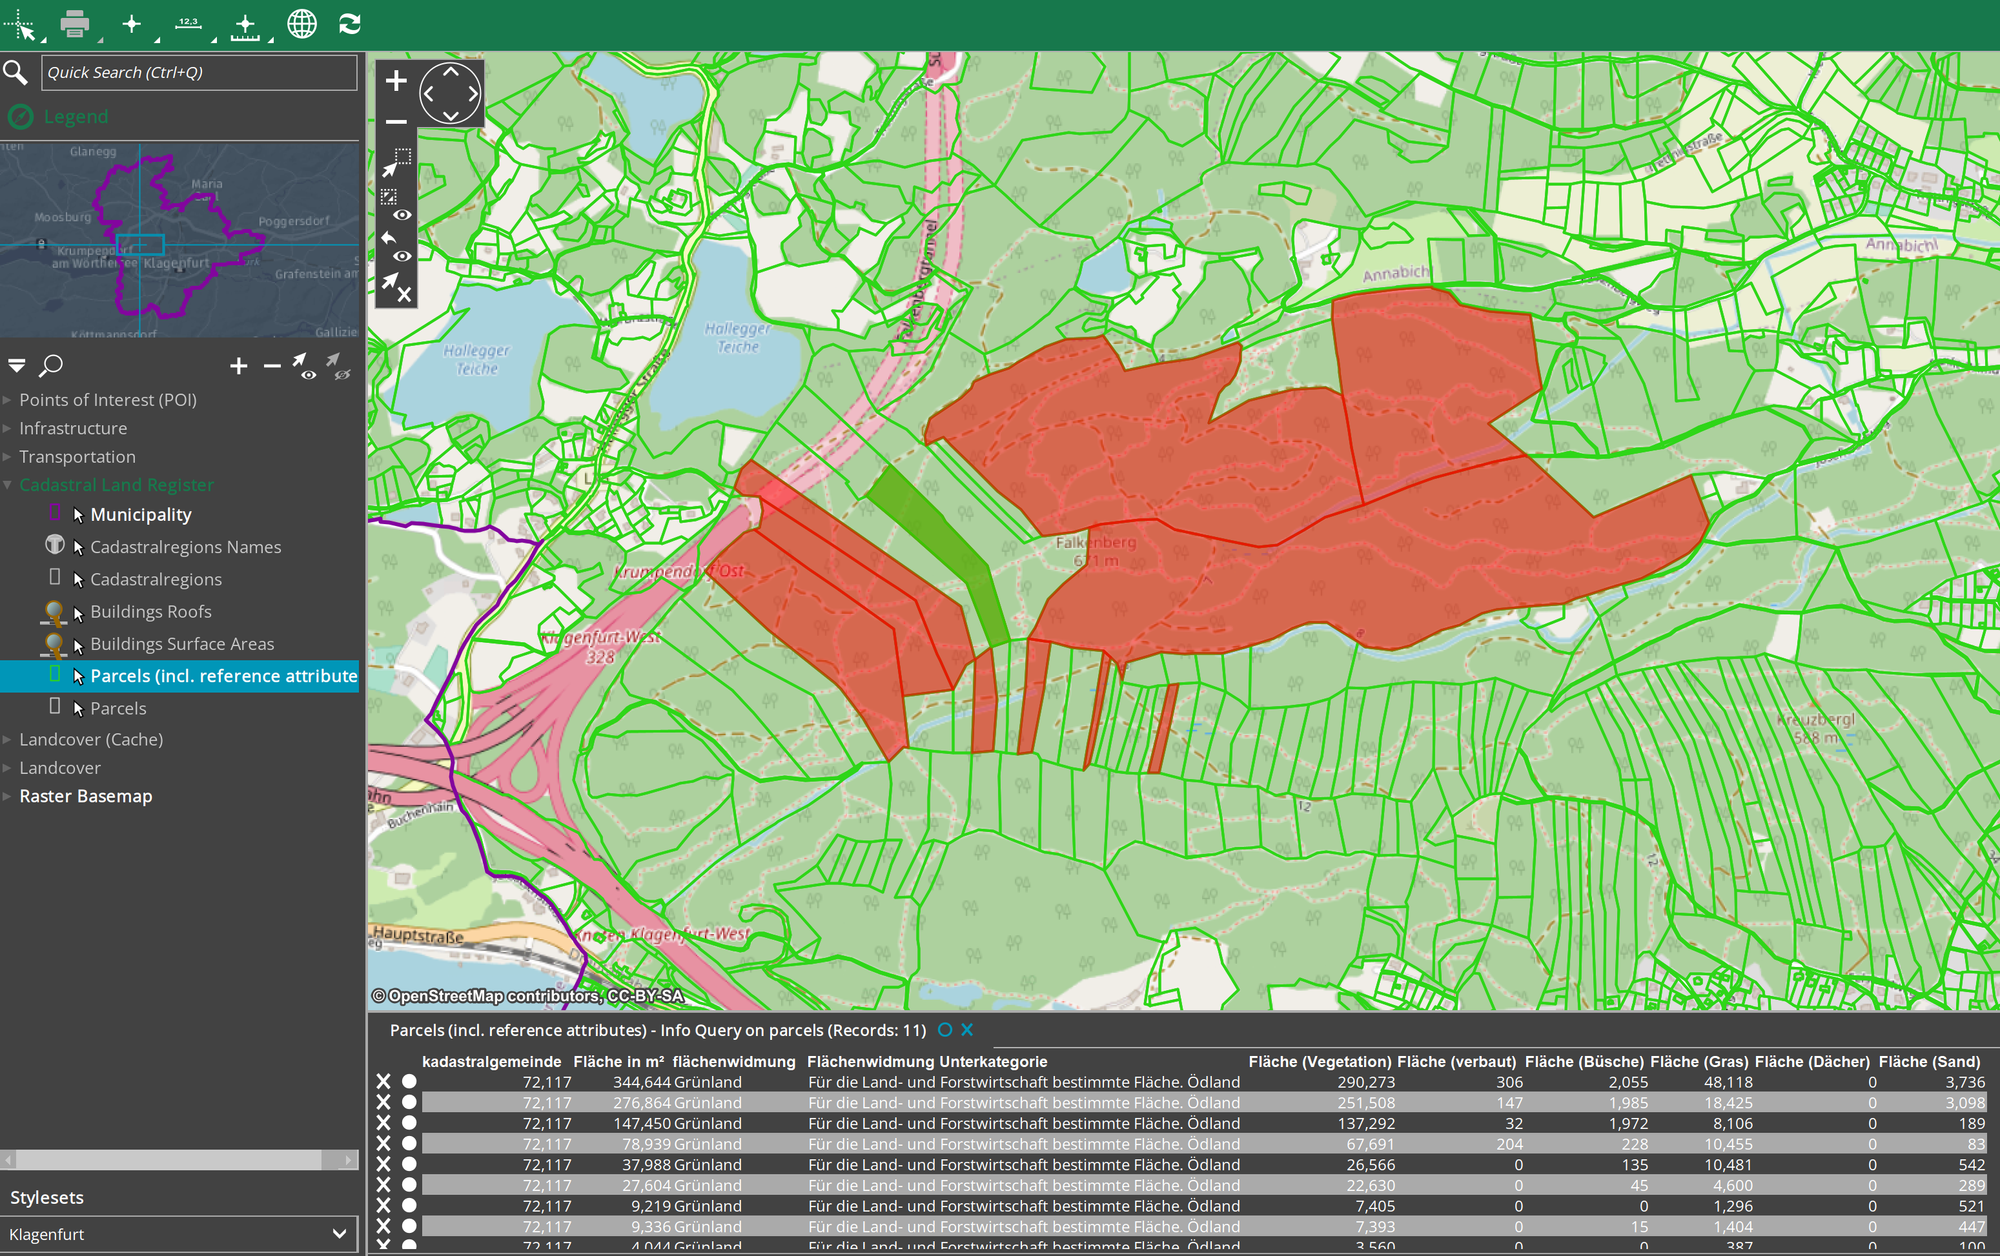
You can delete a single row of your query info table by clicking on the x-icon or by closing the whole tab when you click on the blue x on top. It is also possible to sort the table by clicking on the column names.
Pin a tab
The blue point icon on top of the query table enables you to save your query selection during your session. You can further start another query, which will be opened in another tab. This allows for switching between the tables.

Example with different Query and Display dataset
If you define different datasets, the following scenario would be possible. You want to select first a building in New York and then you want to show for this specific building what are the nearest Subway entrances, after the user defined a specific radius.
select s.id, s.name, ST_Distance(s.geometry, ST_Transform(b.geometry,2831)) as Distance from subway_entrances s JOIN buildings b ON ST_Intersects(s.geometry, ST_Buffer(ST_Transform(b.geometry,2831), {ENTITY.Distance})) AND b.gid IN ({ENTITY.IdFilter}) order by distance
ST_Distance and ST_Buffer are working.Browser App Queries 
To initiate a browser query, complete the general query form and request the data and attributes in your SQL statement which you want to execute in your app.
Example
So, for example, you want to show the squirrel id and fur color of each squirrel geometry in your map. Therefore, select "Squirrel_Census" as both the Query dataset and the Display dataset.
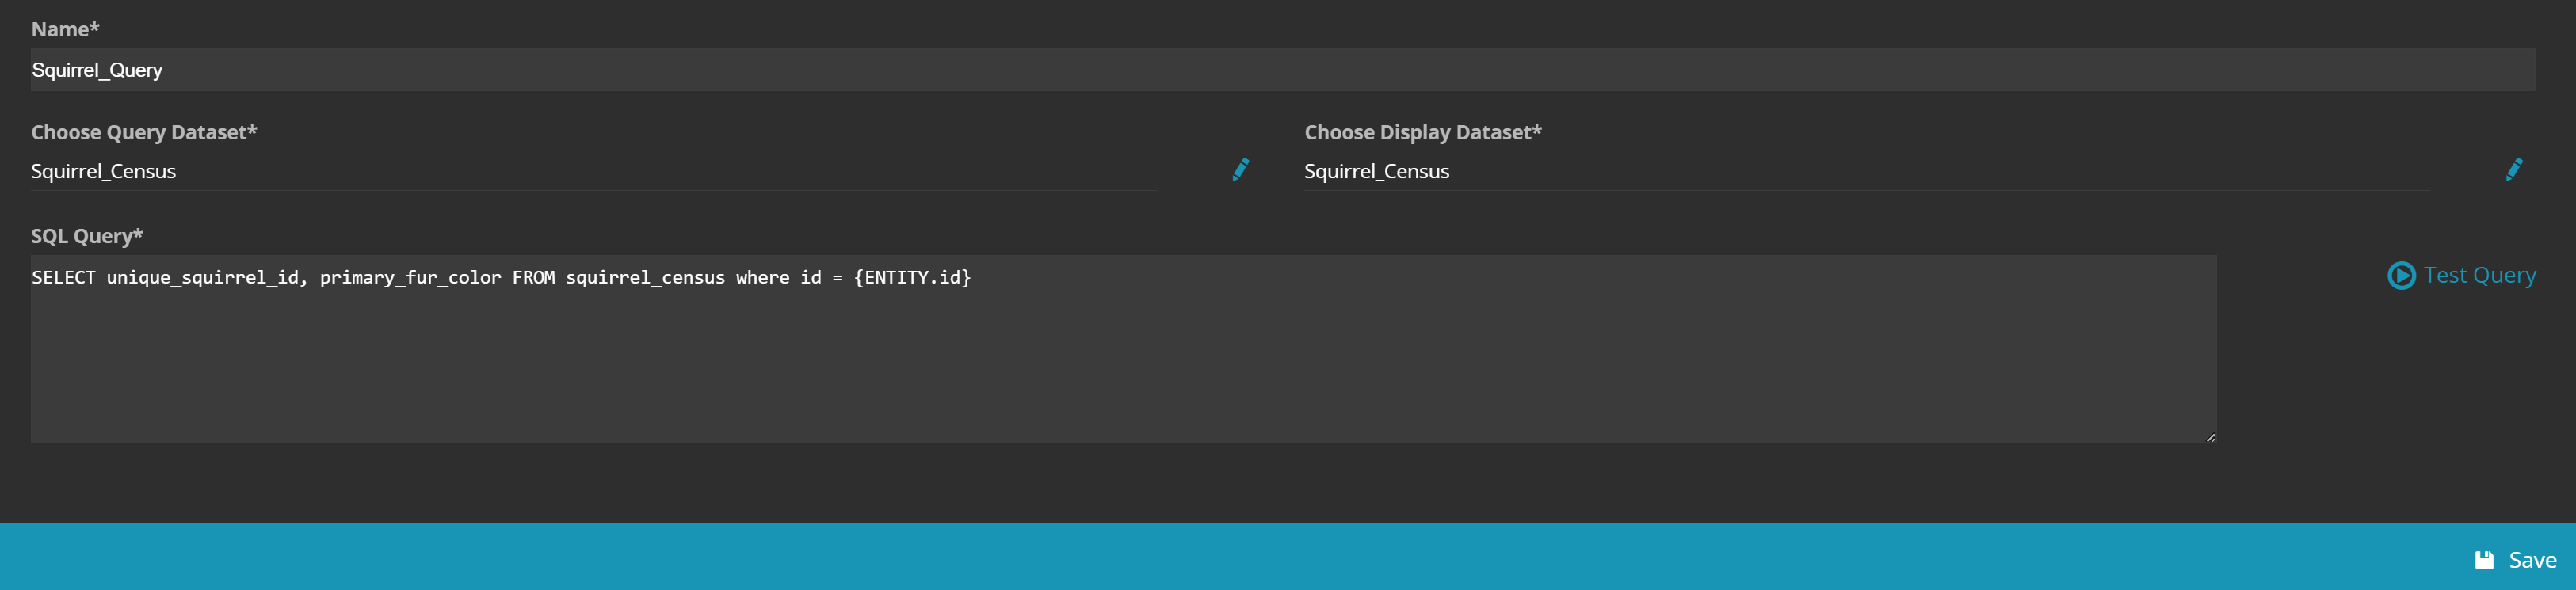
The SQL query could look like this:
SELECT unique_squirrel_id, primary_fur_color FROM squirrel_census where id = {ENTITY.id}
To execute the query in your Browser app, you will need to write additional JavaScript code that determines where and how the dataset information is displayed. This step should be performed in the M.App Editor.
Simply nagivate to your application in Studio: Browser → M.App → Open in editor
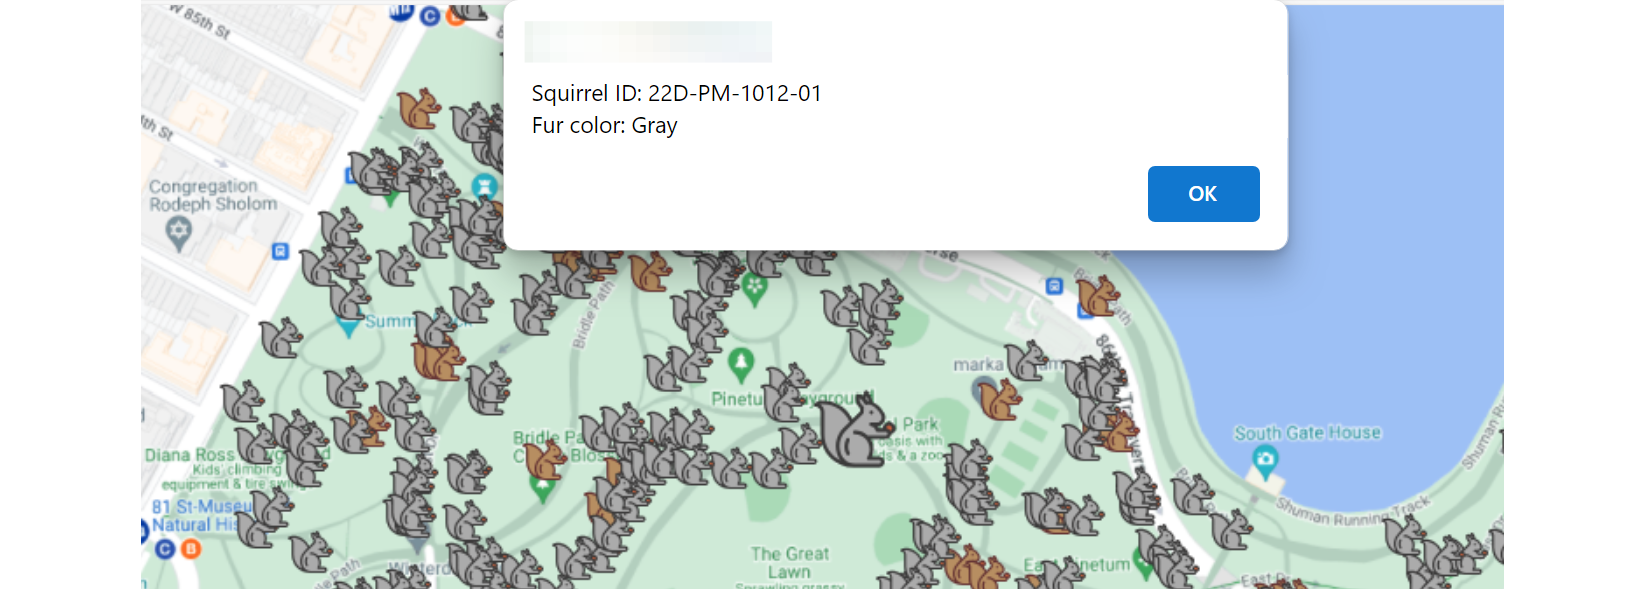
In this example, we want to link the geometry selection to the output. When a squirrel is selected, the squirrel's ID and fur color will be displayed as an alert.
To do so, you could use a code snippet like this:
window.map.on('SelectionChanged', event => {
    if (window?.map?.selectedObjects?.[0]?.selected?.[0]?.id) {
        const queryName = 'Squirrel_Query';
        const queryRequest = {
            format: 'json',
            parameters: {
                id : window.map.selectedObjects[0].selected[0].id
                },
            srid: 26918
        }

        executeQuery(queryName, queryRequest).then(result => {
            alert("Squirrel ID: "+ result.rows[0].unique_squirrel_id + "\nFur color: "+ result.rows[0].primary_fur_color)
        });
    }
});
Now let's have a look in our corresponding Browser App how the query execution looks like.
Make sure that your query dataset is set active to enable geometry selection in the map. Due to the added code snippet, an alert will pop up when you click on a squirrel displaying the Squirrel ID and its Fur color.
For a full tutorial please have a look here:
 Marina Lanxinger