Import/Export a Tenant
In this post we will guide you through importing or exporting a tenant in Management of M.App Enterprise.
Export
The export function in management is suitable for transferring projects and saving them in a single zip file.
To get started, navigate to the Tenants section in the menu bar. You will get a list with all available tenants, their connection, source and validation.
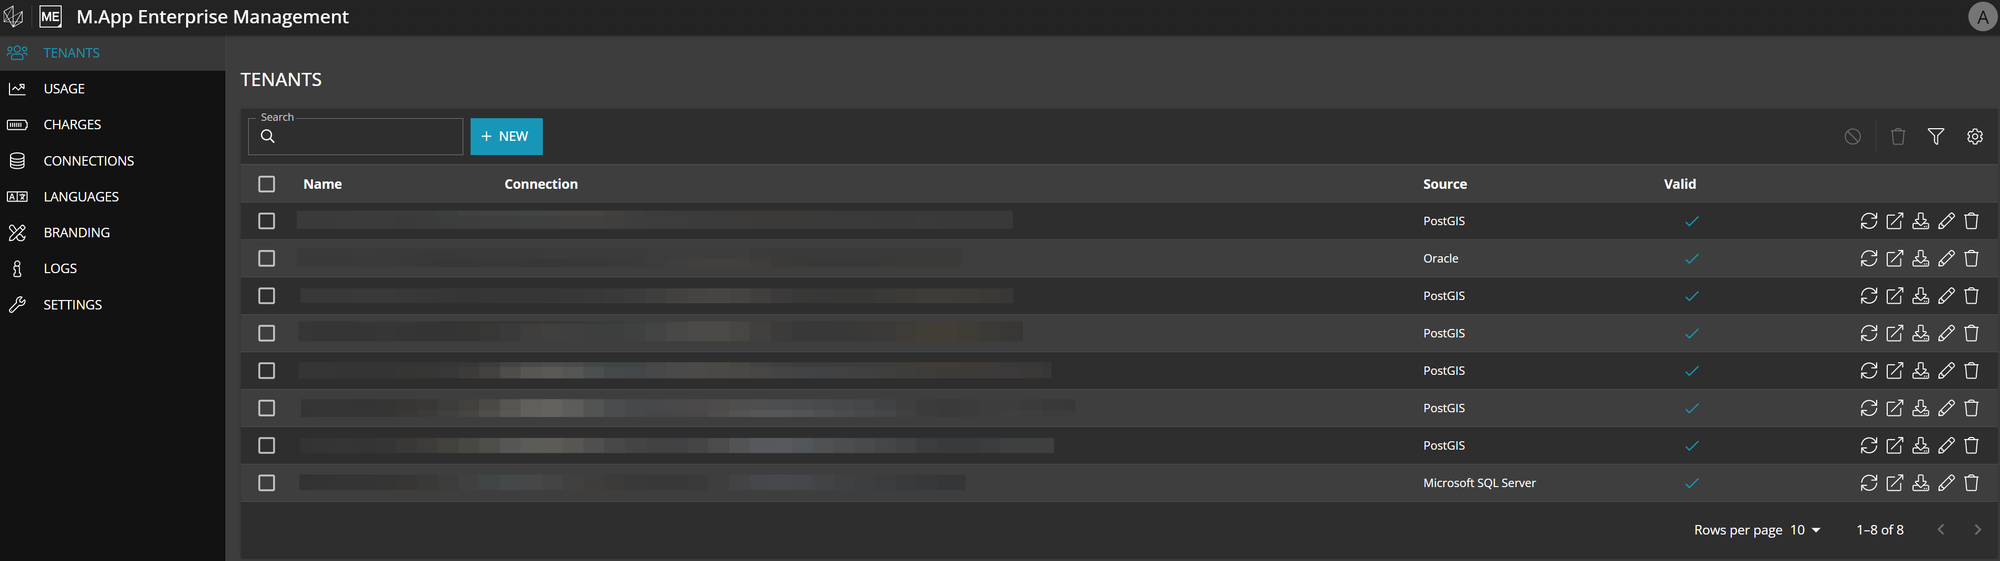
Click on the Export icon on the right of each row.

A window will automatically open asking for a password for the exported data to protect it.
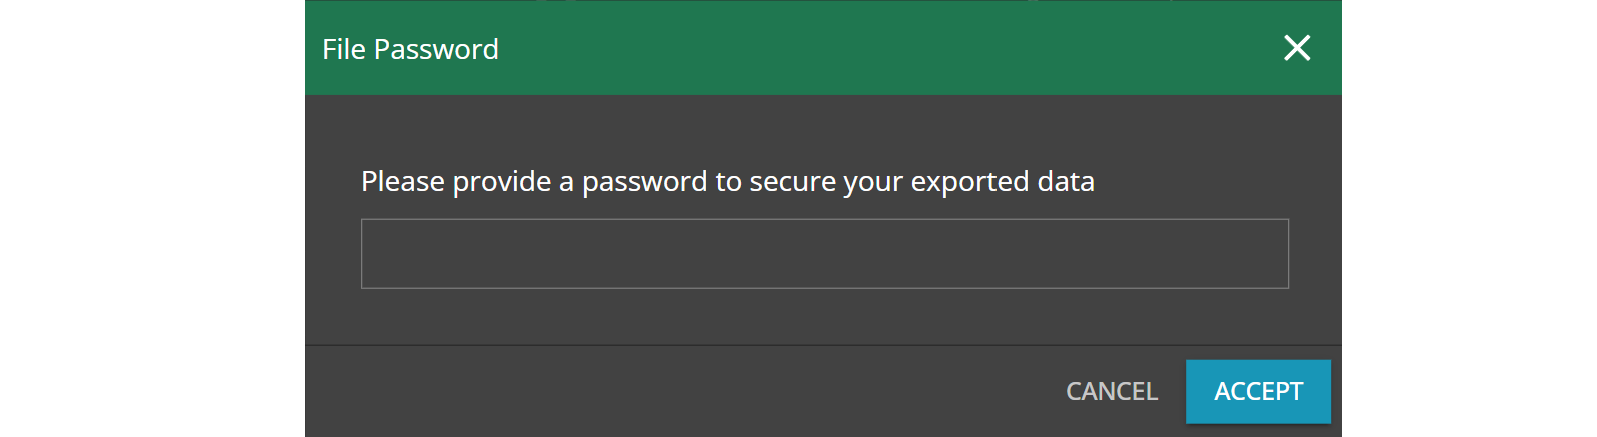
Clicking on Save will automatically start the download of a zip file containing all the tenant data of the selected tenant.
Import
The Tenant Import feature enables you to utilize an exported tenant and all its data to establish a new tenant. Furthermore, it permits switching between database providers, limited to those supported by M.App Enterprise.
Preliminaries
Before you import a tenant within the Management, you need to first create a database in either Oracel, Postgis or MS SQL where the tenant configuration will be saved.
Secondly, have the exported zip file ready on your drive, so you can navigate to it later during the import.
Create a new tenant
Head to the tenant list and select New to initiate the creation of a new tenant, which will then open the input form.
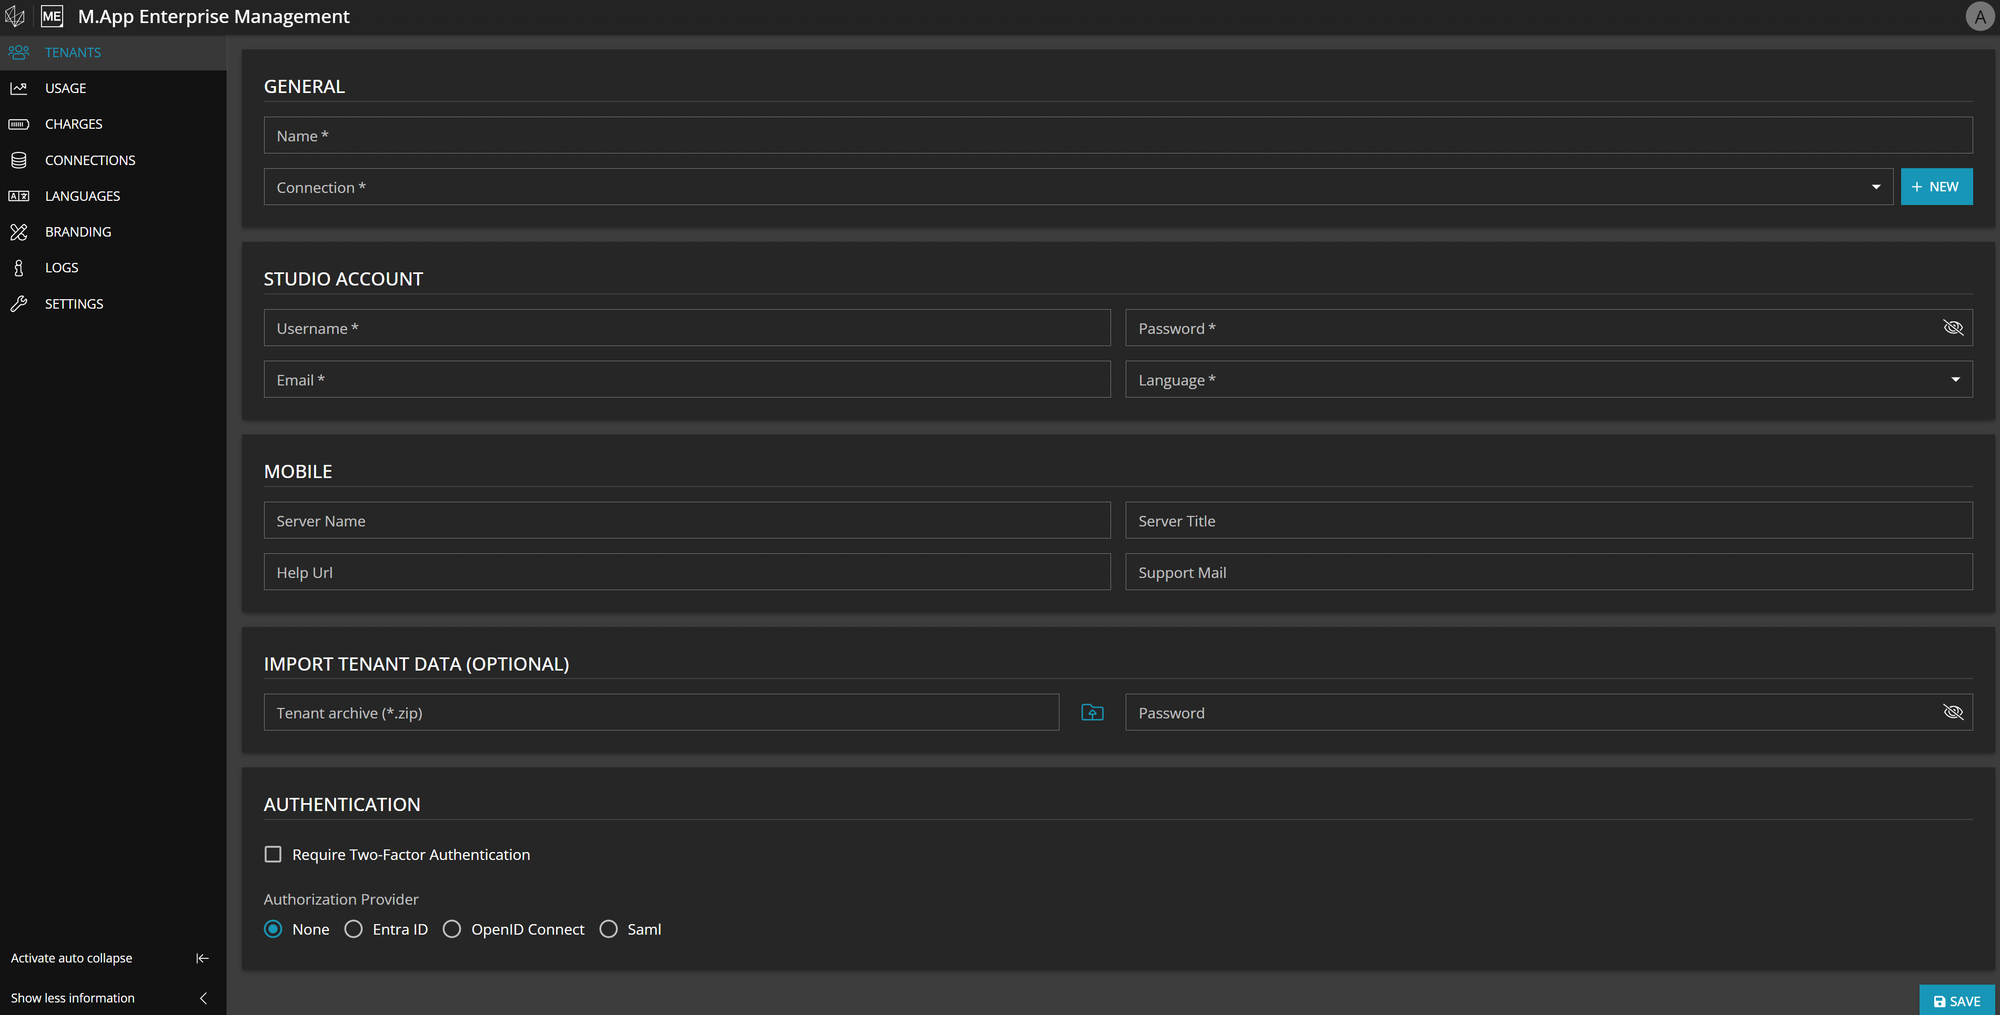
- Provide a
Namefor the new tenant and a databaseConnectionwhere your clean and empty database is located. Most of the time the connection will not yet exist and you have to create it first by clicking onNewand fill out the connection form. - Enter some
studio account credentialsthat will subsequently be needed for studio access. Two-factor authenticationcan also be selected to enhance security.- The
Import Tenant Datasection is where you can upload an exported tenant from your drive. Click on the folder icon and select the suitable zip file. As you can see, there's also aPasswordrequired. This password, generated during the export process, ensures the security of your data. If the password was not shared, you won't be able to import a tenant. - Finally you can integrate your
active directoryif desired.
Click on Save to proceed, or Reset to empty the whole form.
Import Wizard
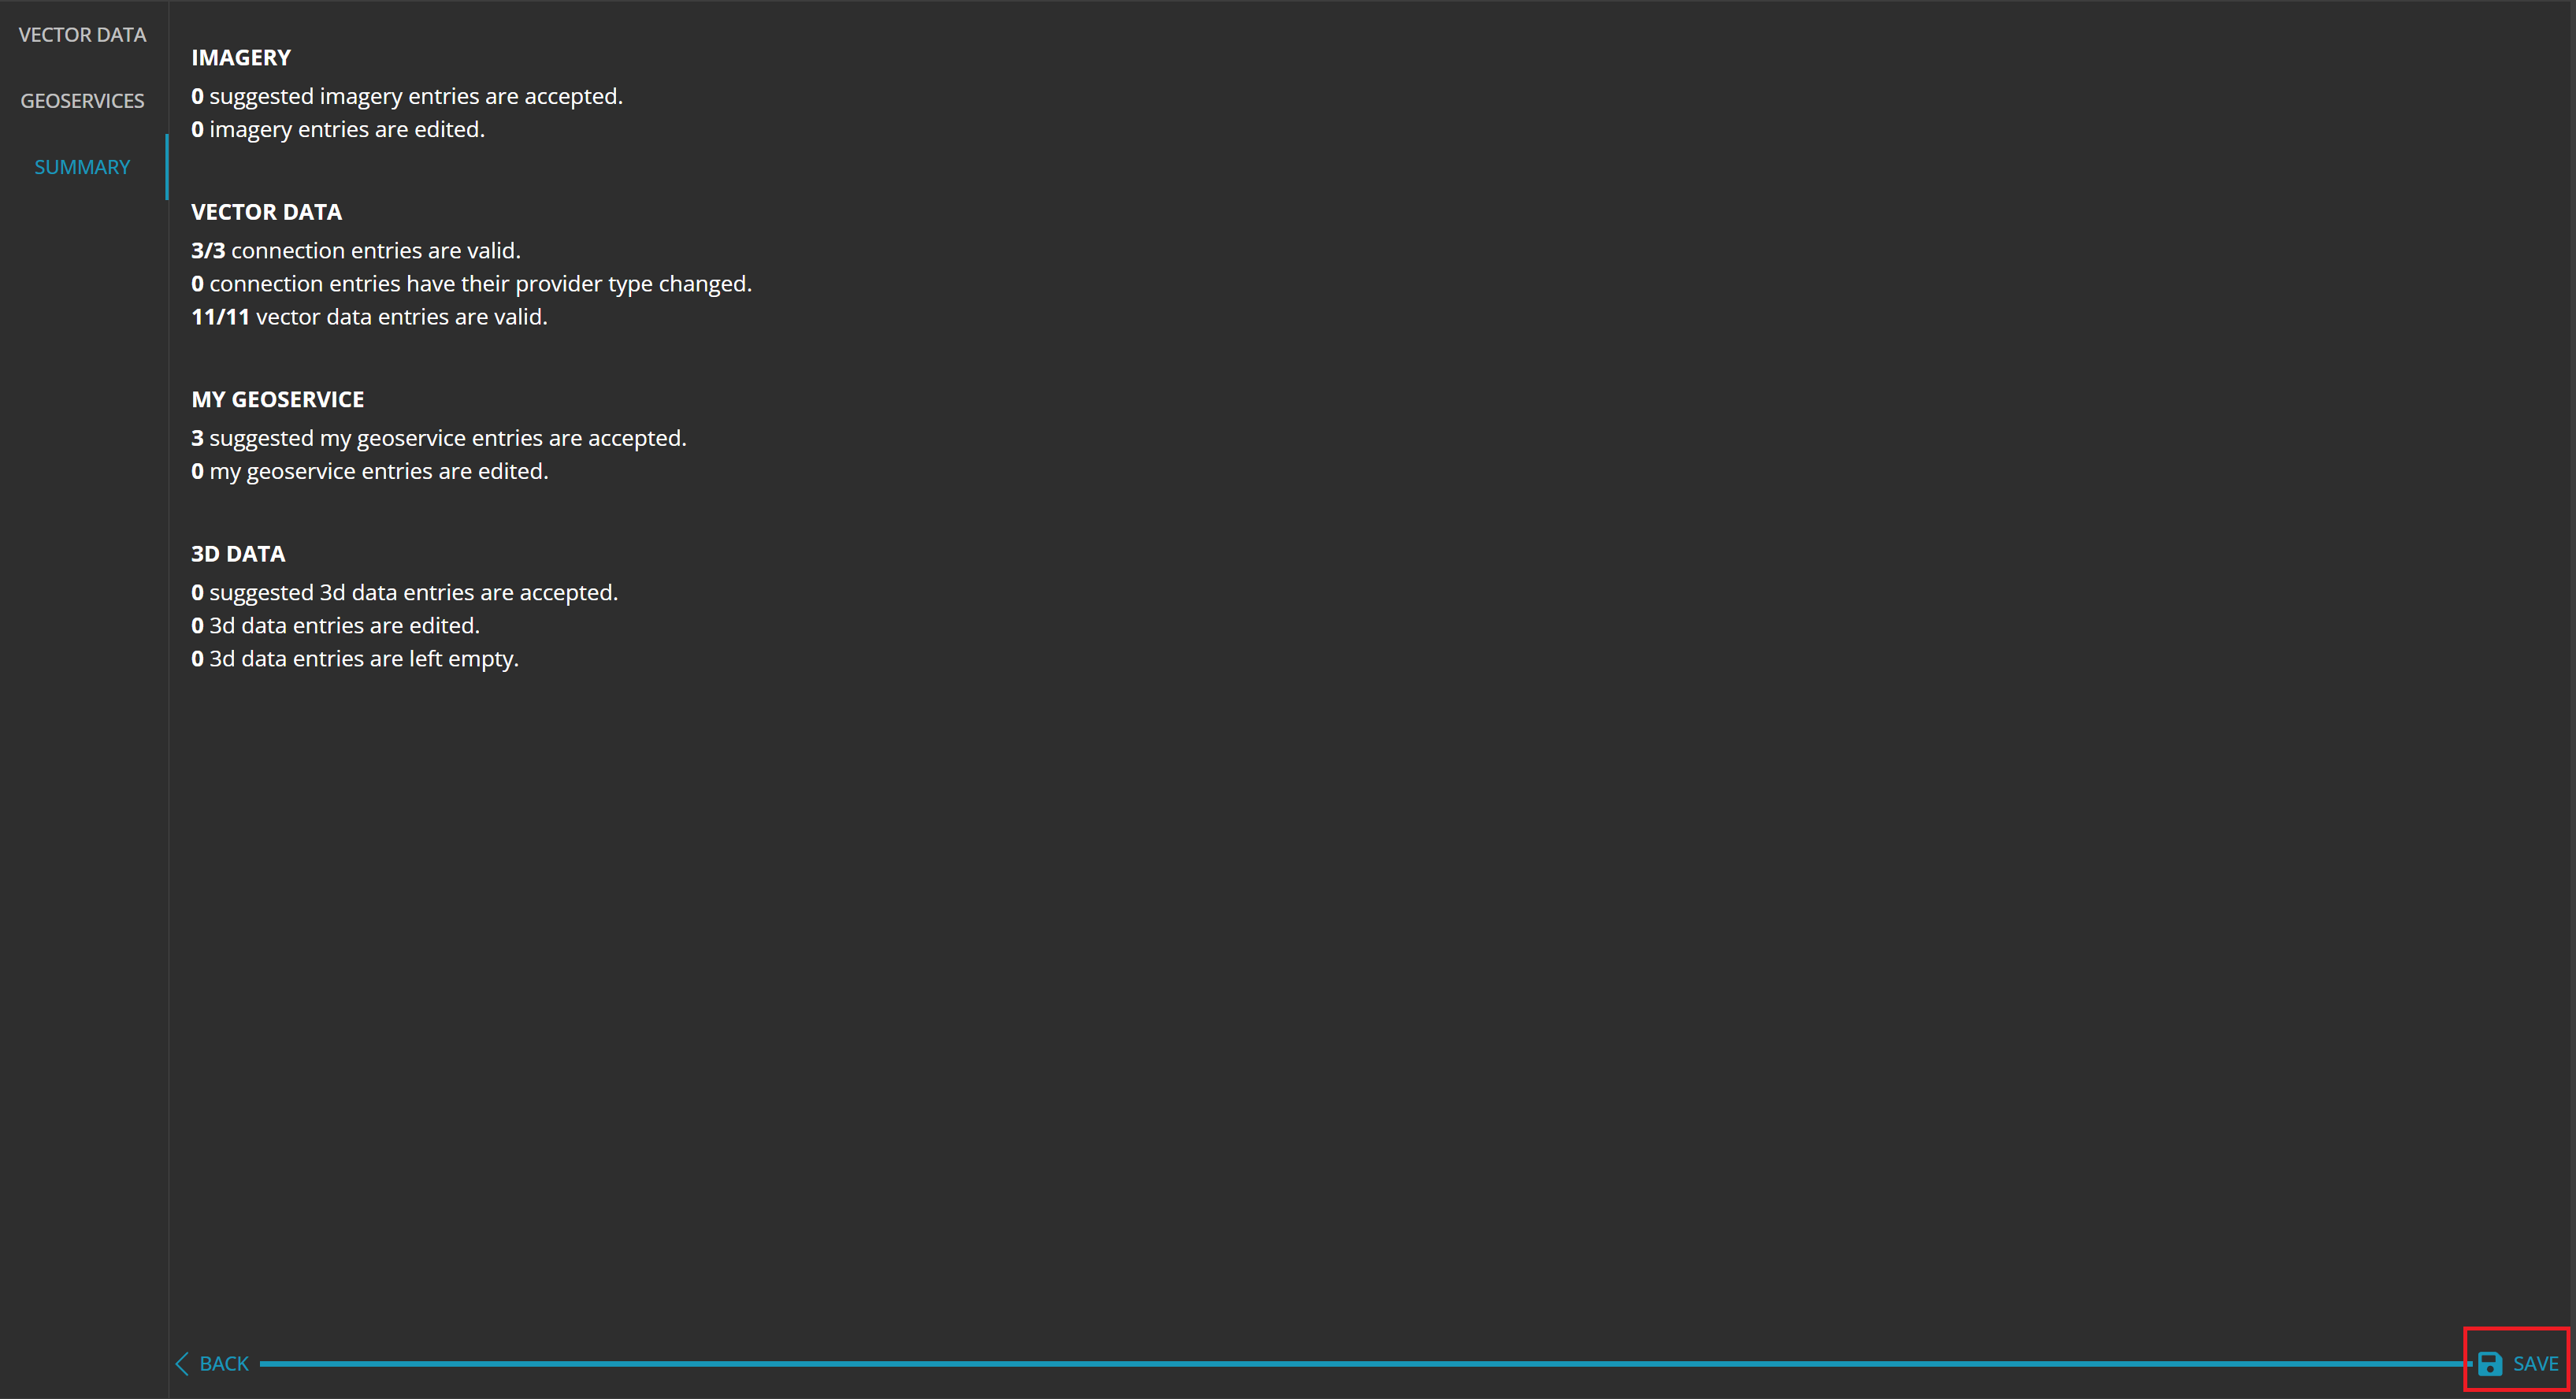
Upon saving the input form for a new tenant, the import wizard will open automatically. On the far left, there's a column featuring various data types such as Vector data, Imagery, Geoservices, 3D, and Summary. In the provided example below, the imported tenant includes only vector data, thus the other categories are absent. So dependent on your imported tenant, you will see more or less categories.
Regardless of the section you are in, you will always see the number of layers displayed. A green number signifies valid datasets, while a red number indicates invalid ones.

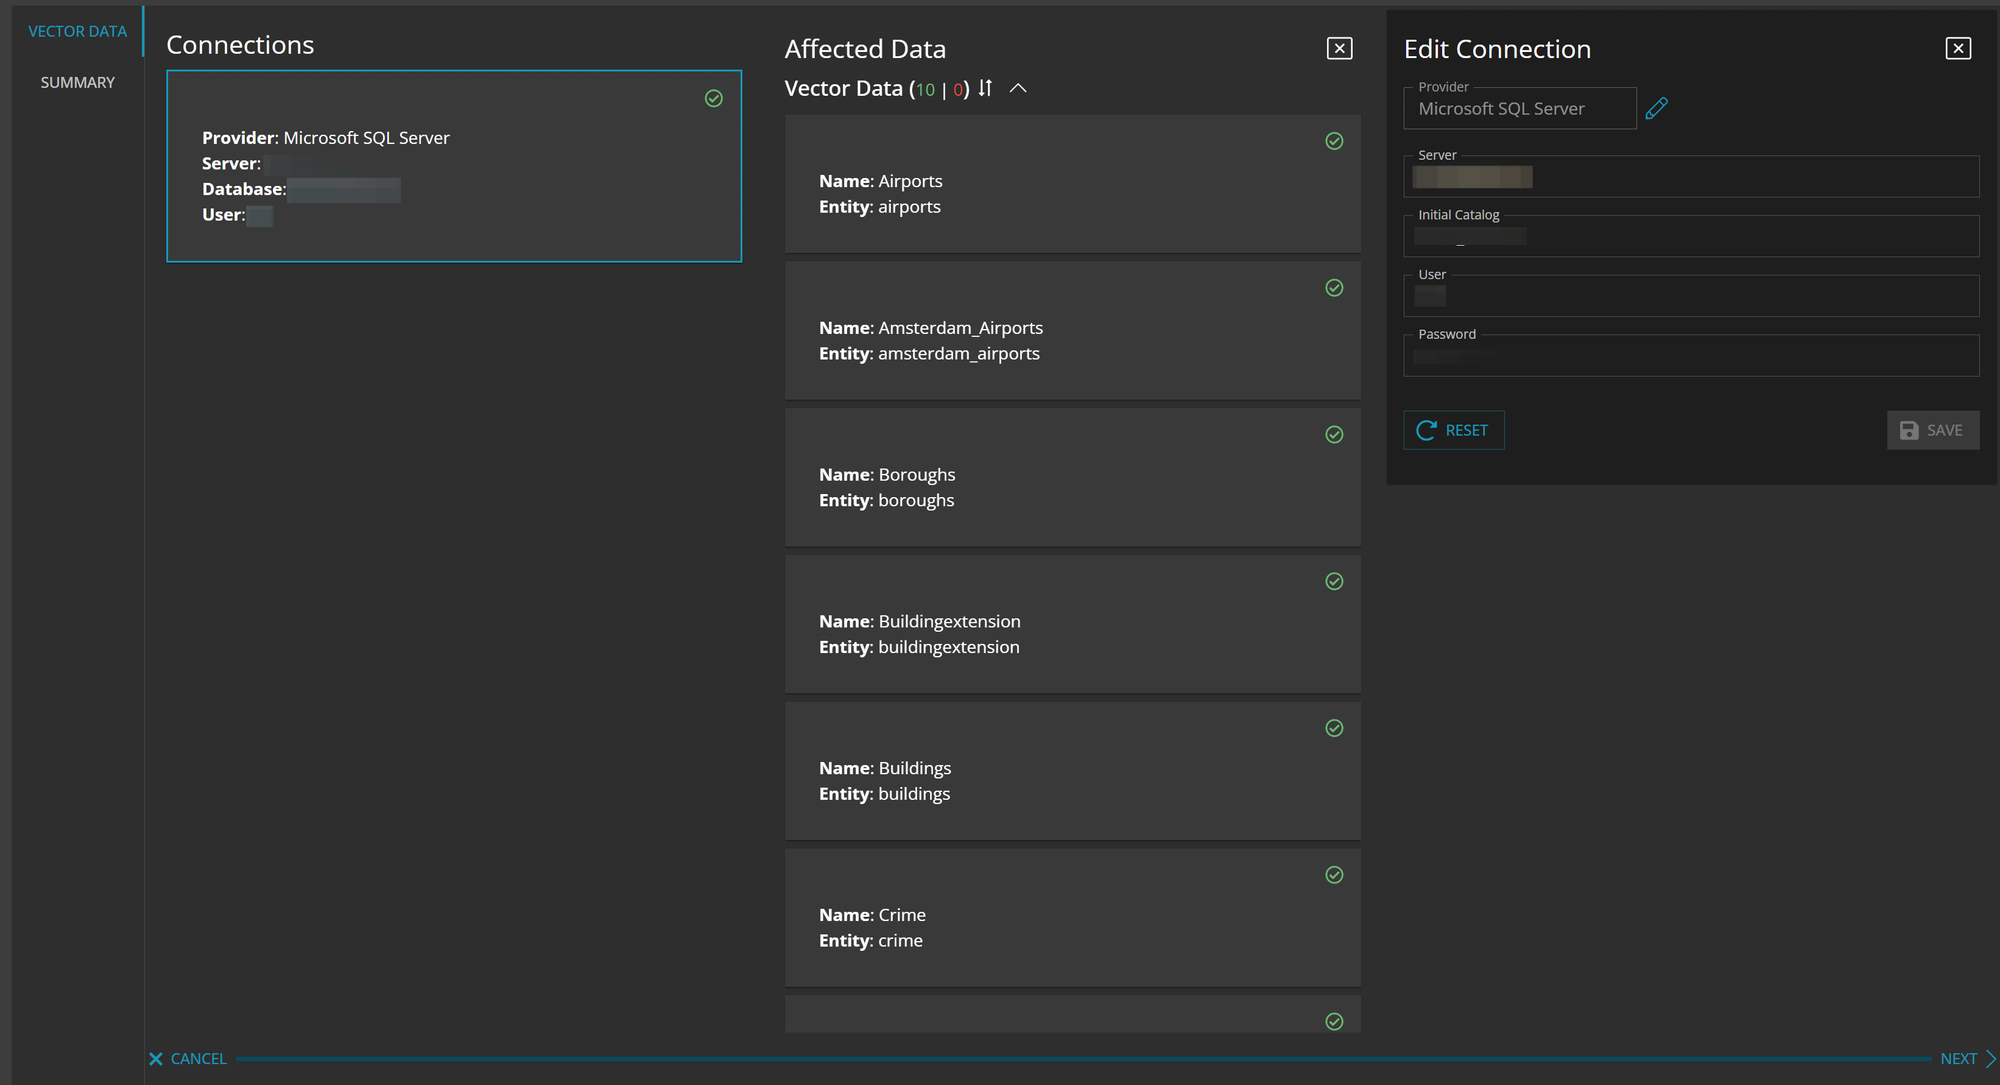
Vector Data
Initially, a window will display the connections utilized for vector data, with a green checkmark indicating that all connections are valid. In the right colum you can edit the connection and its properties.
Clicking on a connection provides additional information about the data used, also validated by green checkmarks. Each dataset is clickable, enabling access to its respective settings.
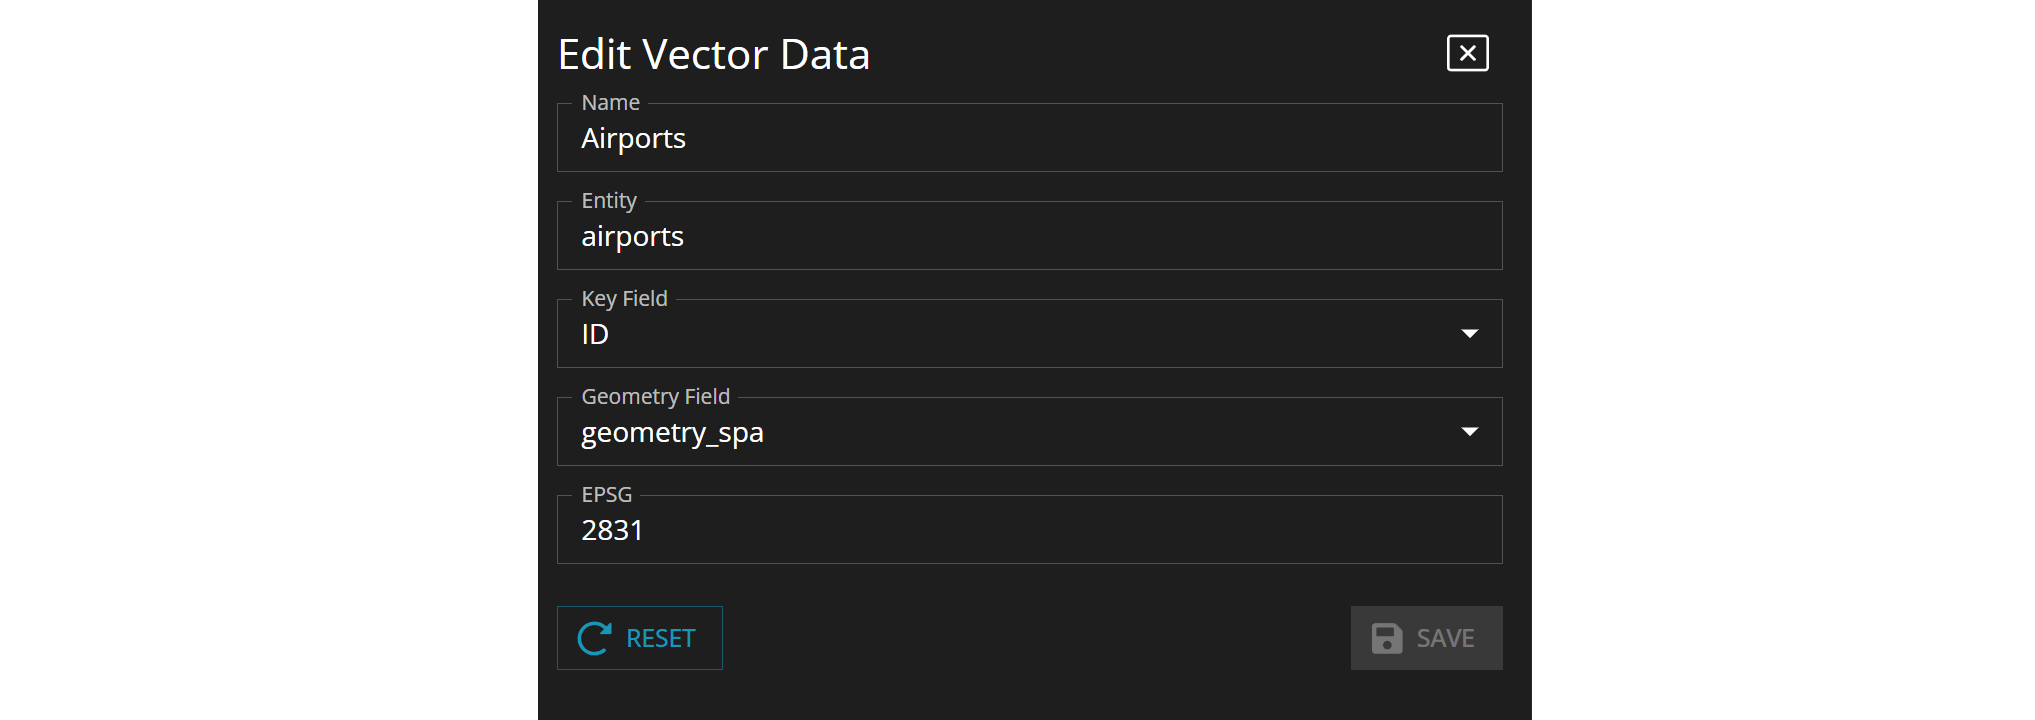
You can modify each dataset by adjusting its name, entity, key field, geometry field or EPSG code. The reset button enables you to restore the original settings.
cached data with the new tenant, you have to manually run the published service again in order to make it work. Geoservices
In case your imported tenant includes MyGeoservices, they will be listed in the Geoservices section on the left. When you click on it, you will see the original connections of them and the new connections for the tenant to be created. Differences between the paths of the original and new connections are highlighted in red and green.

Click on the pen icon to enter edit mode, where you can modify the paths. Simply adjust the text within the URL, then save your changes or reset them as needed.

Imagery
Raster data might also be present in the imported tenant, appearing under the Imagery section in the menu on the left. At the top, you'll notice the warehouse locations from both the source and destination, highlighted in red and green respectively if there are differences between them. Make changes to the paths, if desired, by clicking on the pen icon.

3D Data
The 3D Date section of the menu on the left will appear when 3D data are present in the imported tenant. Any OGC-3D Tiles, elevetion data or panoramics will be shown in the list and their paths can be modified via the pen icon.

Summary
In the summary section, you'll receive a comprehensive overview of all the imported data, indicating whether the import data are valid or if any modifications were made. You can revisit any section to make adjustments, or simply use the save button in the bottom right corner to complete the import process.
Thereafter, you will see the new tenant in the tenant list in Management.