Map Context Menu
This post will shed light on all the options an app user has in the map context menu within a desktop app of M.App Enterprise.
Let's start on how to access the map context menu.
Basic map context menu options
Open your Desktop Application and right-click on the map view. A small panel will appear with the options listed below.

You can either refresh your map or use the zoom box to zoom in on a specific area of the map by drawing a rectangualr box around it. In addition Center at cursor position will allow you to center your map view based on the location of your cursor.
Layer based map context menu
When you right-click on one or more of the displayed geometries in the map view, additional options will be available.
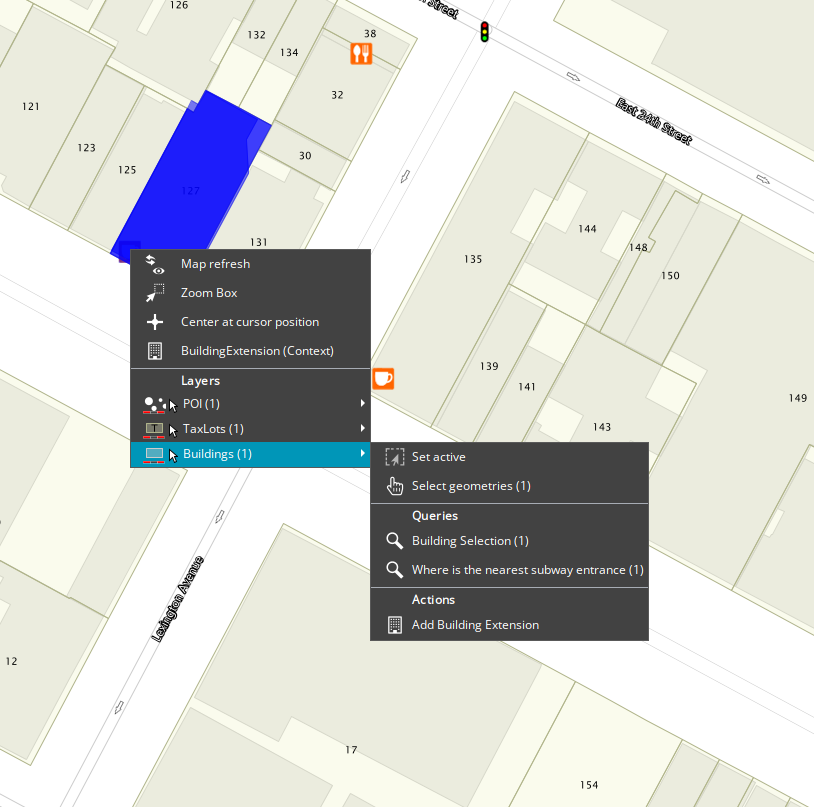
As you can see, the map context menu displays the layers available at the cursor position where the right-click was done. You can now choose the desired layer and use one of the following options:
Set activeSet geometries(Sets the layer active as well)QueriesActions
{ENTITY.IdFilter} placeholder is automatically filled with the ID of the selected element.Feature based.clear map selection to deselect the highlighted geometries, while the other option Fit to selected enables you to zoom to the selected geometry.
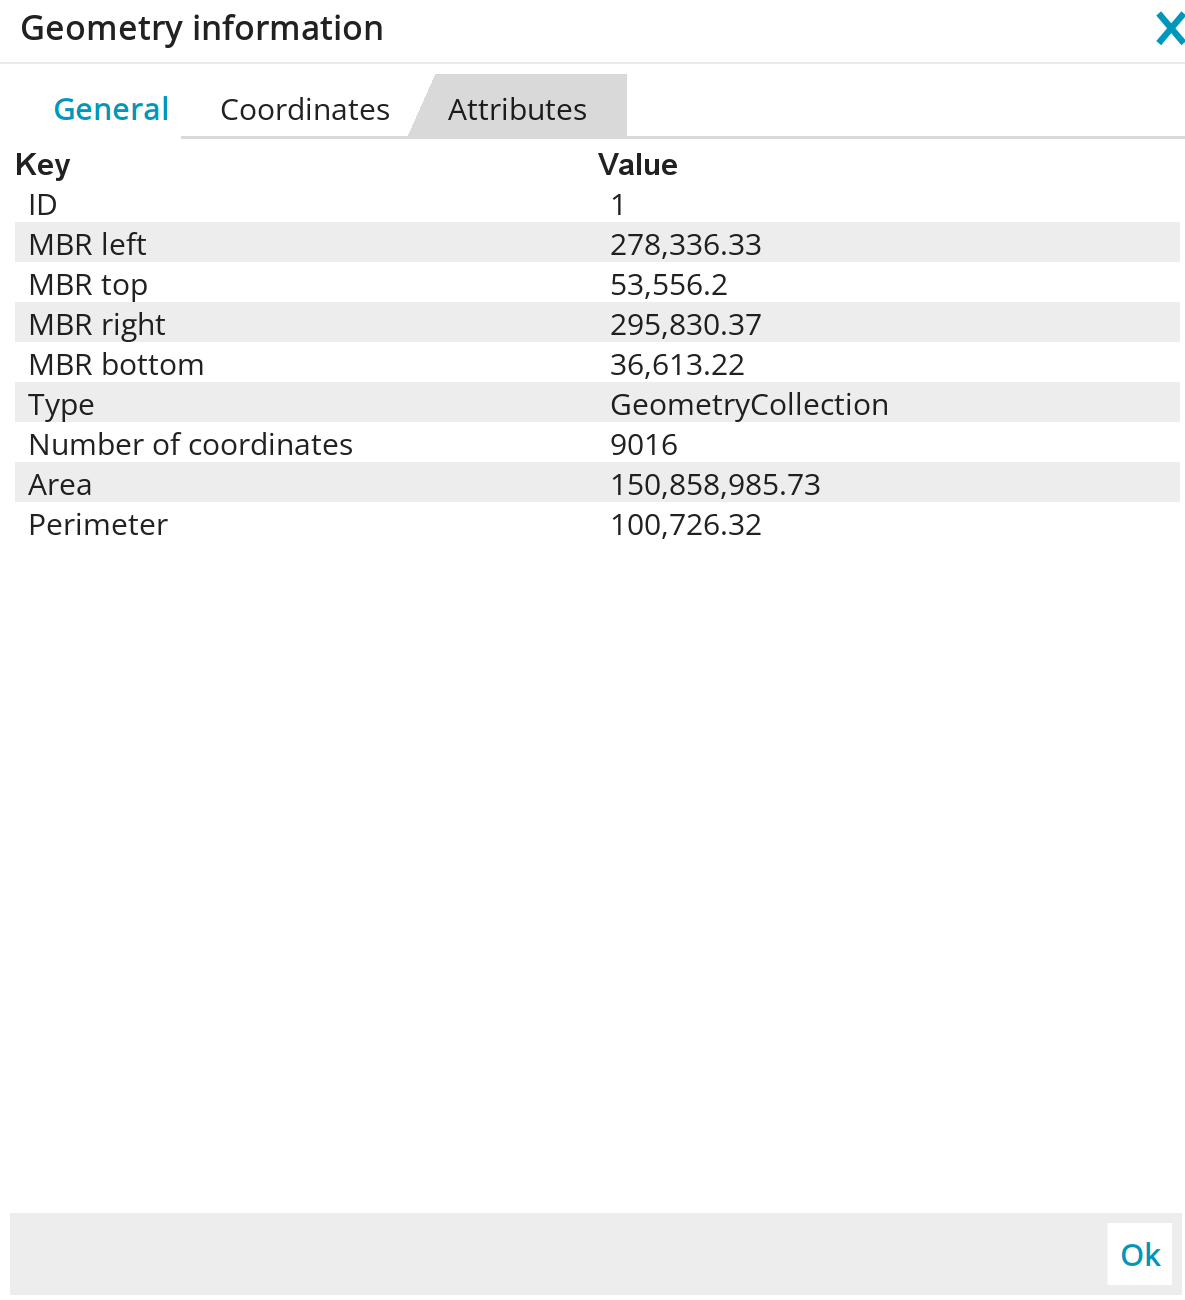
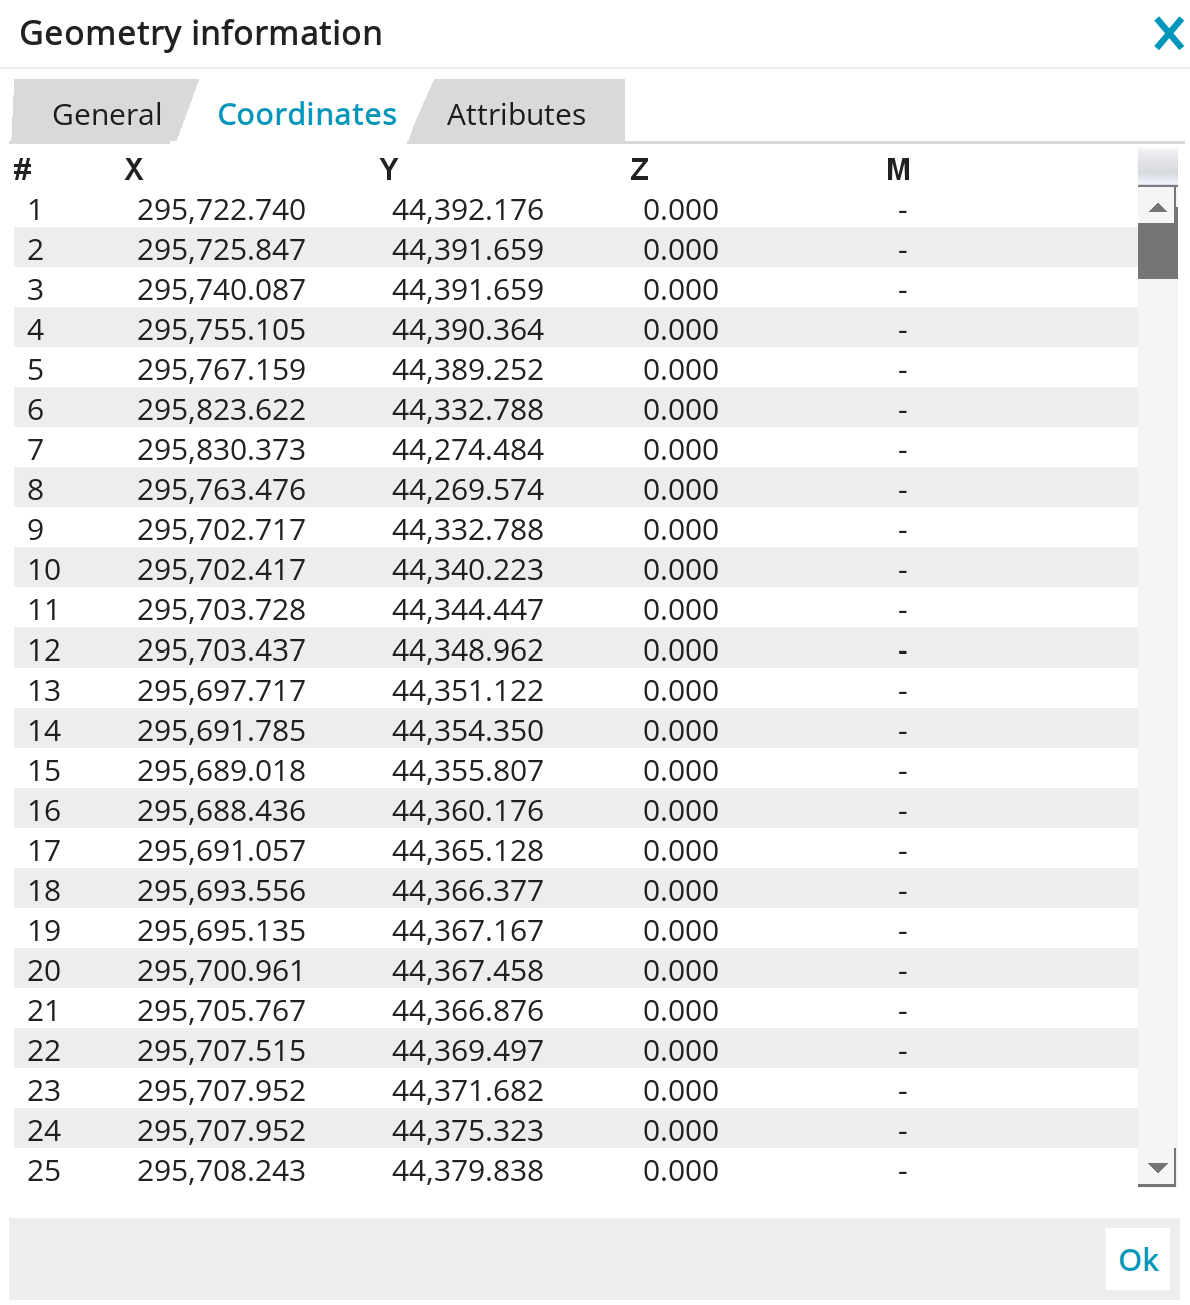
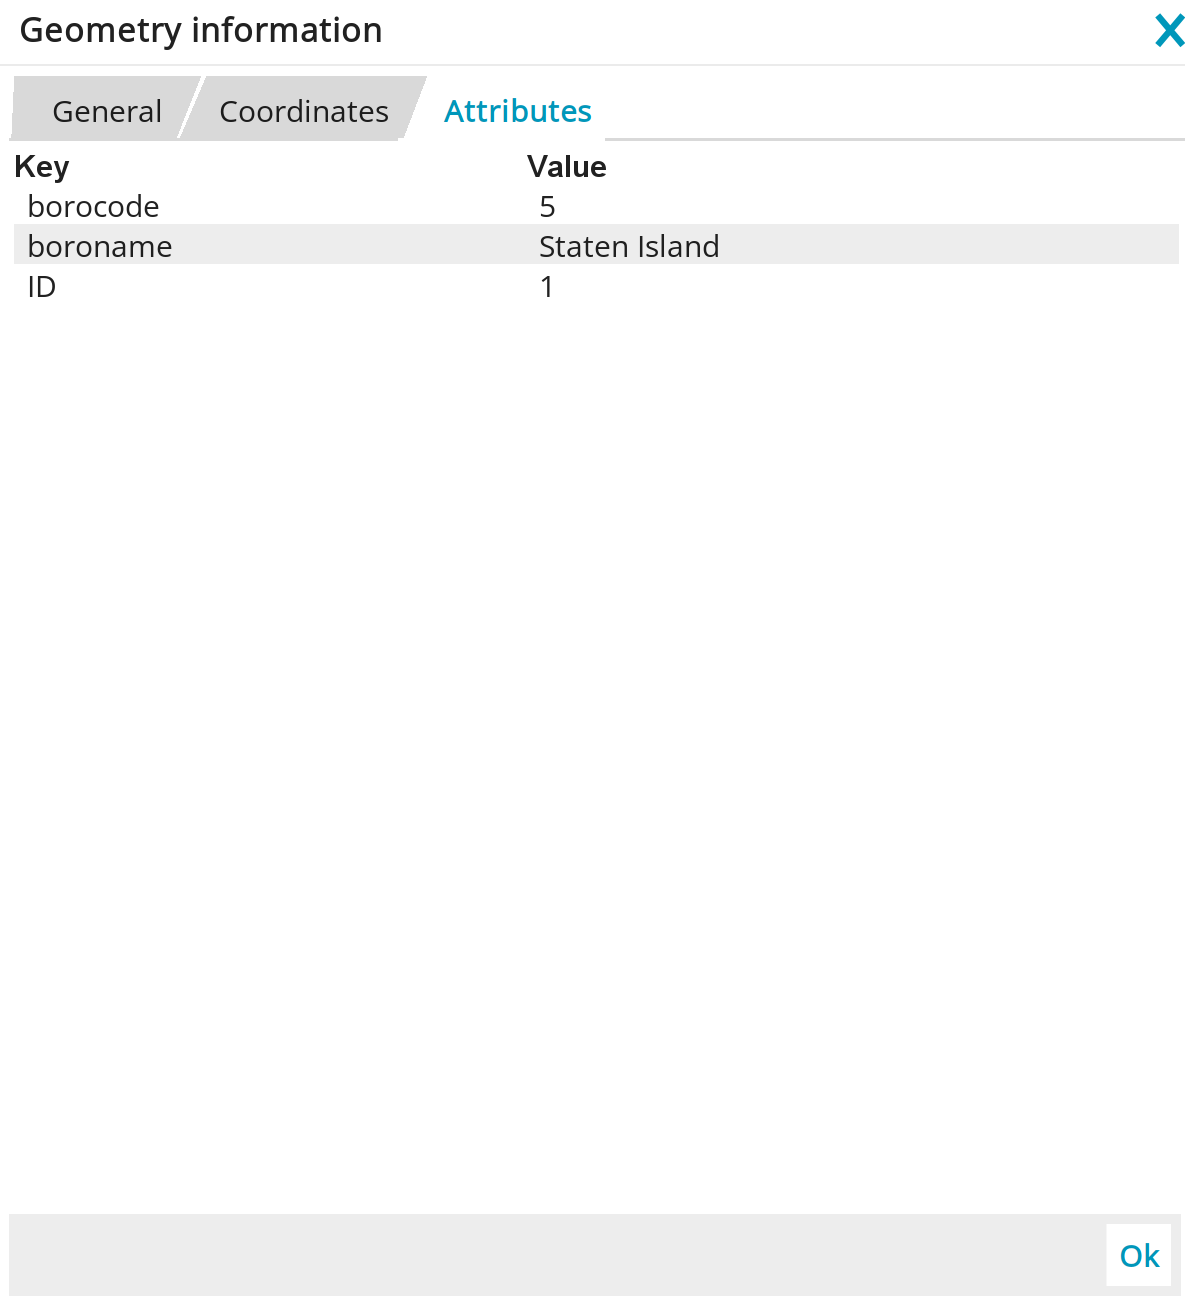
Show geometry information 
Setting a layer active and then selecting a geometry reveals an additional option, called Actions within the map context menu.

Select Geometry information to open a window with detailed information about the selected geometry. As indicated in the images below, the information provided includes general information, information about the attributes and the exact coordinates of all nodes of the respective geometry